To install AlmaLinux 10, follow the step-by-step instructions below. This guide helps you complete the installation on your system.
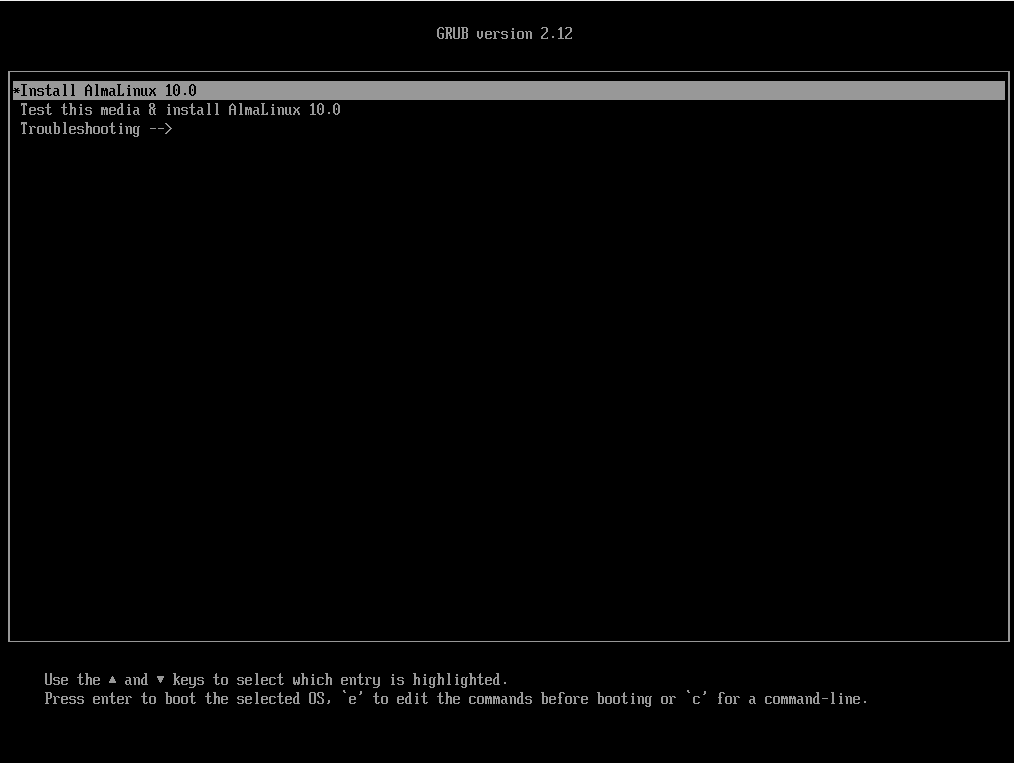
Step 1 : Boot from DVD or USB
Insert your bootable DVD/USB and set your computer to boot from it.
Step 2 : Select "Install AlmaLinux 10"
When the boot menu appears, choose Install AlmaLinux 10.
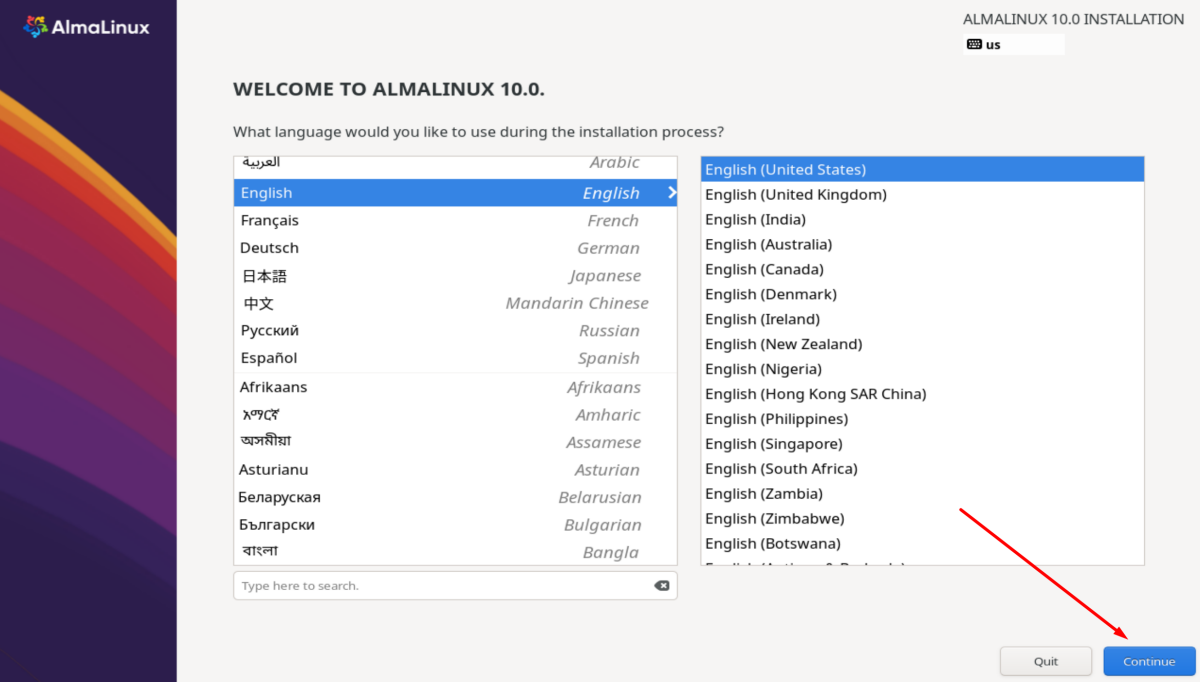
Step 3 : Choose Your Language
Select the language you want to use during installation, then continue.
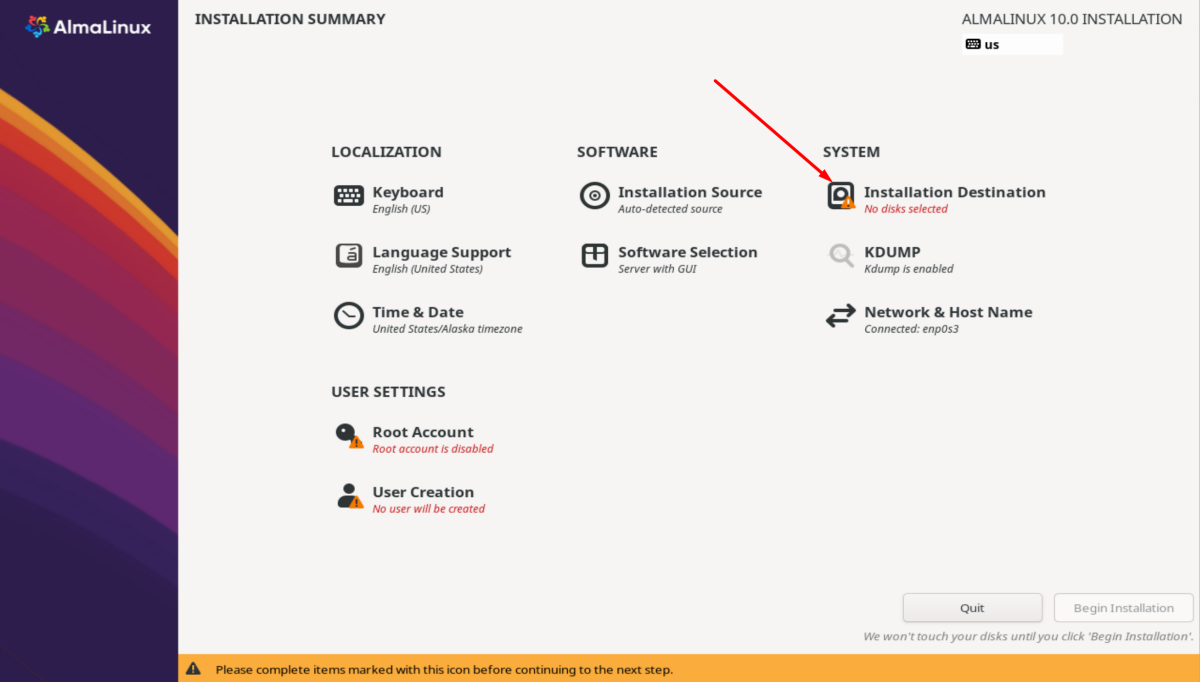
Step 4 : Installation Destination
In the Installation Summary screen, click Installation Destination and choose the disk where you want to install AlmaLinux.
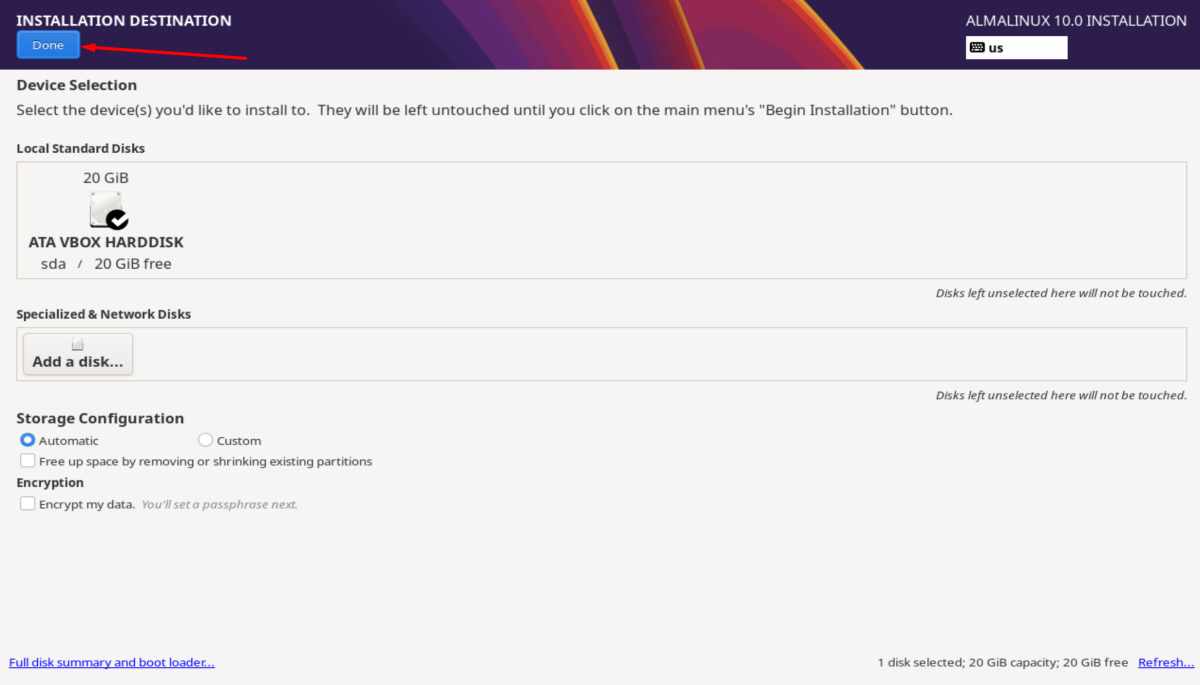
Step 5 : Confirm Disk Selection
If everything looks correct, click Done to return to the Installation Summary.
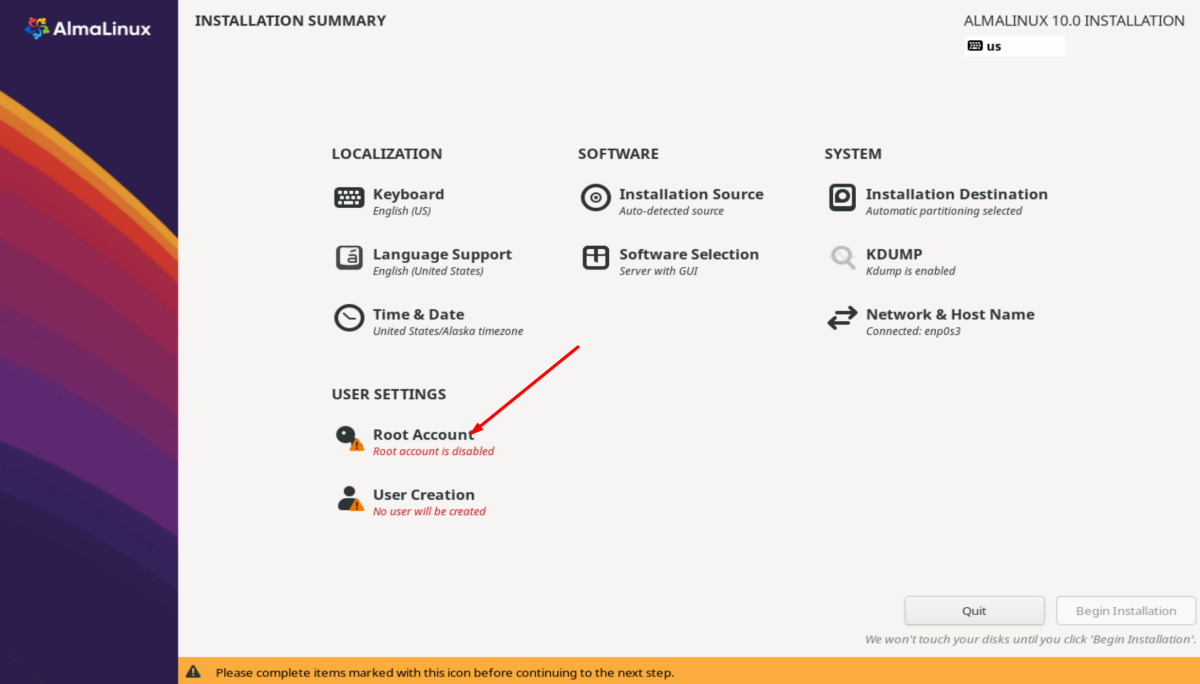
Step 6 : Set Root Password
In the Installation Summary, click Root Password.
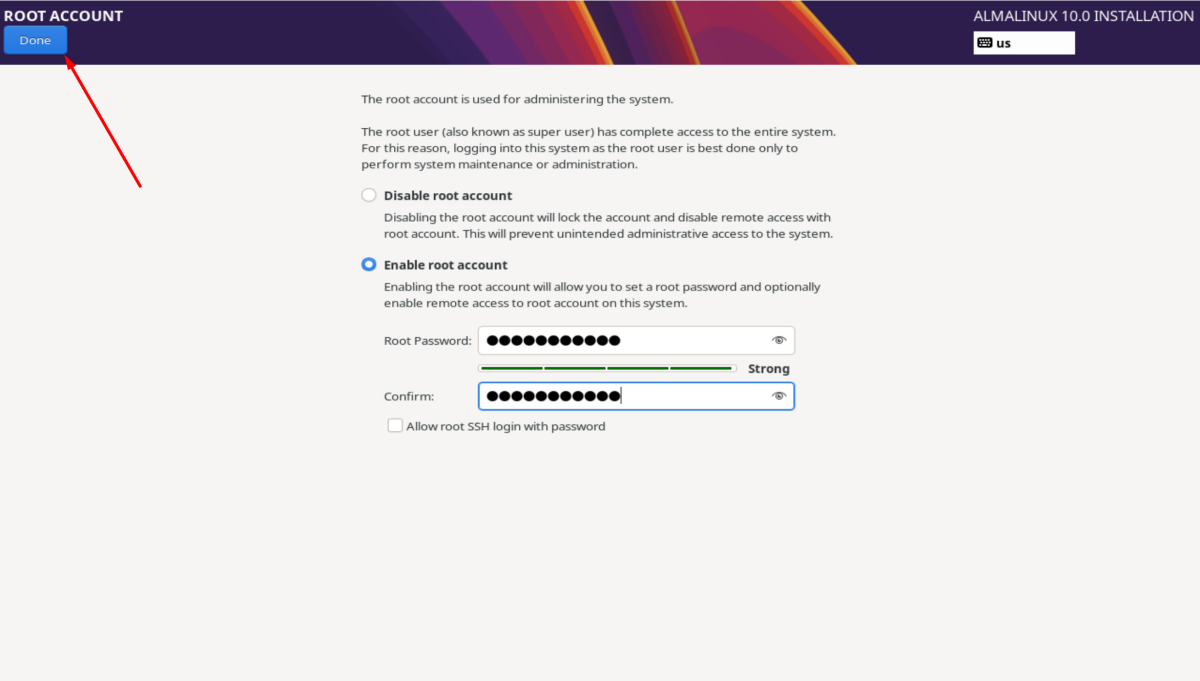
Step 7 : Enter the Password
Type your desired root password, then click Done to go back to the Installation Summary.
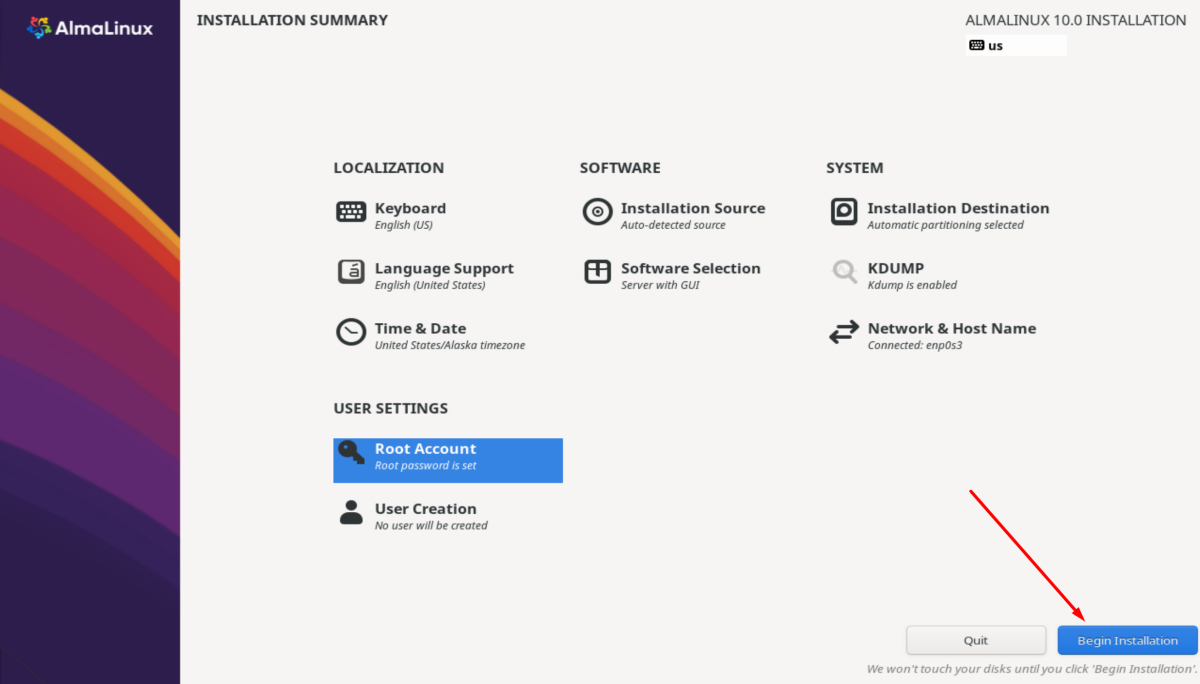
Step 8 : Begin Installation
Click Begin Installation to start the setup process.
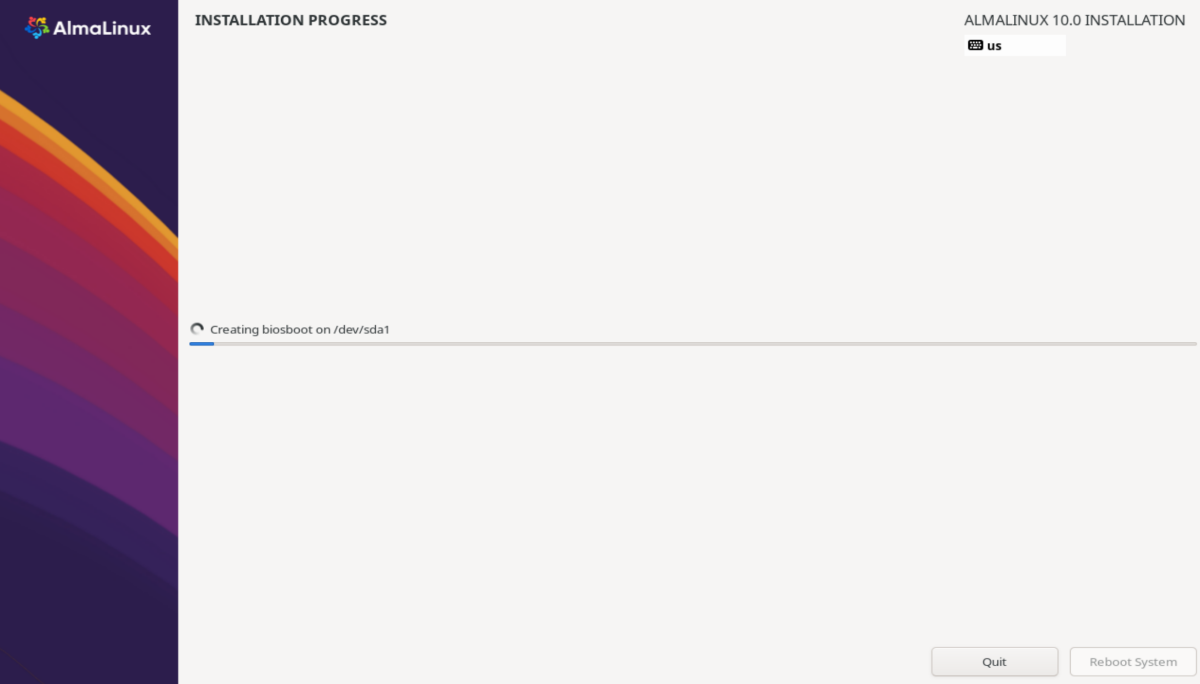
Step 9 : Wait for Installation
The system will install AlmaLinux 10. This may take several minutes.
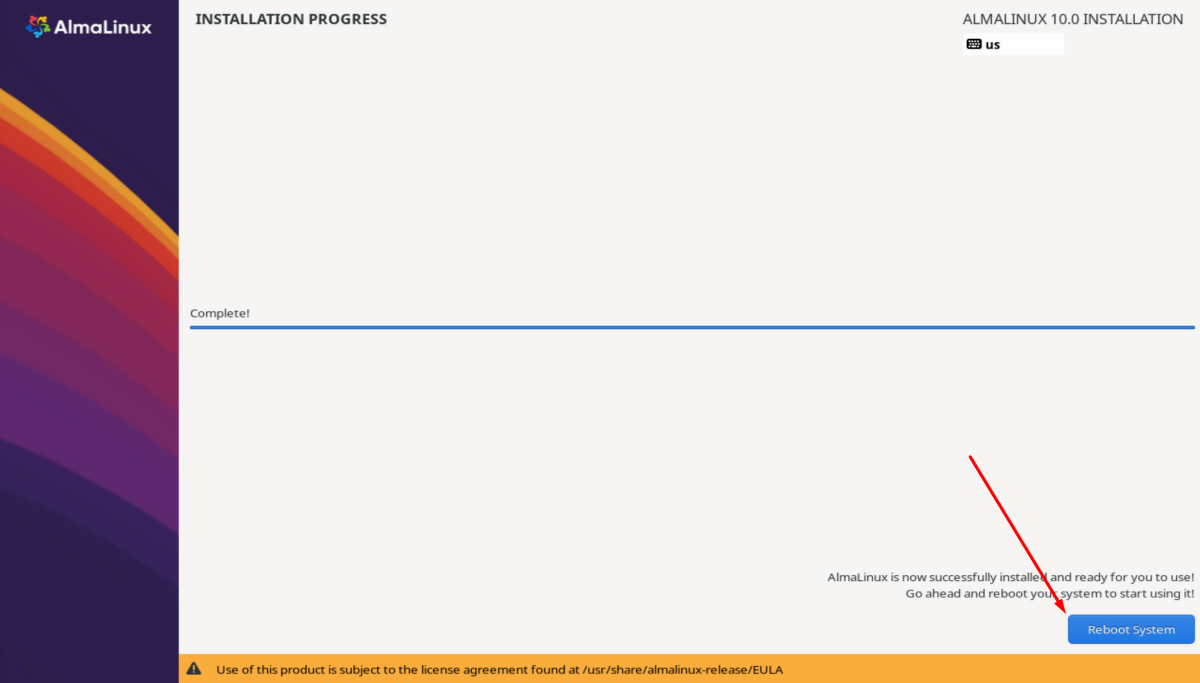
Step 10 : Click “Reboot System”
Once installation is complete, click Reboot System.
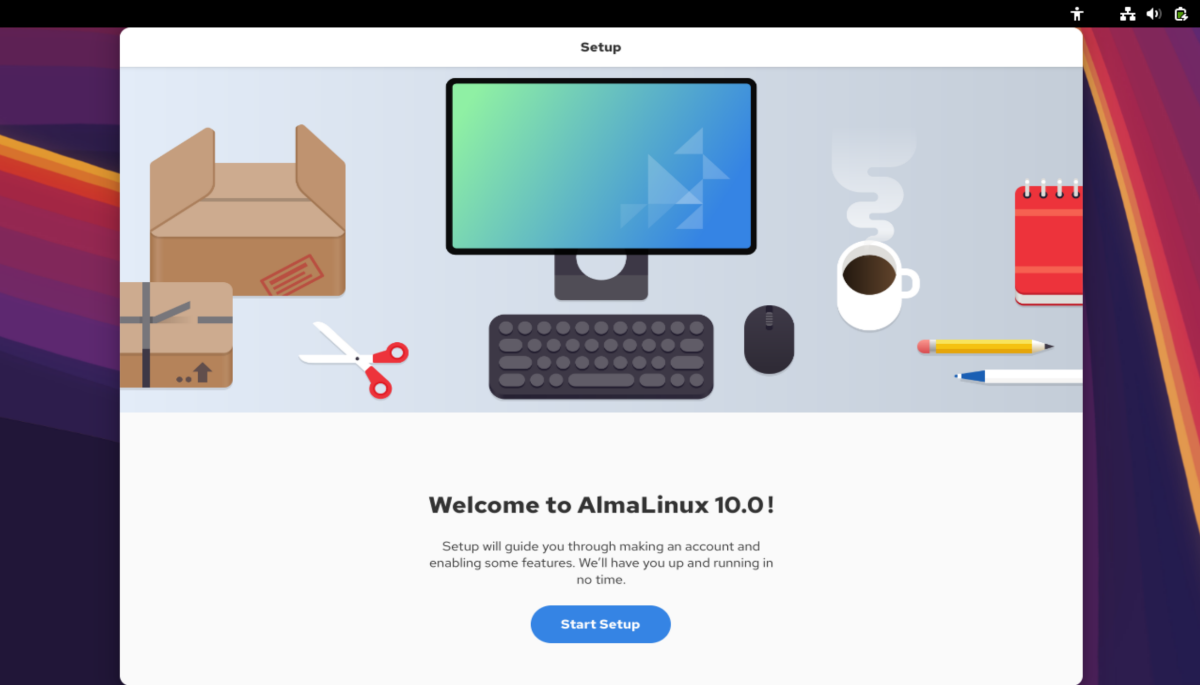
Step 11 : After Restart
Your system will boot into the newly installed AlmaLinux 10 environment.
Step 12 : Complete
You have now finished the installation.
Congratulations! You have successfully installed AlmaLinux 10 and are ready to explore your new system.