To configure SELinux on AlmaLinux 10, follow the steps below to understand its modes, adjust settings, and work with SELinux when running services like Apache.
Step 1 : Check SELinux Status (Default Enabled)
By default, SELinux is enabled. Verify its current mode with:

Step 2 : View Detailed SELinux Status
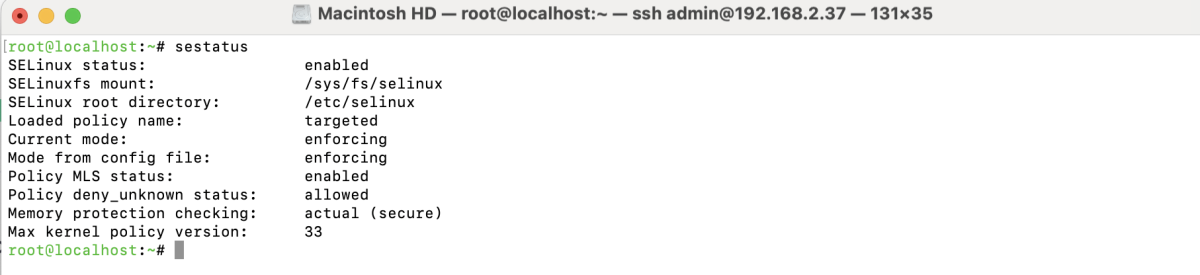
Step 3 : SELinux Modes Explained
- Enforcing – SELinux policies are fully enforced. Unauthorized actions are blocked.
- Permissive – Actions are allowed but logged. Useful for debugging.
- Disabled – SELinux is turned off completely.
Step 4 : Disable SELinux (Only If Necessary)
- Temporarily Disable SELinux

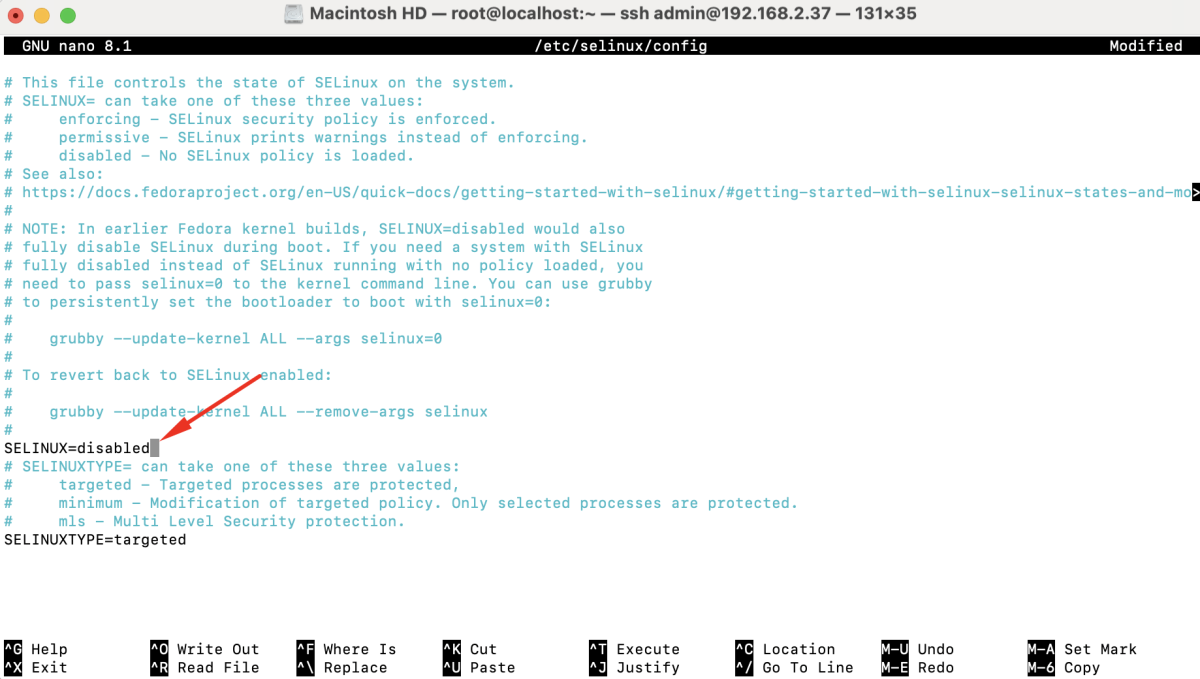
- Permanently Disable SELinux
Edit the config file:
Change:
- Reboot Required : After permanent changes:
Step 5 : Verify SELinux Status
After reboot (or change):
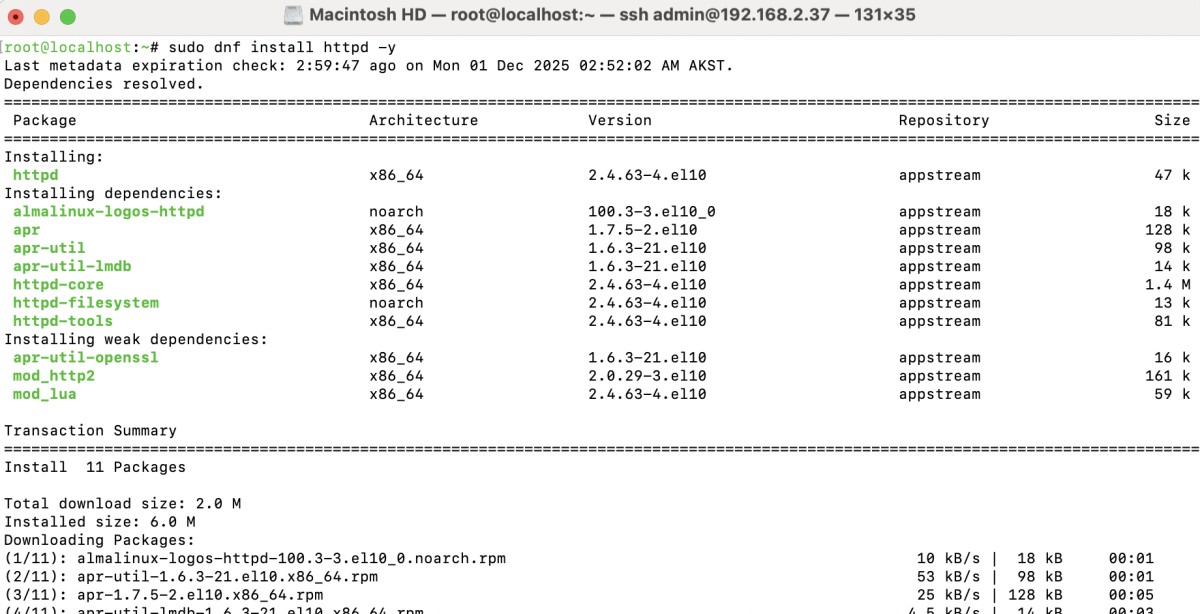
Step 6 : Example — Configure Apache to Use a Custom Port and Directory Under SELinux
- Install Apache (httpd)
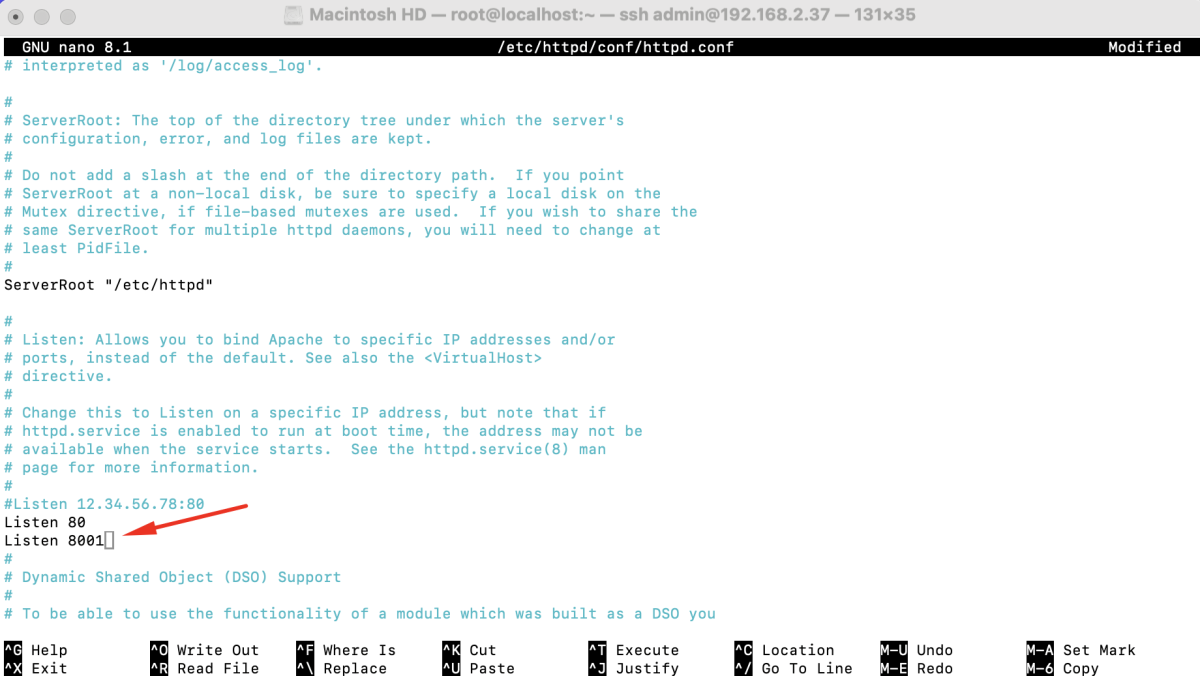
- Edit Apache Config to Listen on Port 8001
Edit:
Add:
- Create a Virtual Directory and Custom Document Root
Example directory:

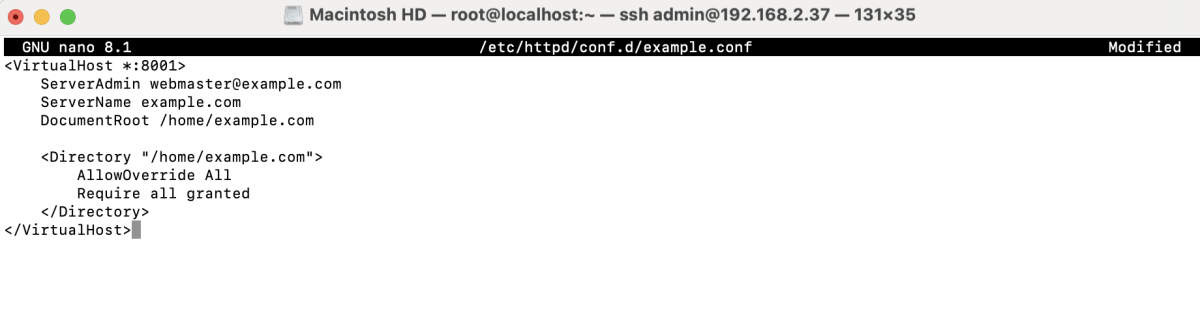
Create virtual host file:
Add:
- Create Index File and Set Permissions

Test Apache Configuration

- Open Firewall Port (If FirewallD Is Enabled)

- Install SELinux Management Tools

- List Current HTTP Ports

- Add New Port (8001) to SELinux

- Verify Port Was Added

- Restart Apache

- Apply Correct SELinux Context to Custom Directory

- Apply New SELinux Label

- Access the Website : Open in browser:

You should see your test page.
Congratulations, You have successfully configured SELinux on AlmaLinux 10, adjusted policies, and set up Apache to run on a custom port and directory under SELinux rules.