To set up an SFTP server on Ubuntu 24.10, follow these steps:
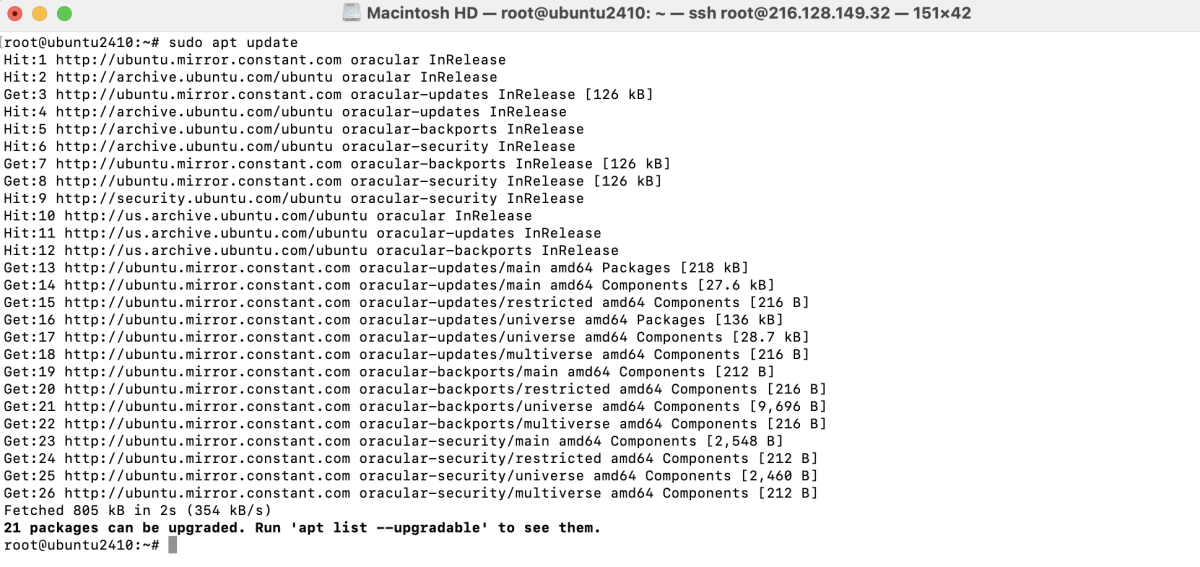
Step 1 : Run the following command to ensure your system is up to date:
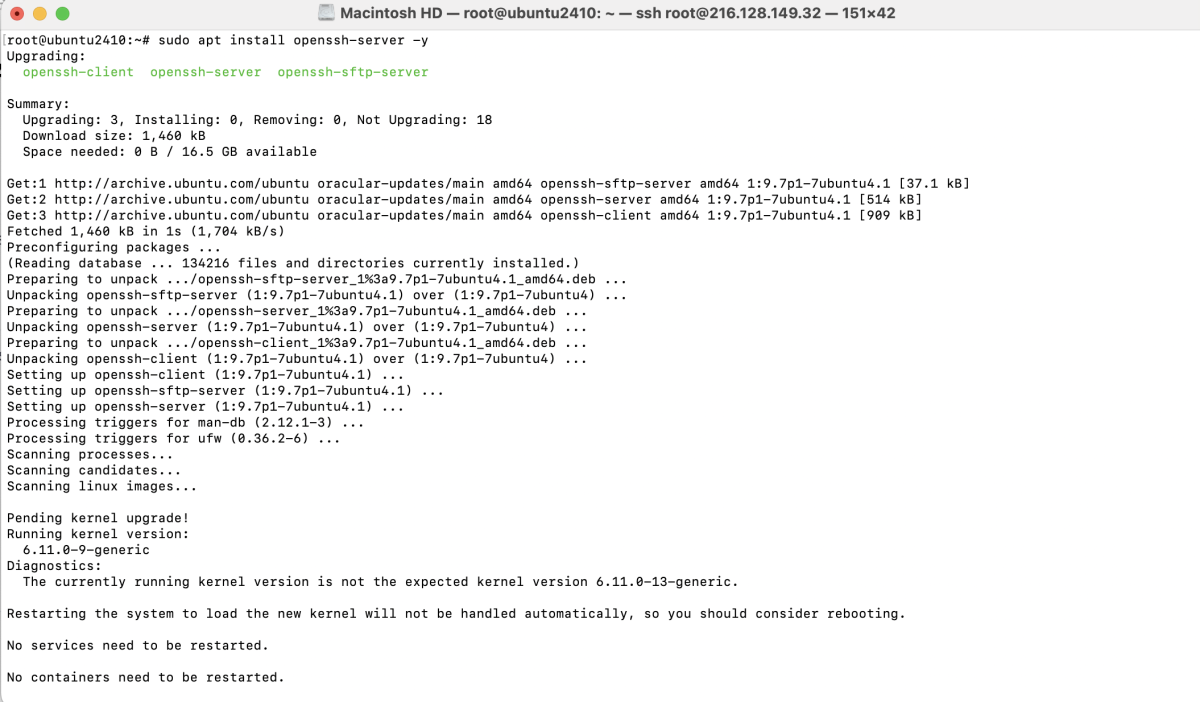
Step 2 : If openssh-server is not installed, install it with:
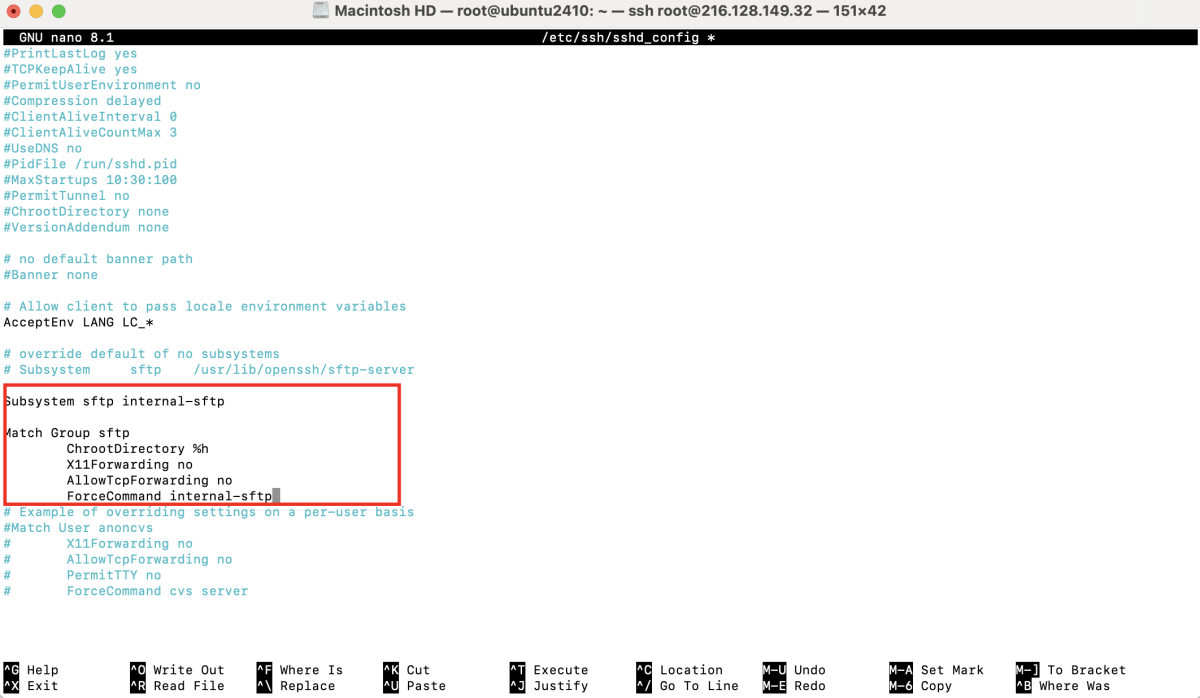
Step 3 : Edit the SSH configuration file:
Add or modify the following lines to configure SFTP:
Step 4 : Apply the changes by restarting SSH:

Step 5 : Create a group for SFTP users:

Step 6 : Add a new user and assign them a home directory:

Step 7 : Assign the user to the sftp group:

Step 8 : Set the correct permissions for the user's home directory:

Step 9 : Allow SSH traffic through the firewall:

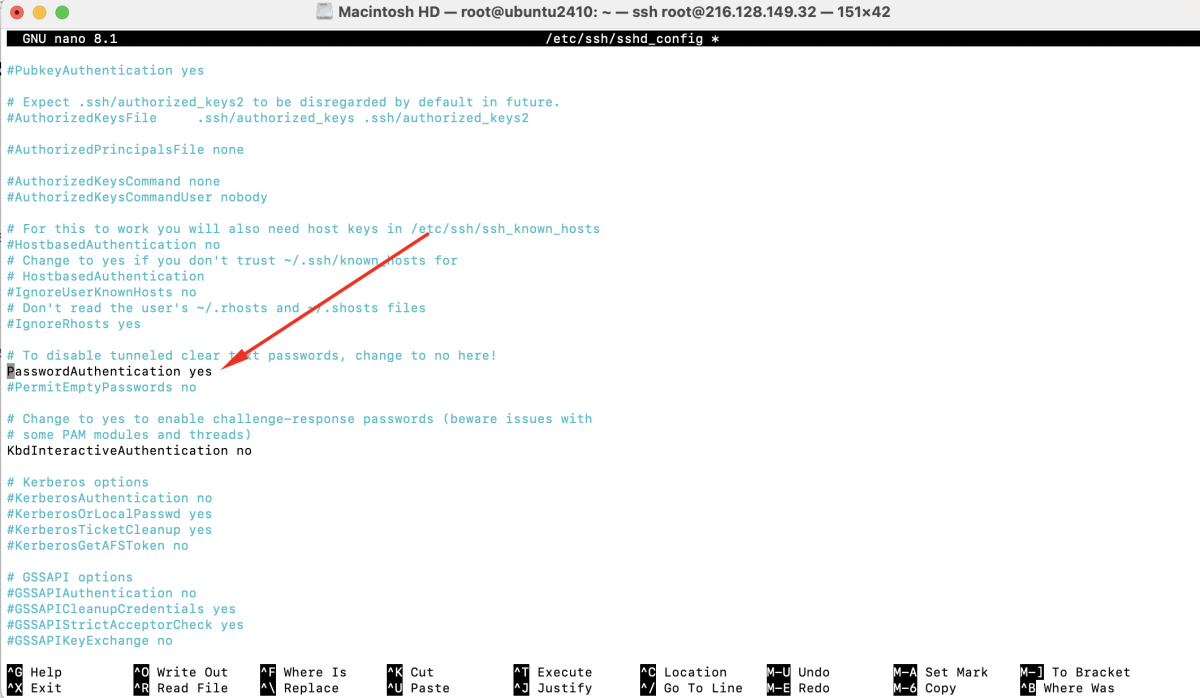
Step 10 : If you want to enable login using a password, ensure the following line in sshd_config is set to:
Step 11 : Restart the SSH service again:

Step 12 : Test the SFTP Connection
- Open an SFTP Client: Launch FileZilla or any SFTP client.
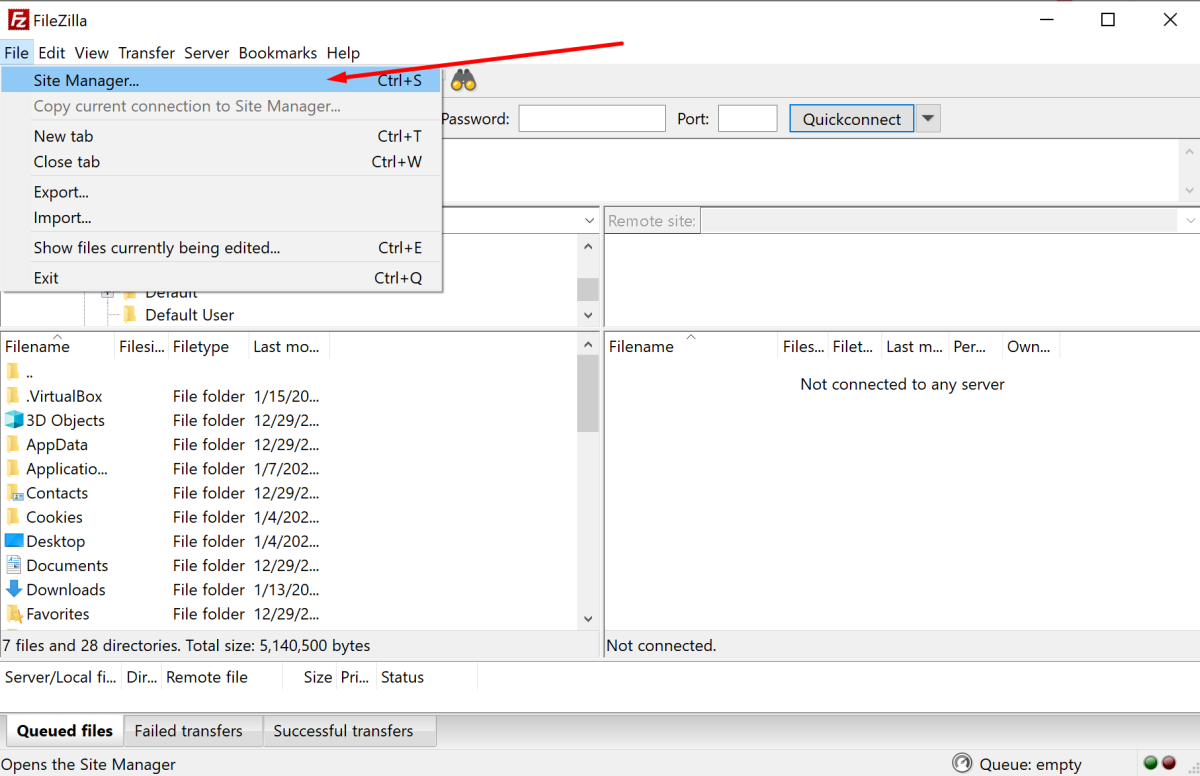
- Add a New Site: Go to File > Site Manager, and create a new site.
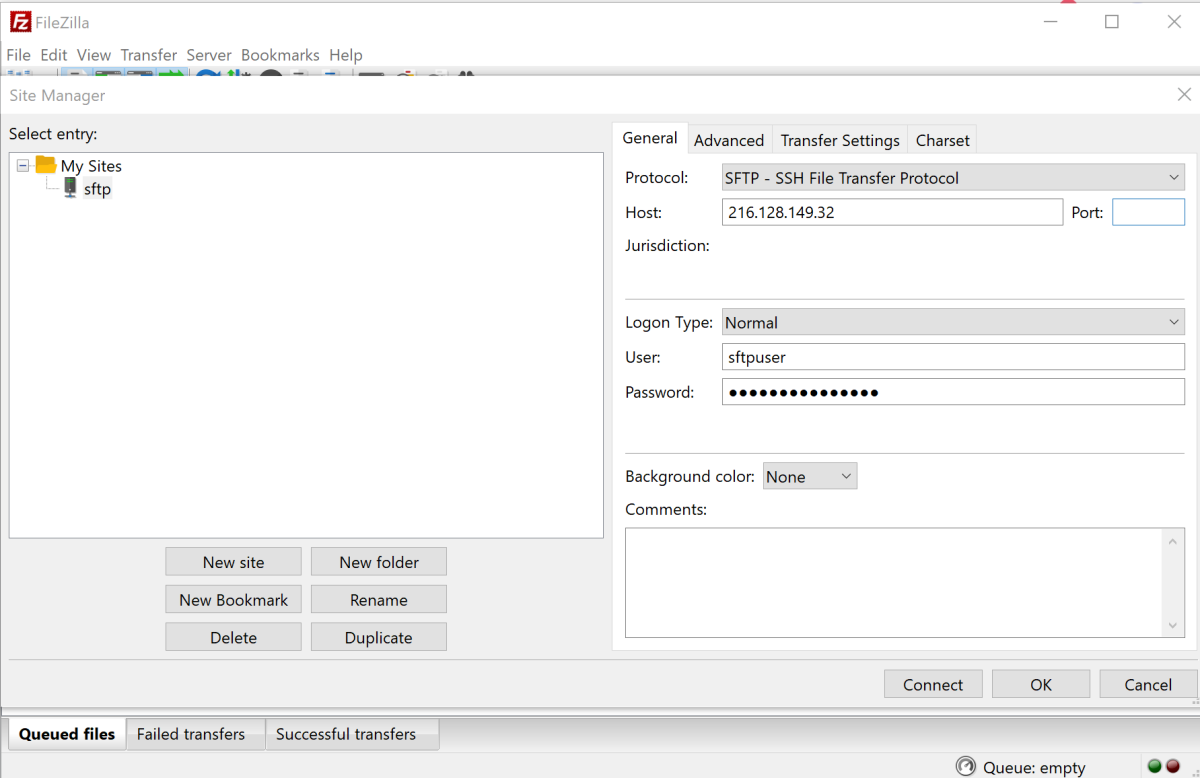
- Configure Connection:
Protocol: SFTP
Host: Your server's IP address
Port: 22
Logon Type: Normal
User: sftpuser
Password: The password you set for sftpuser
Step 13 : Click Connect and verify the setup.
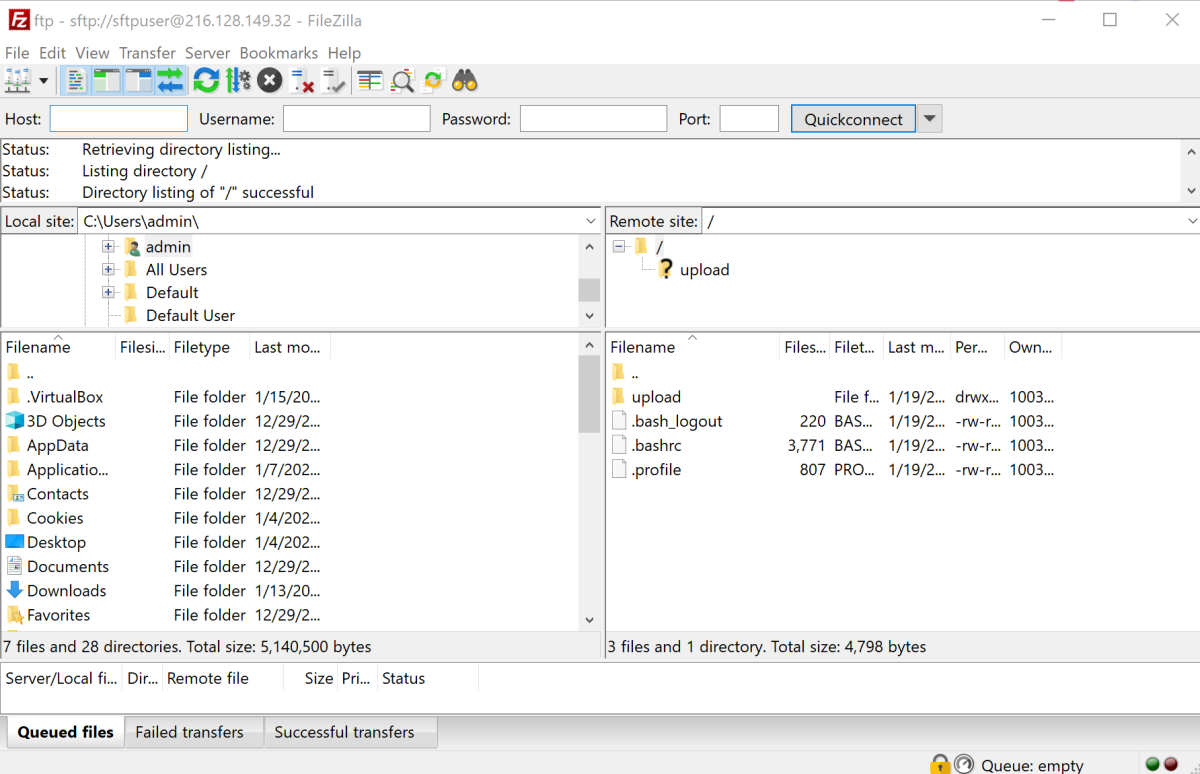
Congratulations! You have successfully set up an SFTP server on Ubuntu 24.10