To install WordPress on Ubuntu 24.10 with the LEMP stack, follow these steps:
Step 1 : If you haven't already installed LEMP, follow the guide for Ubuntu 24.10 here to install Nginx, PHP, and MariaDB.
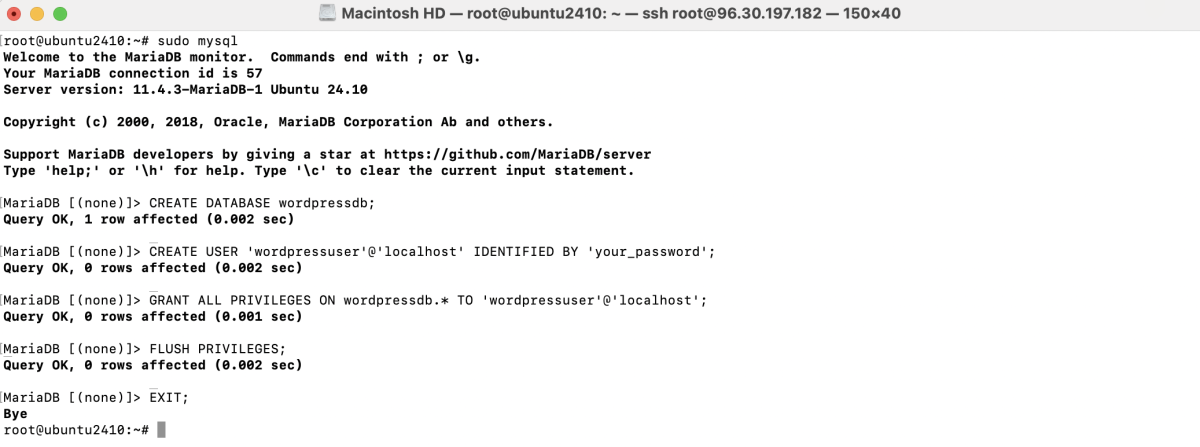
Step 2 : Create a Database
- Log into MariaDB using the following command:

- Create a new user and database for WordPress:
Step 3 : Download and Install WordPress
- Create a directory for your WordPress site:

- Navigate to the directory and download the latest version of WordPress:

- Extract the WordPress files:
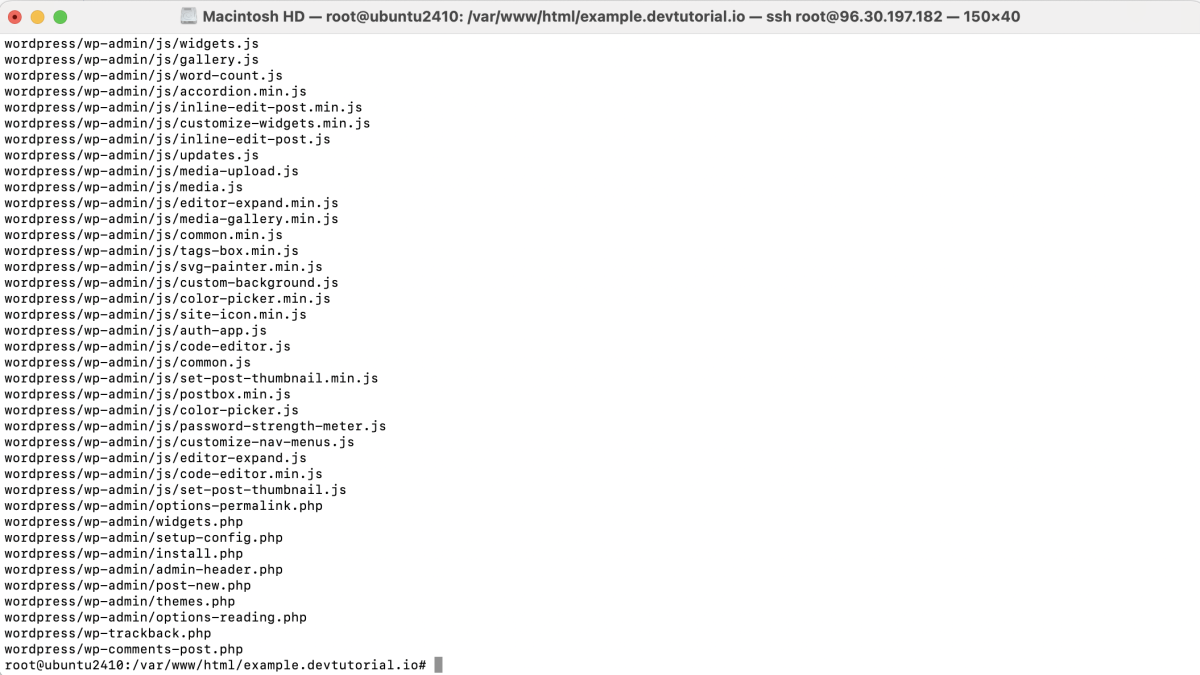
- Move the extracted files to the root directory:

- Set the correct permissions:

Step 4 : Configure Nginx for example.devtutorial.io
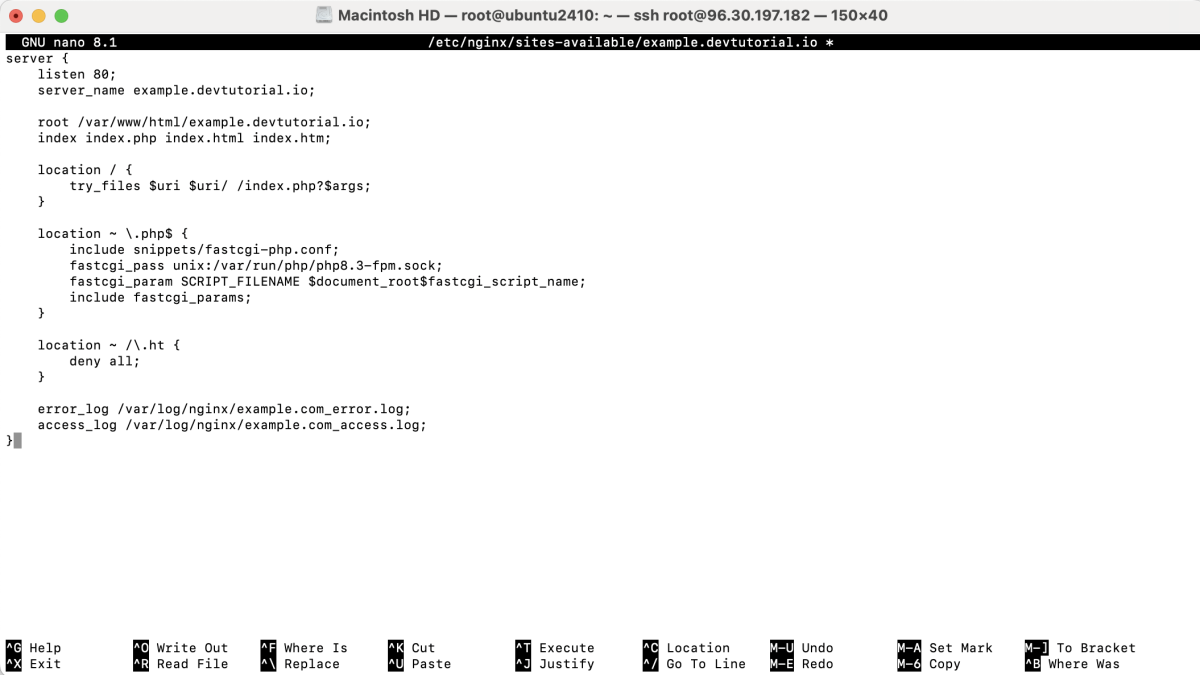
- Create a new Nginx server block configuration file for your site:
- Add the following configuration:
Step 5 : Create a symlink to enable the Nginx configuration:

Step 6 : Test the Nginx configuration:

- If the configuration is successful, restart Nginx:

Step 7 : Open Browser and Set Up WordPress
- Open your browser and navigate to http://example.devtutorial.io.
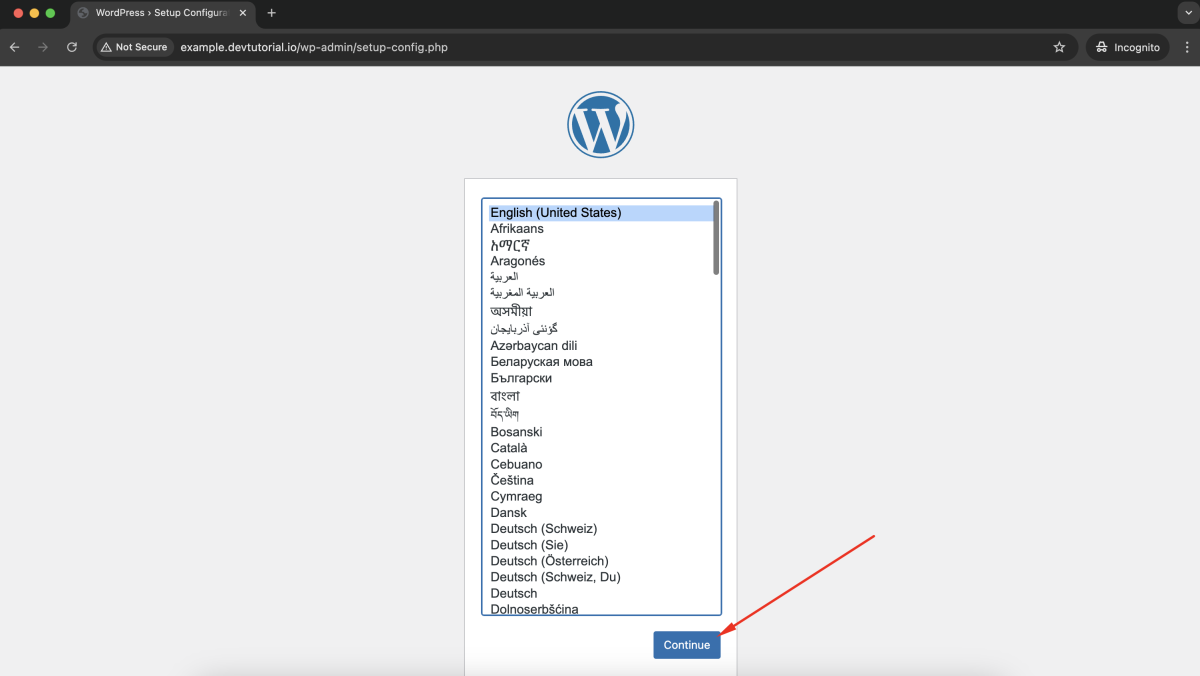
- Select your language and click Let's go!.
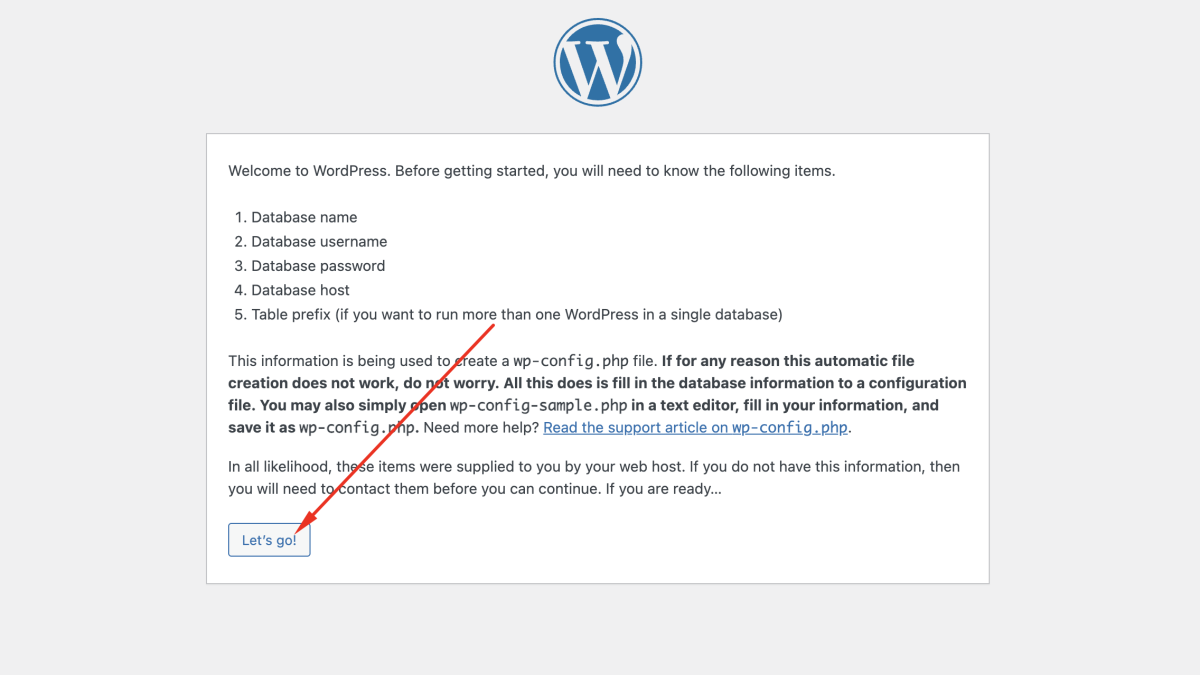
- Enter the database details:
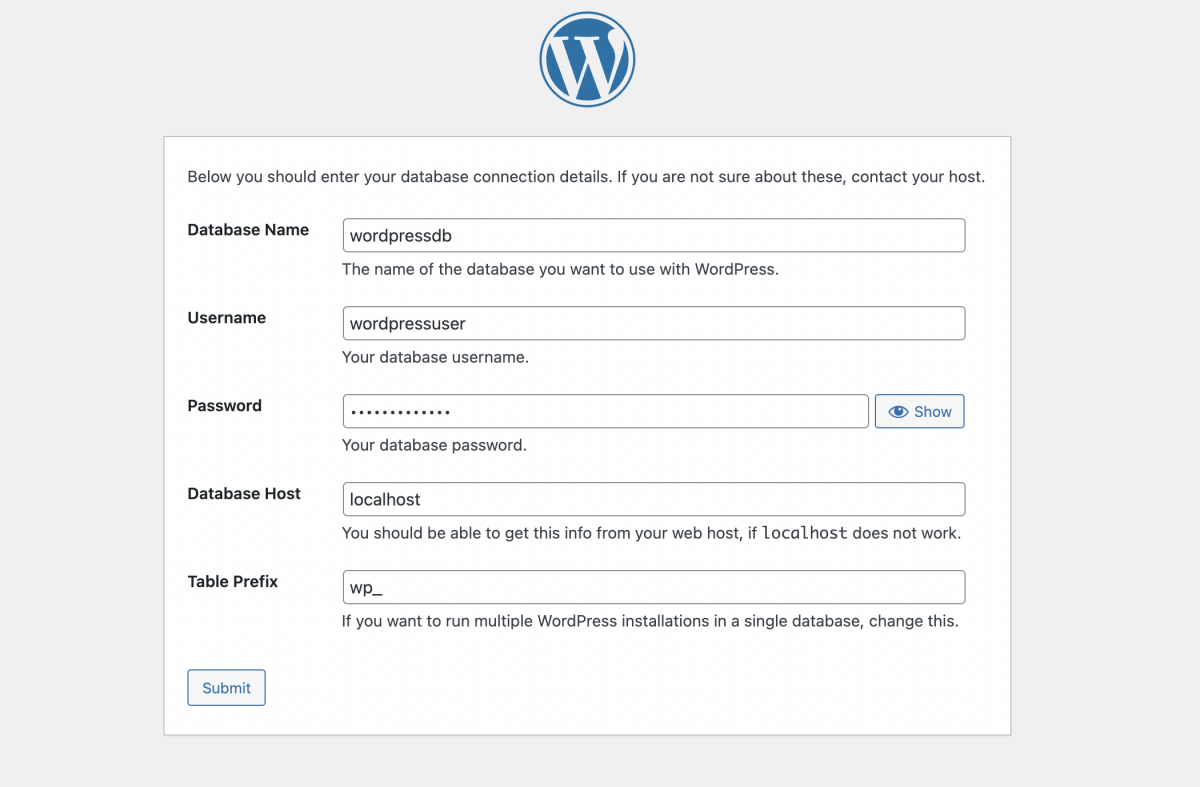
Database Name
Username
Password
Database Host
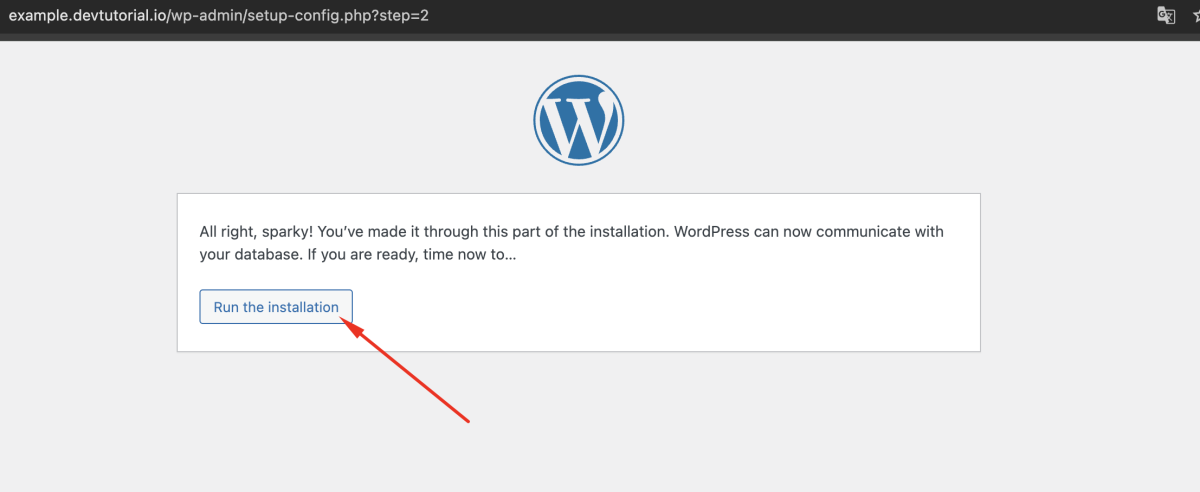
Step 8 : If the information is correct, click Run the installation.
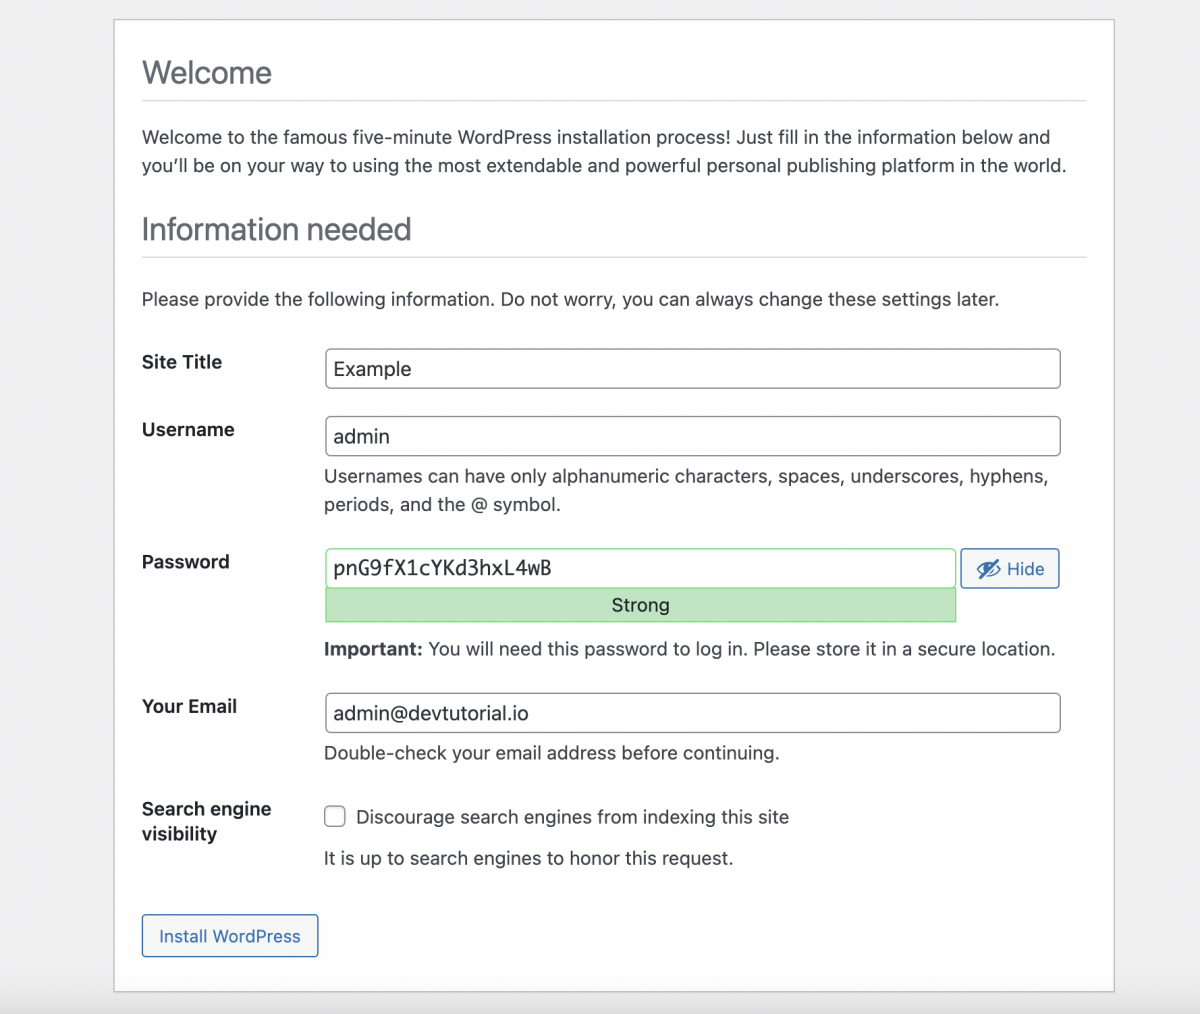
Step 9 : Fill in the WordPress site details, such as the admin username, password, and email, then click Install WordPress.
Step 10 : After installation, log in to WordPress by going to http://example.devtutorial.io/wp-admin.
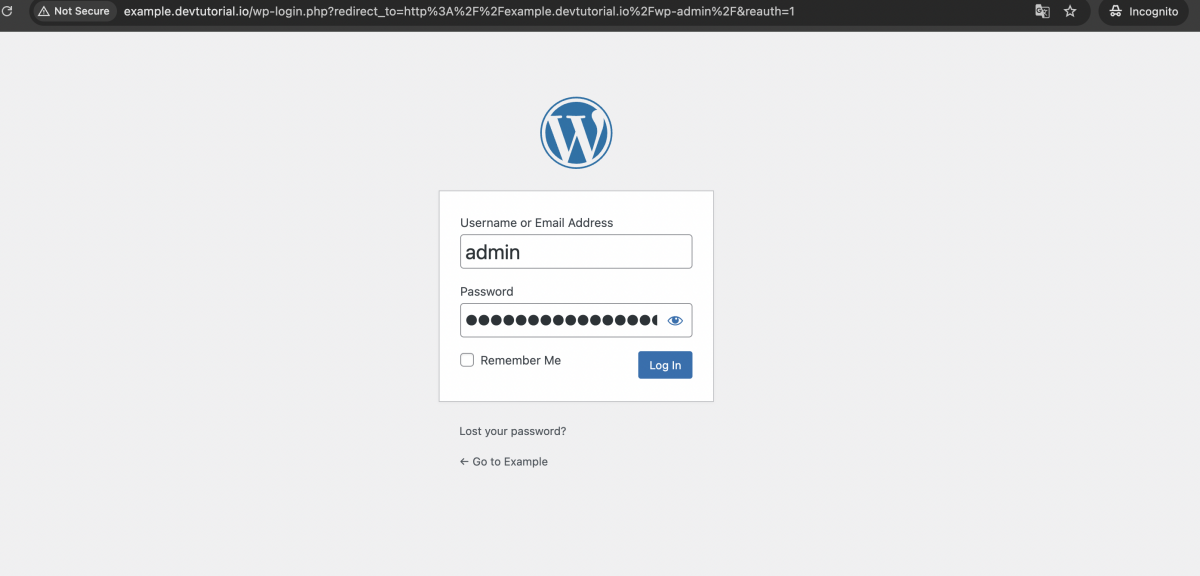
- Enter your admin username and password.
Step 11 : Once logged in, you'll be redirected to the WordPress dashboard where you can manage your site, install themes, and add plugins.
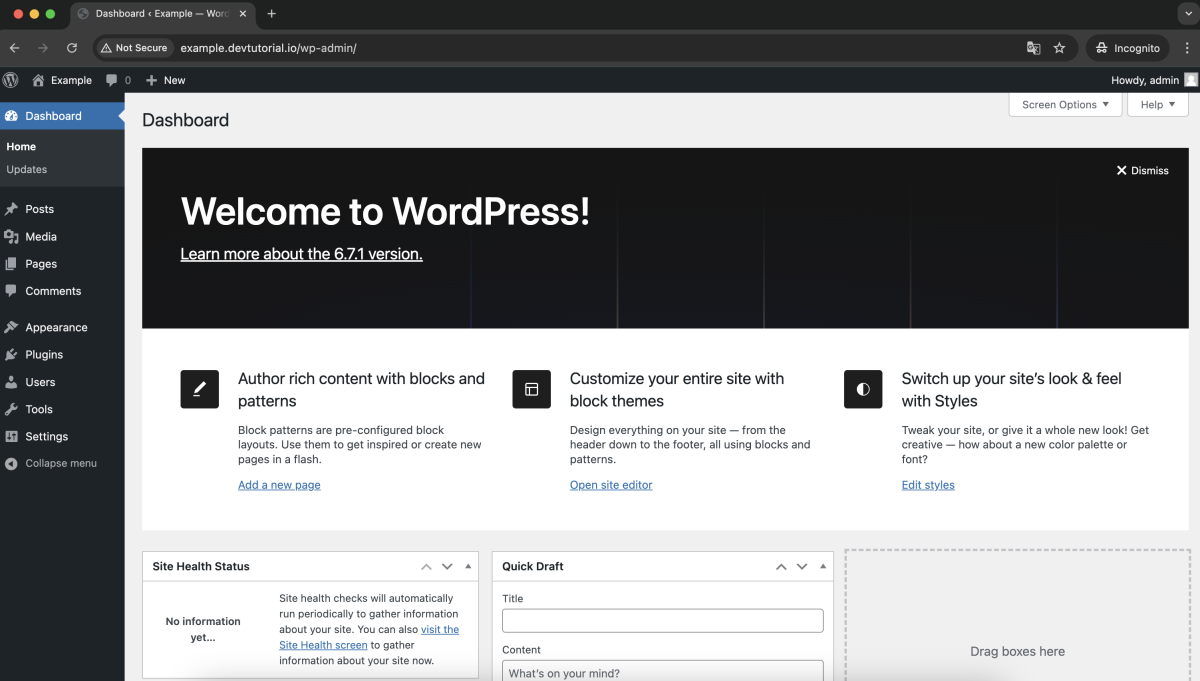
Congratulations, you've successfully installed WordPress with the LEMP stack on Ubuntu 24.10!