Setting up Apache virtual hosts on Ubuntu 23.10 allows you to host multiple websites on a single server. Here's a step-by-step guide on how to create and configure Apache virtual hosts:
Step 1 : Create the Document Root Directory:
First, create the directory where you will store the files for your virtual host. This will typically be within the /var/www/ directory:

Step 2 : Assign Permissions:
Assign appropriate permissions to the directory:

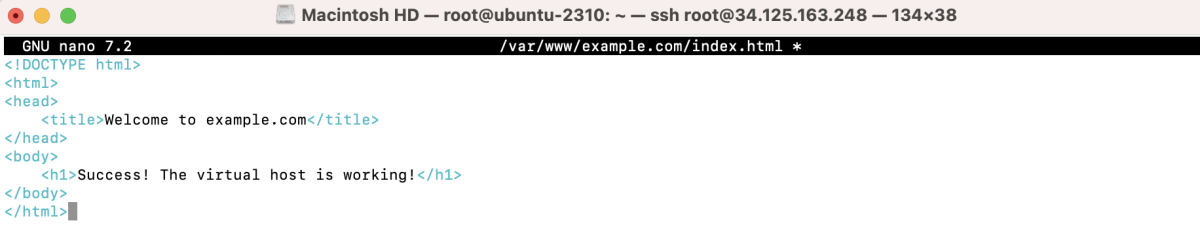
Step 3 : Create a Simple HTML File:
Create a simple HTML file to test your virtual host:
Add some content:
Save the file.
Step 4 : Create a Virtual Host Configuration:
Create a new virtual host configuration file in the /etc/apache2/sites-available/ directory. You can use a text editor of your choice, such as Nano:
Add the following configuration, replacing example.com with your domain or chosen hostname:

- ServerAdmin: The email address of the server administrator.
- ServerName: The domain or hostname associated with the virtual host.
- DocumentRoot: The directory where the website files are stored.
- ErrorLog and CustomLog: Log file locations.
Step 5 : Enable the Virtual Host:
Enable the virtual host configuration by creating a symbolic link to the sites-enabled directory:

Step 6 : Restart Apache:
Restart the Apache service to apply the changes:

Step 7 : Update Hosts File (Optional):
If you're testing on the local machine, you can update the /etc/hosts file to map the domain name to your server's IP address:
Add a line like this:
Step 8 : Test Your Virtual Host:
Open a web browser and navigate to http://example.com. You should see the content you added to the index.html file.

You've successfully set up an Apache virtual host on Ubuntu 23.10. Repeat these steps for additional virtual hosts as needed.