To install WordPress on CentOS Stream 10 with a LAMP stack, follow these steps for a smooth setup.
Step 1 : Install LAMP Stack
If you haven't installed the LAMP stack (Linux, Apache, MySQL/MariaDB, PHP) yet, you can follow the guide in this CentOS Stream 10 Guide for detailed instructions.
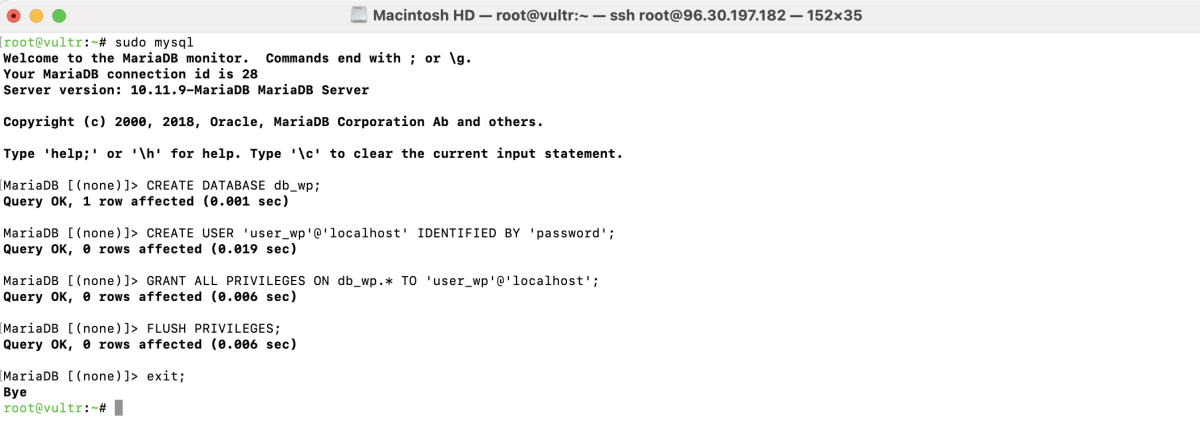
Step 2 : Create Database
- Log in to MariaDB or MySQL as the root user:

- Create a database for WordPress:
- Create a user and assign permissions:
Step 3 : Download and Install WordPress
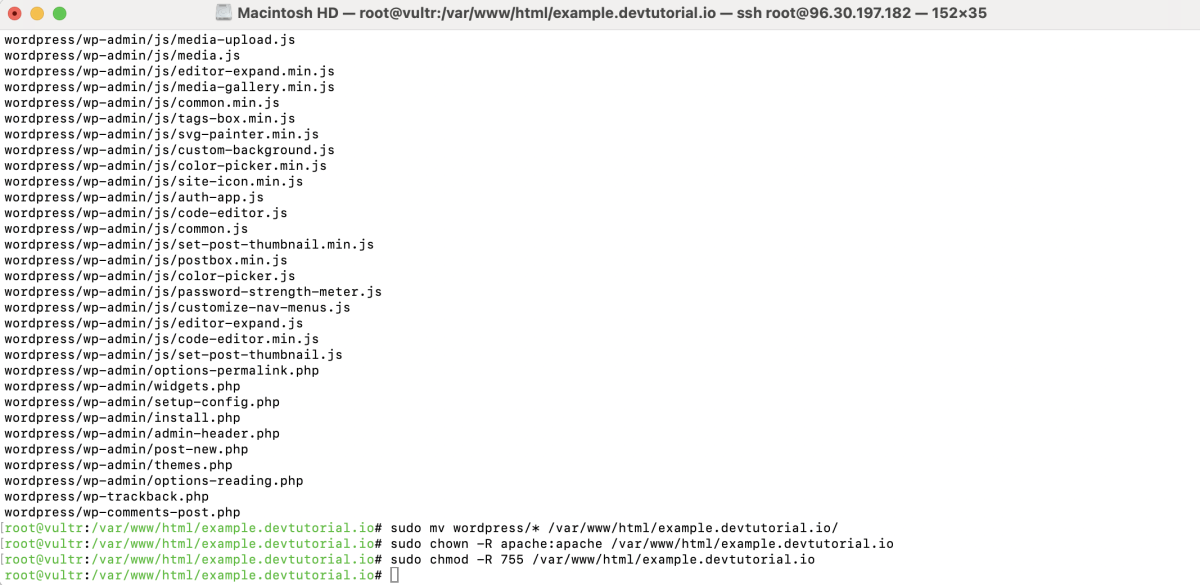
- Create the directory for your website under /var/www/html (example: example.devtutorial.io):
- Navigate to the directory and download WordPress:

- Extract the downloaded WordPress files:
- Move the WordPress files to the correct directory:
- Set proper permissions for the files:
Step 4 : Create a configuration file for your WordPress site:
Add the following configuration:

Step 5 : Test the Apache configuration for syntax errors:

If the output is Syntax OK, restart Apache to apply the changes:

Step 6 : If you're using SELinux, allow Apache to serve content from the web directory:

Step 7 : Open Browser and Install WordPress
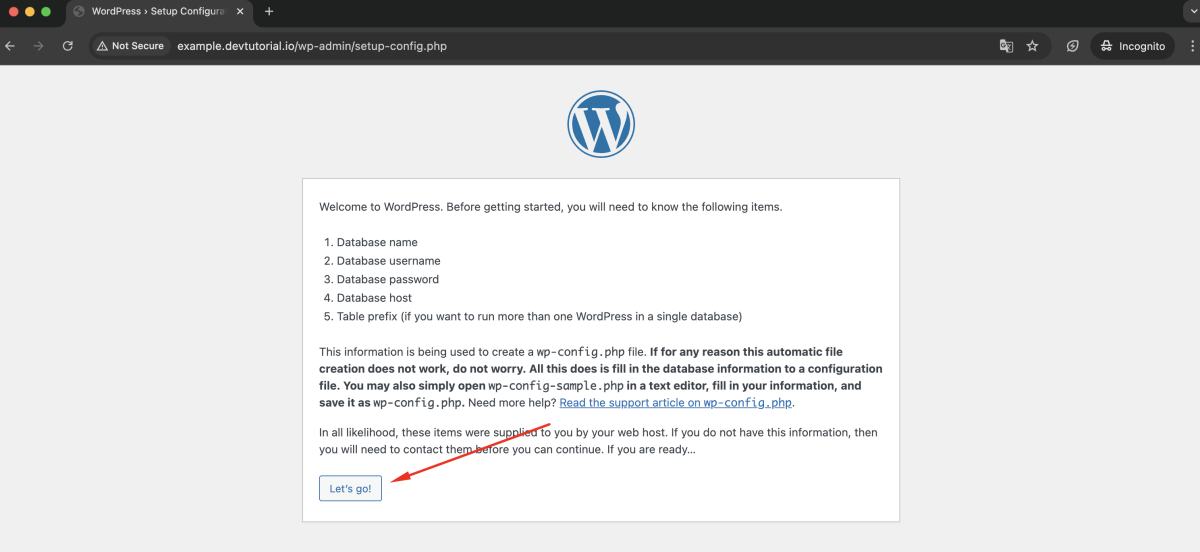
- Open your browser and go to http://example.devtutorial.io. Click Let's Go!
- Enter the database details:
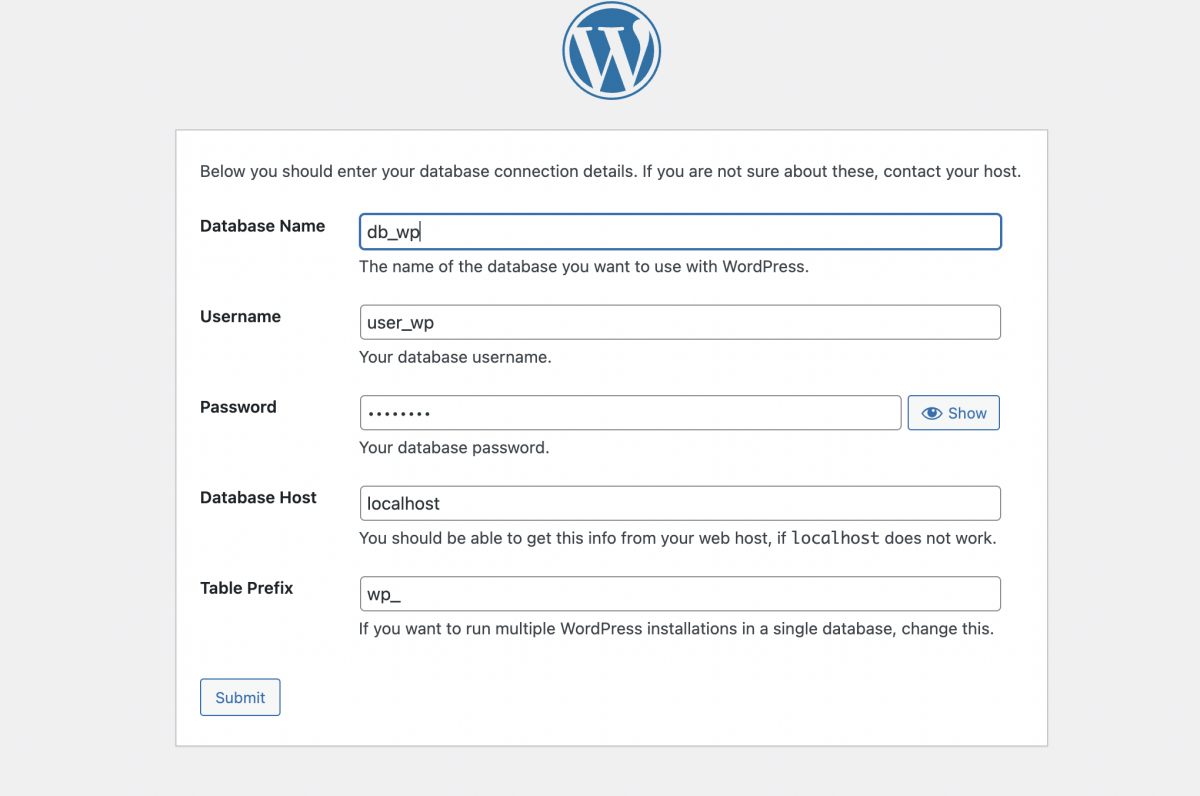
- If the information is correct, click Run the installation.

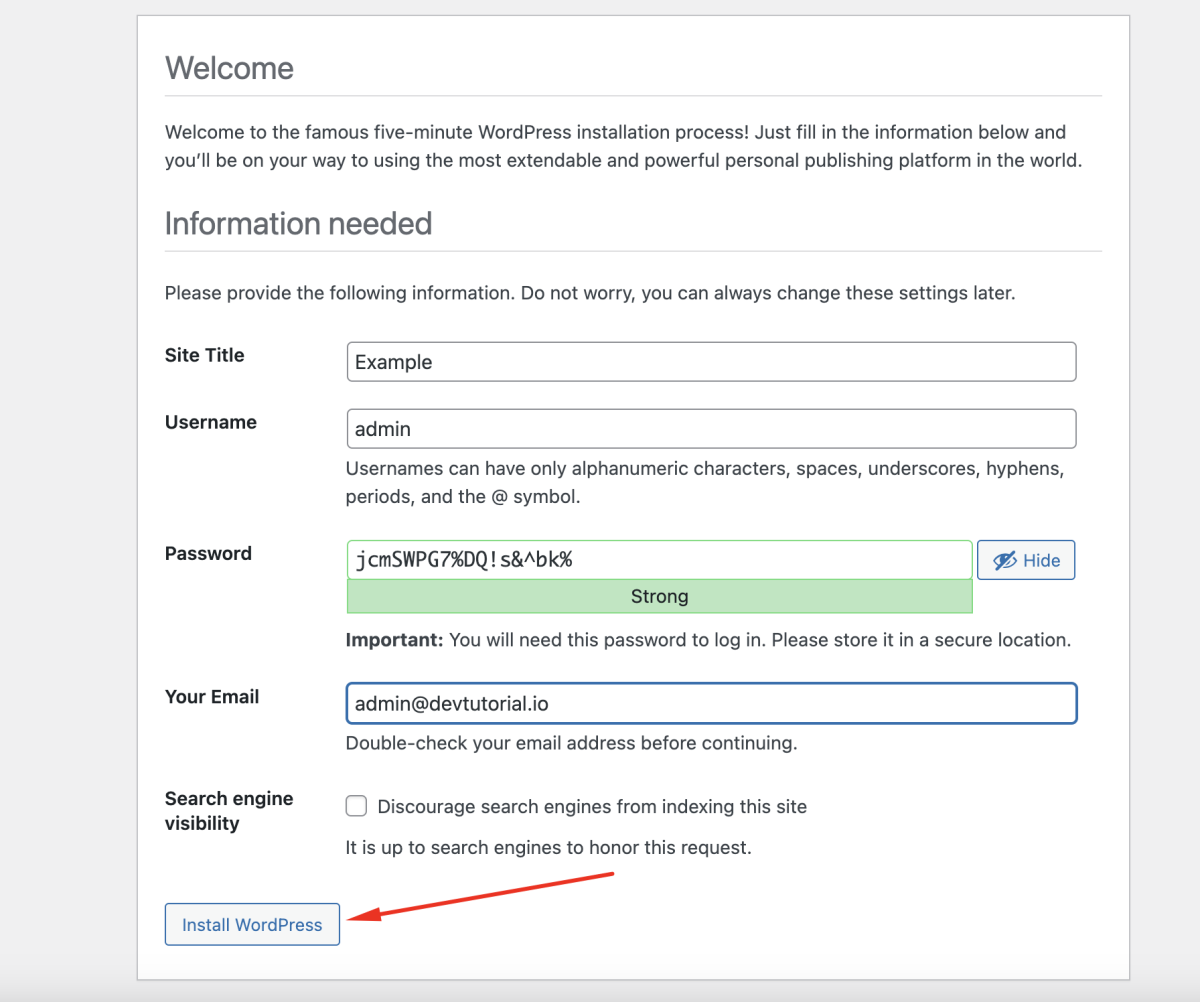
- Fill in your WordPress details (site title, admin username, password, and email), then click Install WordPress.
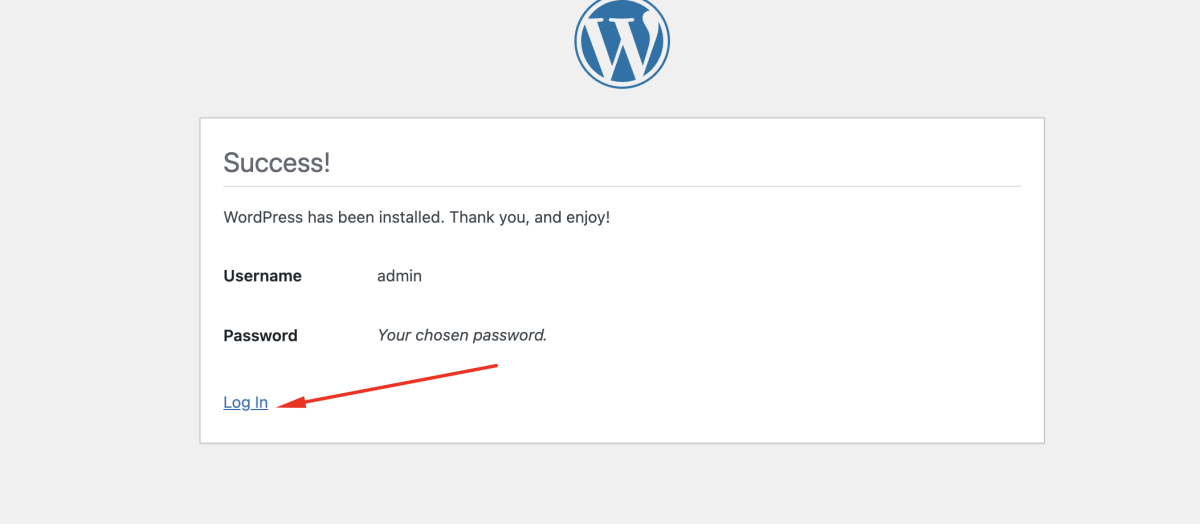
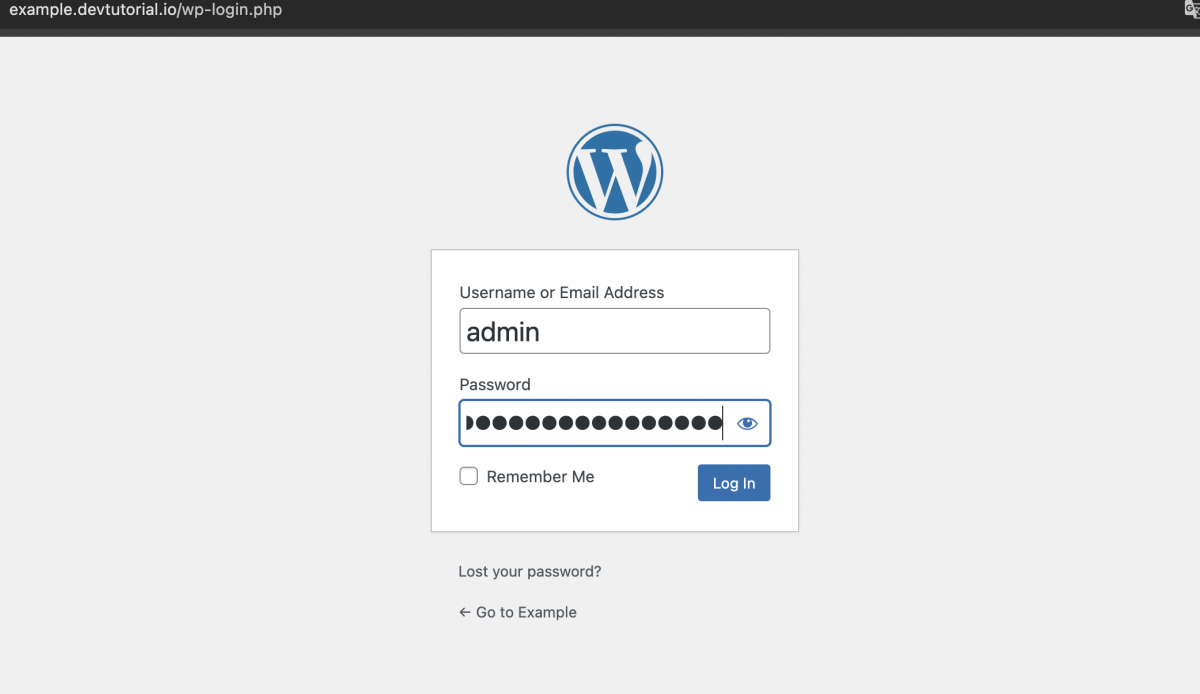
- Once WordPress is installed, you can log in to the admin panel by going to http://example.devtutorial.io/wp-login.php.
Use the username and password you created during installation.
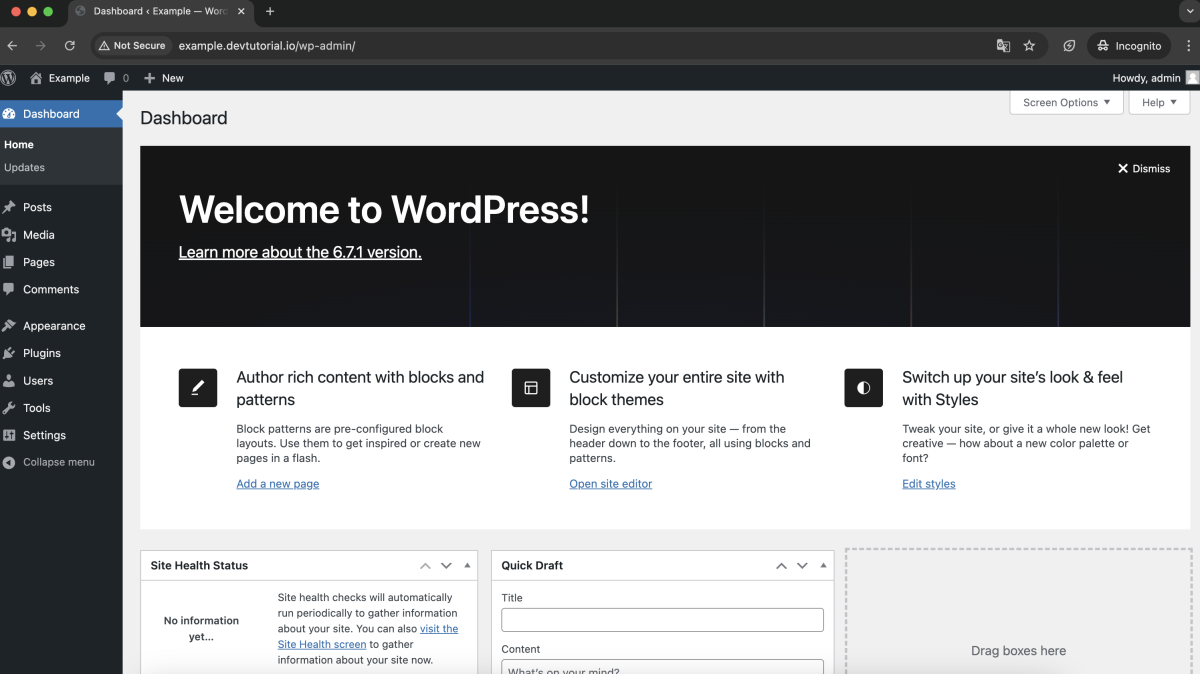
Step 8 : After logging in, you will be redirected to the WordPress dashboard, where you can begin customizing your site.
Congratulations, you have successfully installed WordPress on CentOS Stream 10 with LAMP!