To set up a reliable FTP server on CentOS Stream 10, vsftpd is an excellent choice. Follow these steps to install and configure it properly.
Step 1 : Ensure your system is up to date before proceeding:

Step 2 : Install the vsftpd package:
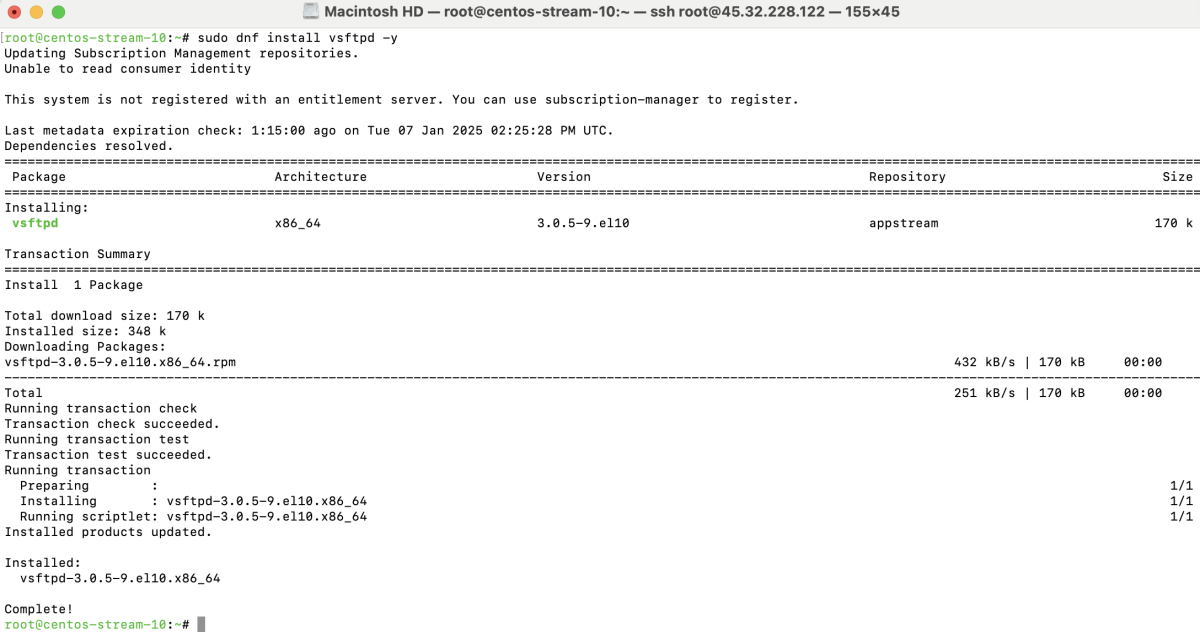
Step 3 : Once installation is complete, enable and start the service:

Step 4 : Verify that vsftpd is running:

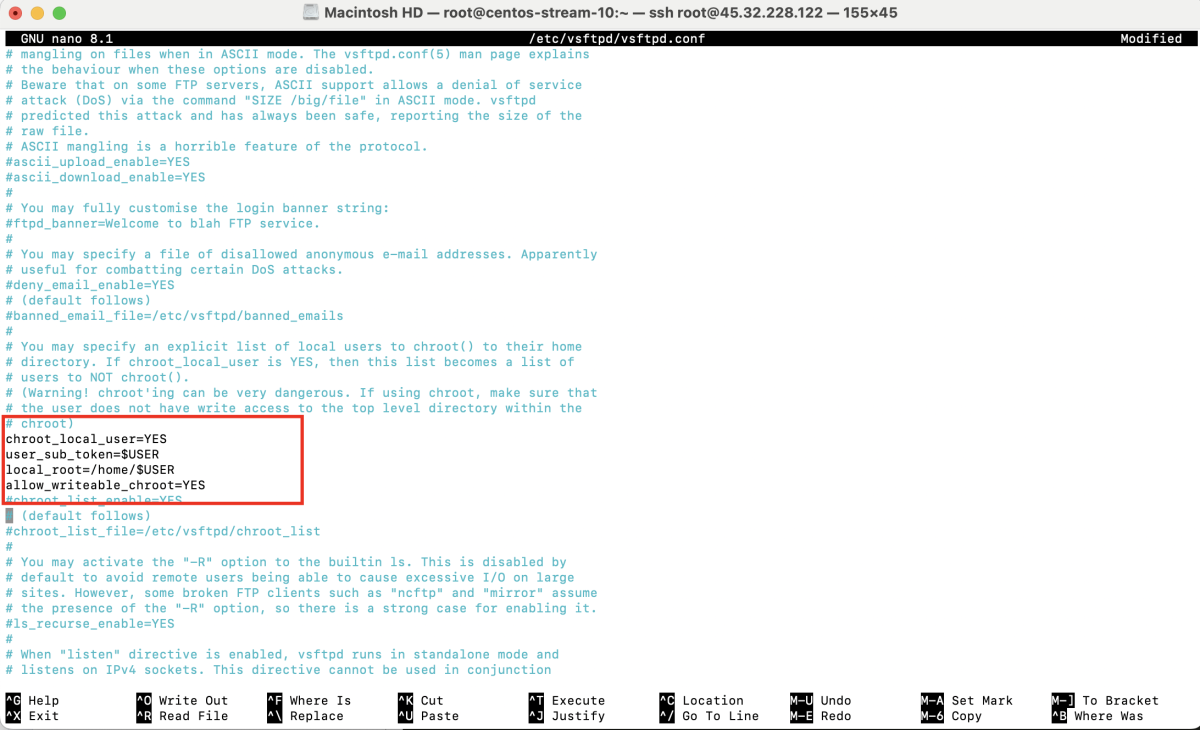
Step 5 : To secure the FTP server, disable anonymous FTP access and update the configuration file at /etc/vsftpd/vsftpd.conf.
Open the file for editing:
Modify or add the following lines:
Save the changes and exit the editor.
Step 6 : Restart the vsftpd service to apply the changes:

Step 7 : Add a new user for FTP access:

Step 8 : Assign a password to the new user:

Step 9 : If your server uses a firewall, allow FTP traffic:

Step 10 : If SELinux is enabled, configure it to allow FTP access:

Step 11 : Use an FTP client like FileZilla to connect to your server.
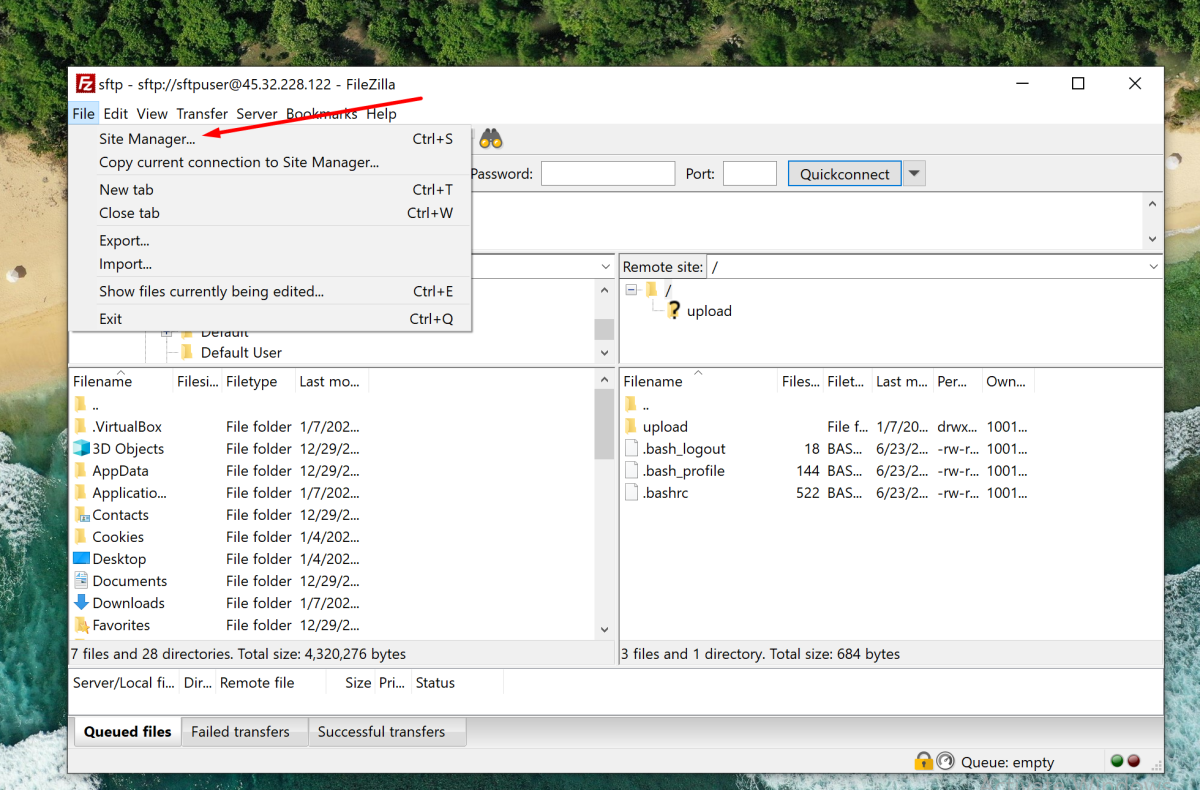
- Open FileZilla.
- Go to Site Manager and create a new site.
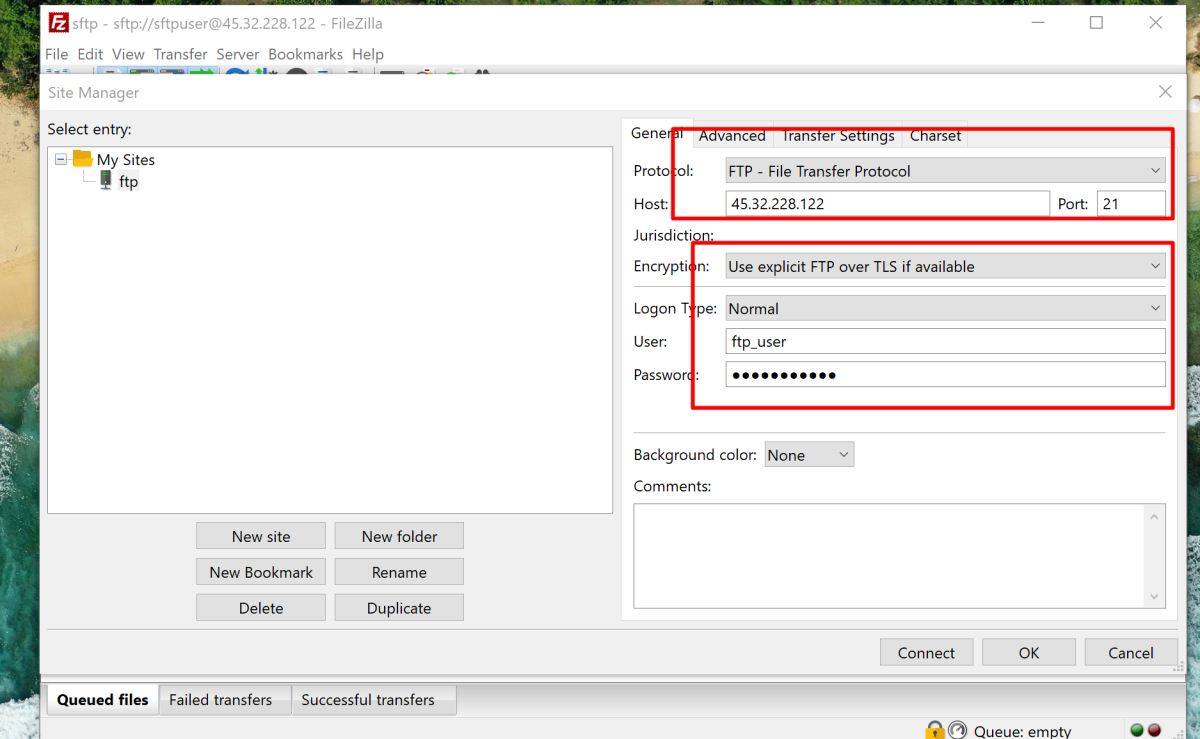
- Configure Connection Settings
Host: Enter your server's IP address.
Protocol: Choose "FTP - File Transfer Protocol".
Logon Type: Choose "Normal".
Username: Enter ftp_user.
Password: Enter the password set earlier.
- Click Connect and verify access to the FTP server.
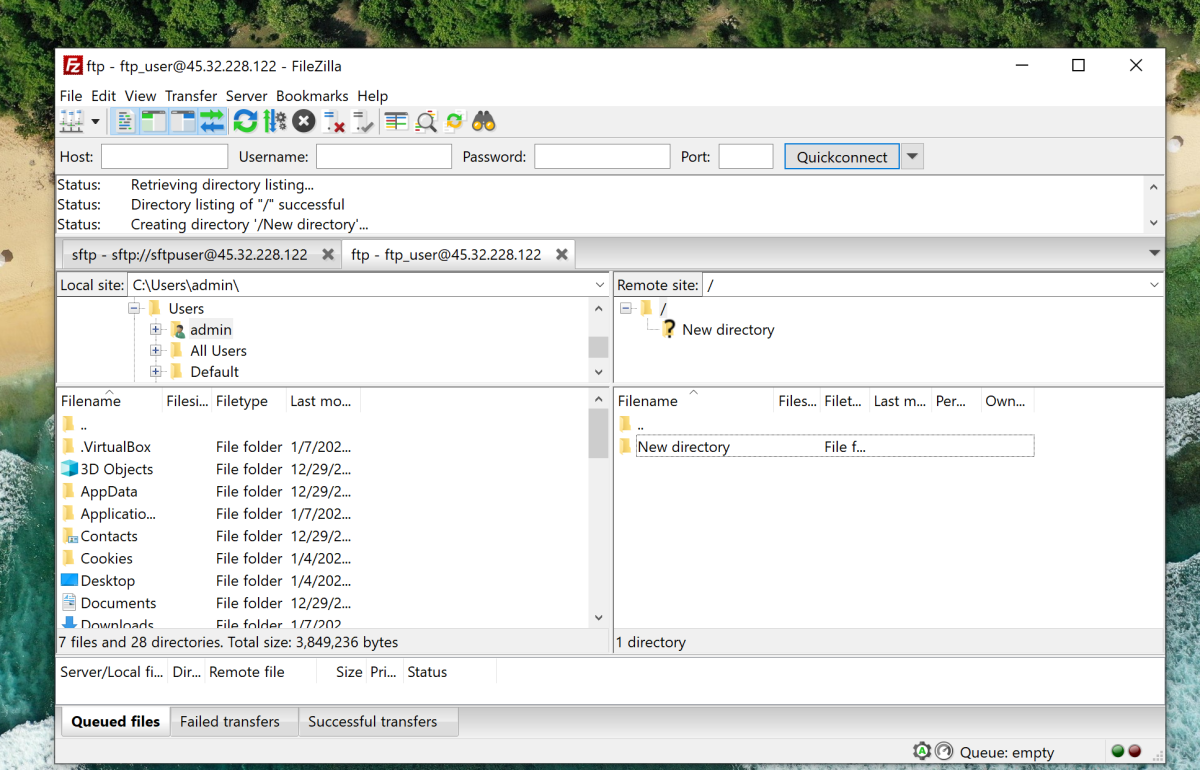
Congratulations! You have successfully installed and configured the vsftpd FTP server on CentOS Stream 10.