To install Webmin on Rocky Linux 9, follow the steps below.
Step 1 : Ensure that your system packages are up to date by running the following commands:

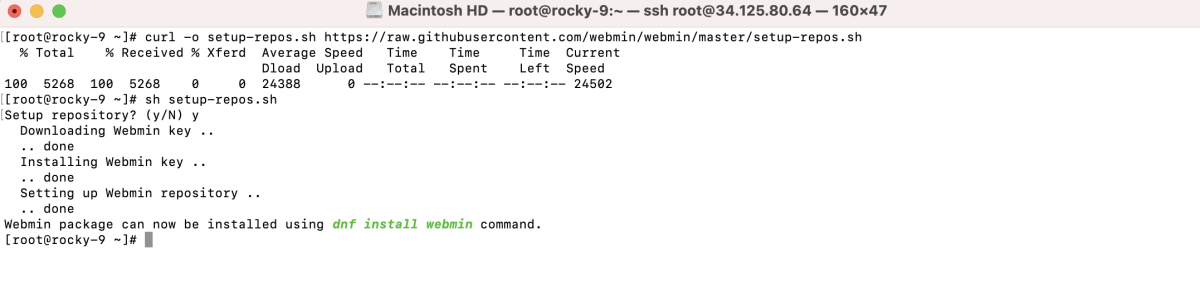
Step 2 : Download and run the Webmin repository setup script to add the necessary repository:
Step 3 : Now that the repository has been added, you can install Webmin using the following command:
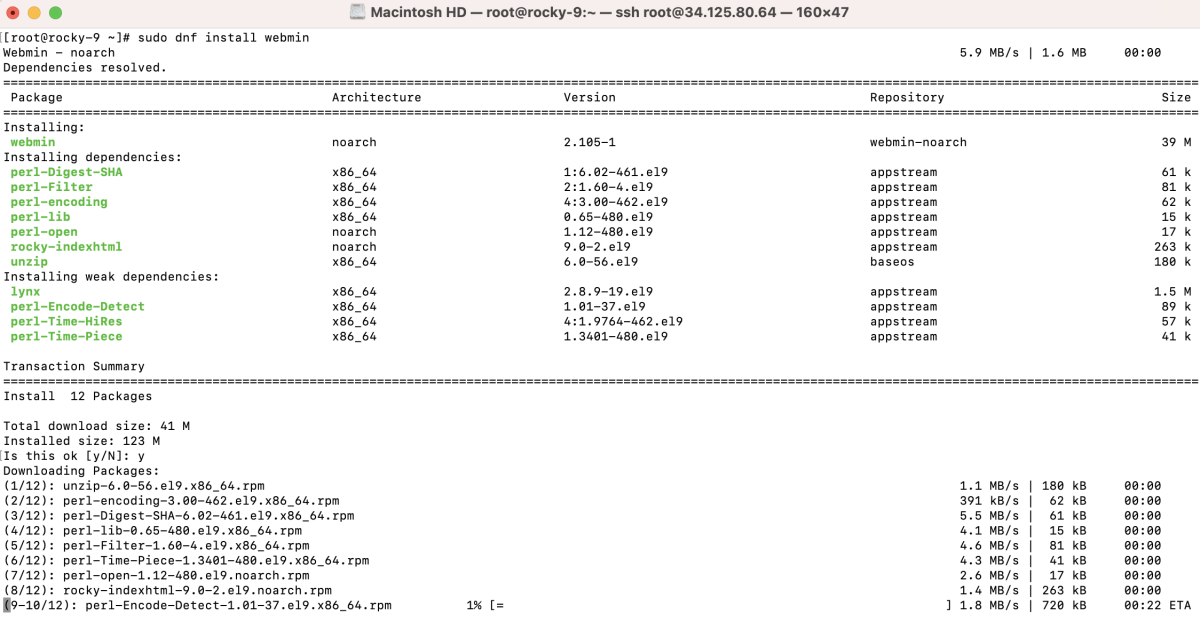
During the installation, you may be prompted to confirm the installation. Type 'y' and press Enter to proceed.
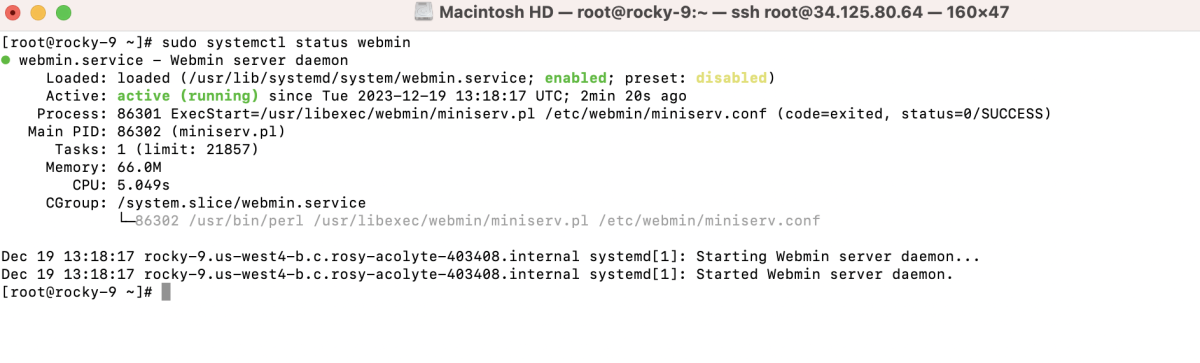
Step 4 : After the installation, check the status of the Webmin service:
Step 5 : If you are using a firewall, allow access to the Webmin port (default is 10000) using the following command:

Step 6 : After the installation is complete, you can access Webmin by opening your web browser and navigating to:
- Replace "your_server_ip" with the actual IP address of your Rocky Linux server.
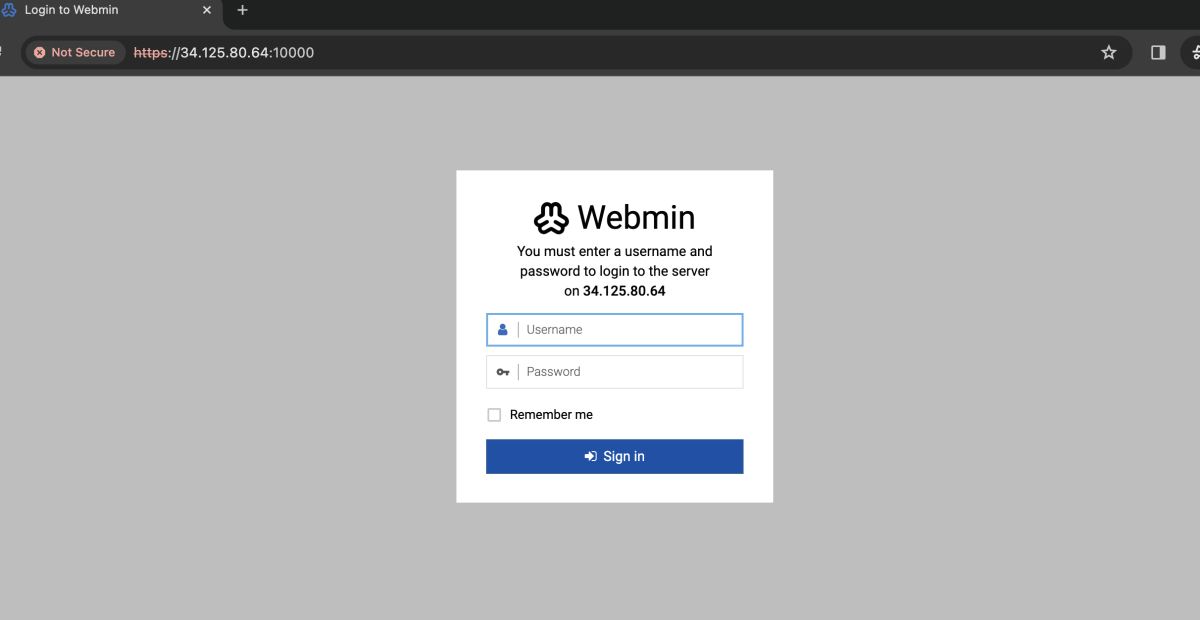
- Log in with your system username and password.

Congratulations! You have successfully installed Webmin on Rocky Linux 9.