To create a bootable USB installer for Rocky Linux 9, follow these steps:
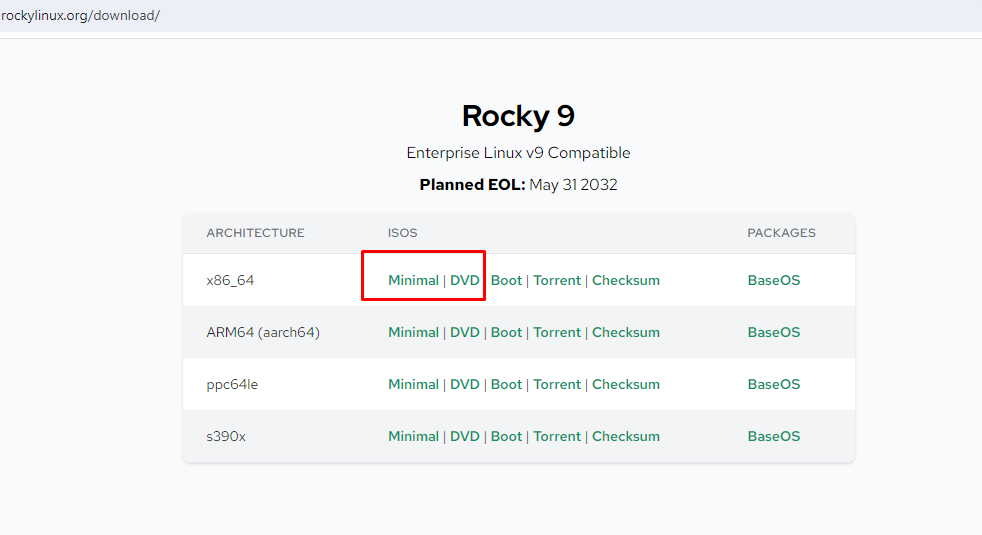
Step 1 : Visit the official Rocky Linux website and download the ISO file for Rocky Linux 9 (https://rockylinux.org/download)
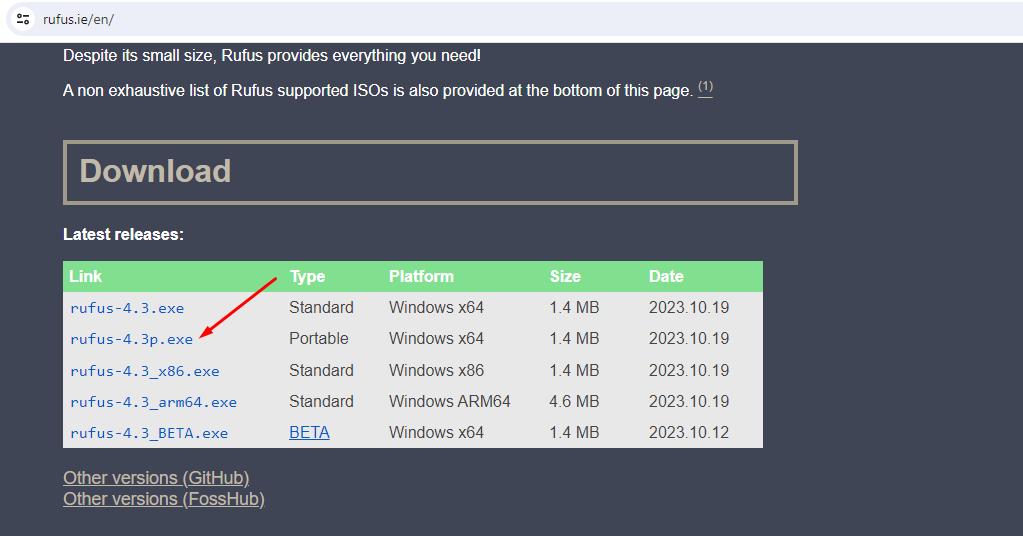
Step 2 : Download Rufus, a reliable tool for creating bootable USB drives. You can find Rufus on its official website: (https://rufus.ie)
Step 3 : Insert your USB flash drive into a USB port on your computer.
Step 4 : Run Rufus on your computer. It is not necessary to install Rufus; it can be run directly.
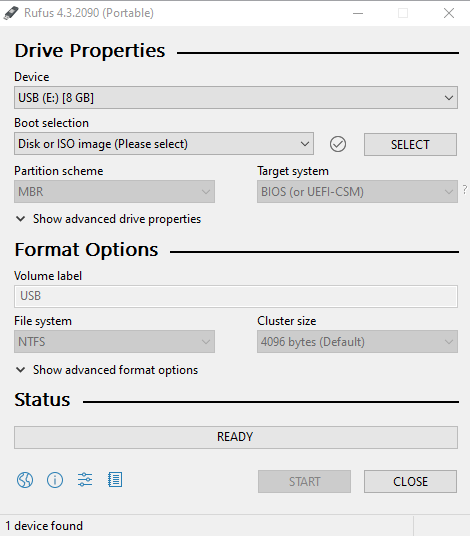
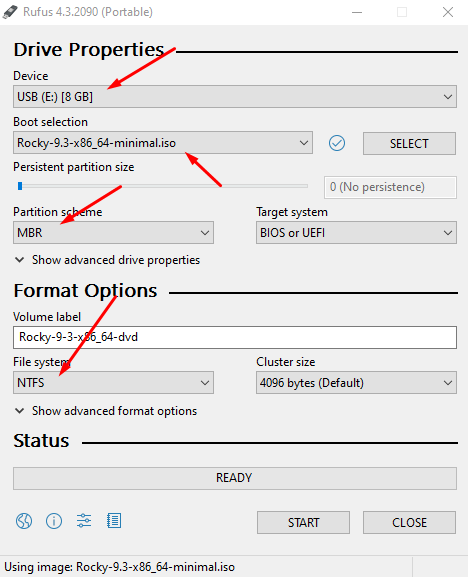
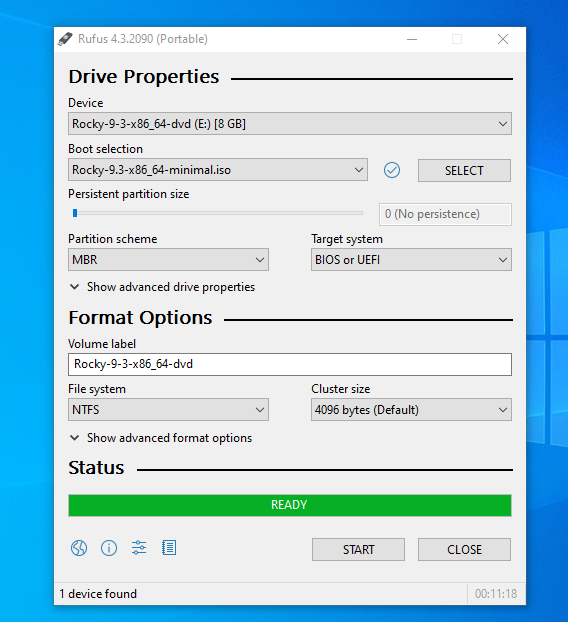
Step 5 : Configure Rufus:
- Select your USB drive from the "Device" dropdown menu.
- Click on the "Select" button next to "Boot selection" and choose the Rocky Linux ISO file you downloaded.
- Ensure the partition scheme is set to "MBR" (for BIOS or UEFI) or "GPT" (for UEFI).
- Set the File System to "NTFS" or "FAT32."
Step 6 : Click on the "Start" button in Rufus to initiate the process.
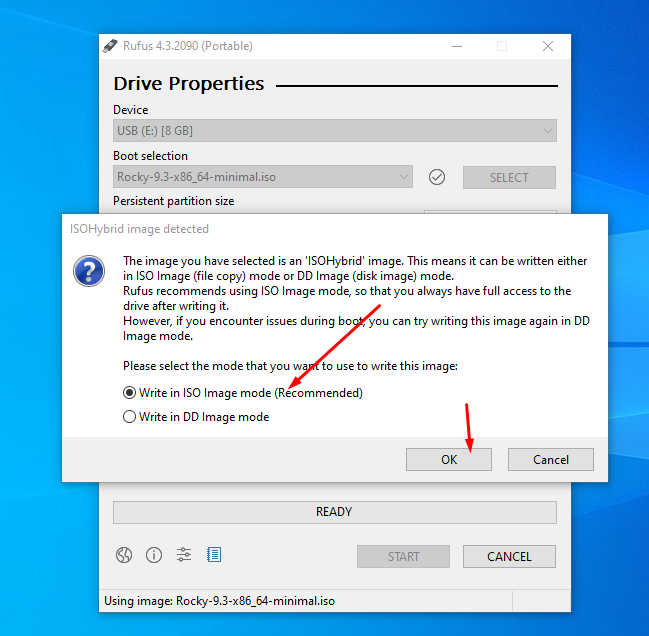
Step 7 : When prompted, select "Write in ISO image mode" and click "OK."
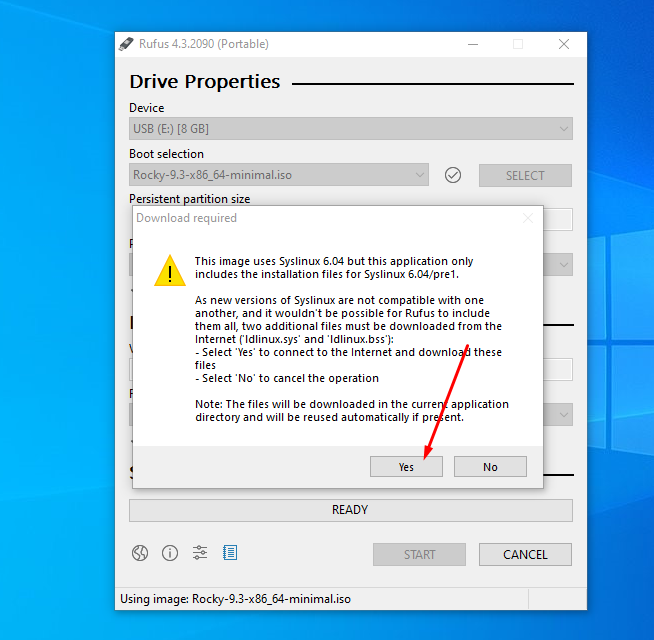
Step 8 : If Rufus prompts you to download the latest syslinux version, choose "Yes" to ensure you have the latest bootloader.
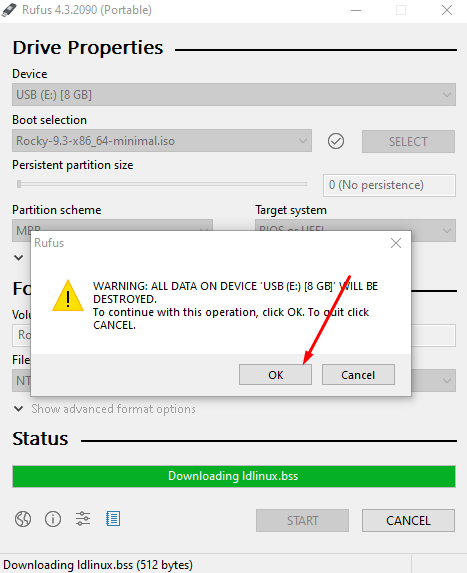
Step 9 : Confirm the warning that all data on the USB drive will be destroyed and click "OK" to proceed.
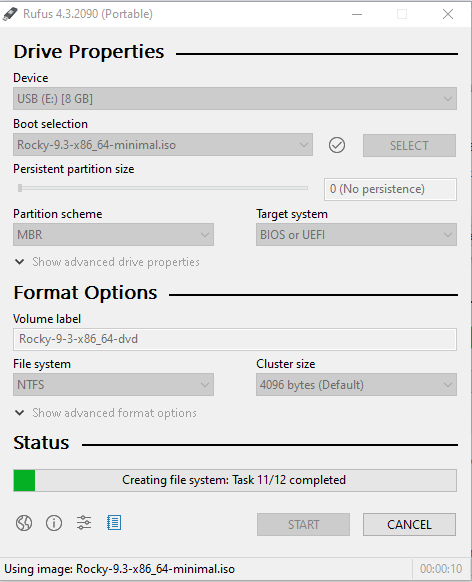
Step 10 : Wait for Rufus to complete the process. This may take some time depending on the speed of your USB drive.
Step 11 : Once the process is complete, eject the USB flash drive safely.
Congratulations! You have successfully created a bootable USB installer for Rocky Linux 9 using Rufus. You can now use this USB drive to install Rocky Linux 9 on your computer.