Logo

How To Install phpMyAdmin With Apache on Ubuntu 24.04

Mar 16, 2024

To install phpMyAdmin with Nginx on Ubuntu 24.04, follow these steps:

Step 1 : Update

sudo apt update

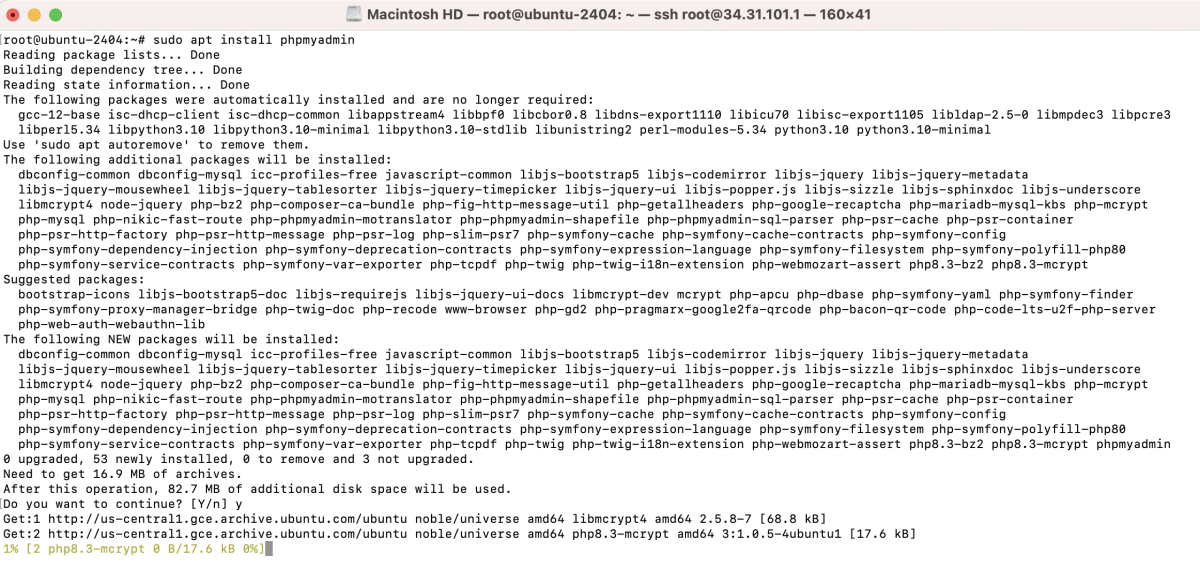
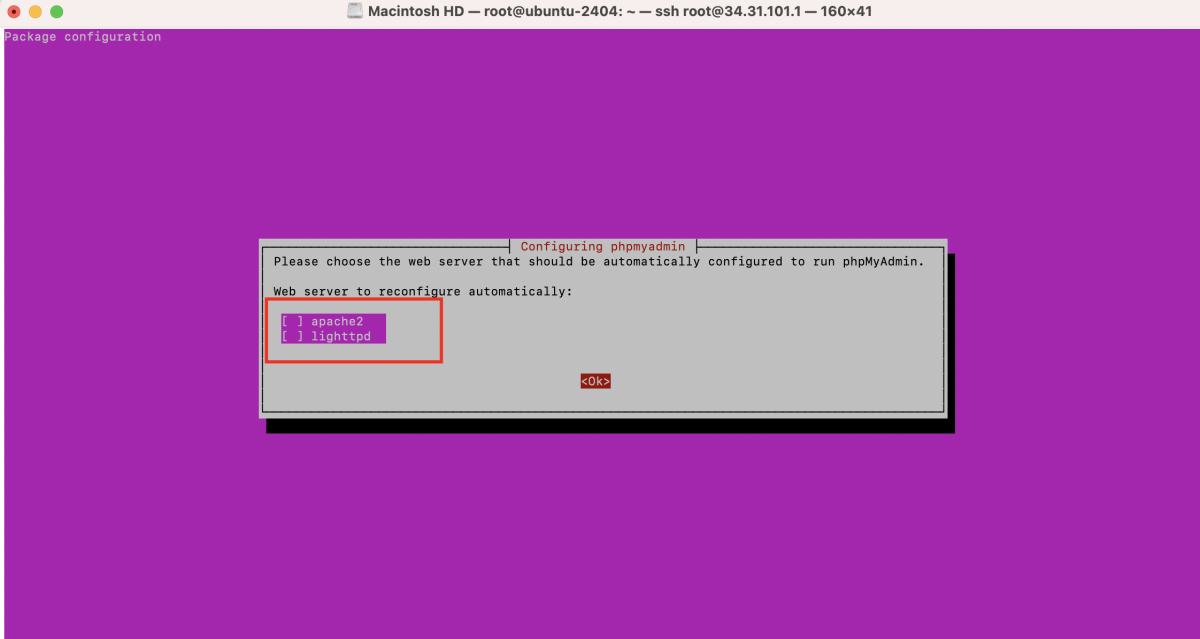
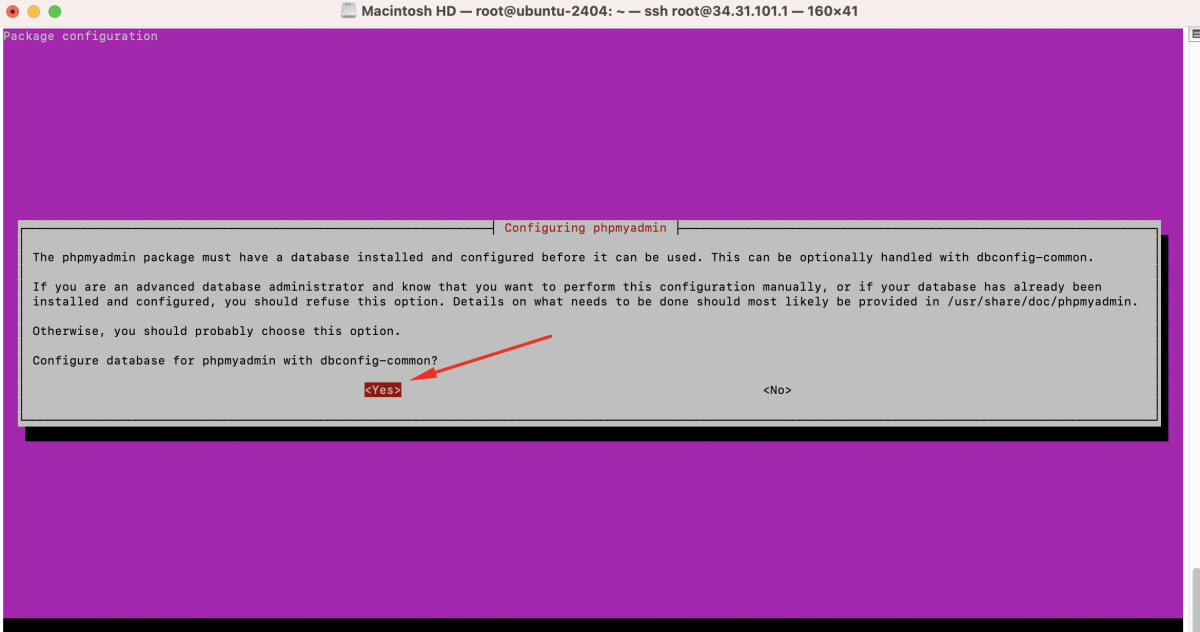
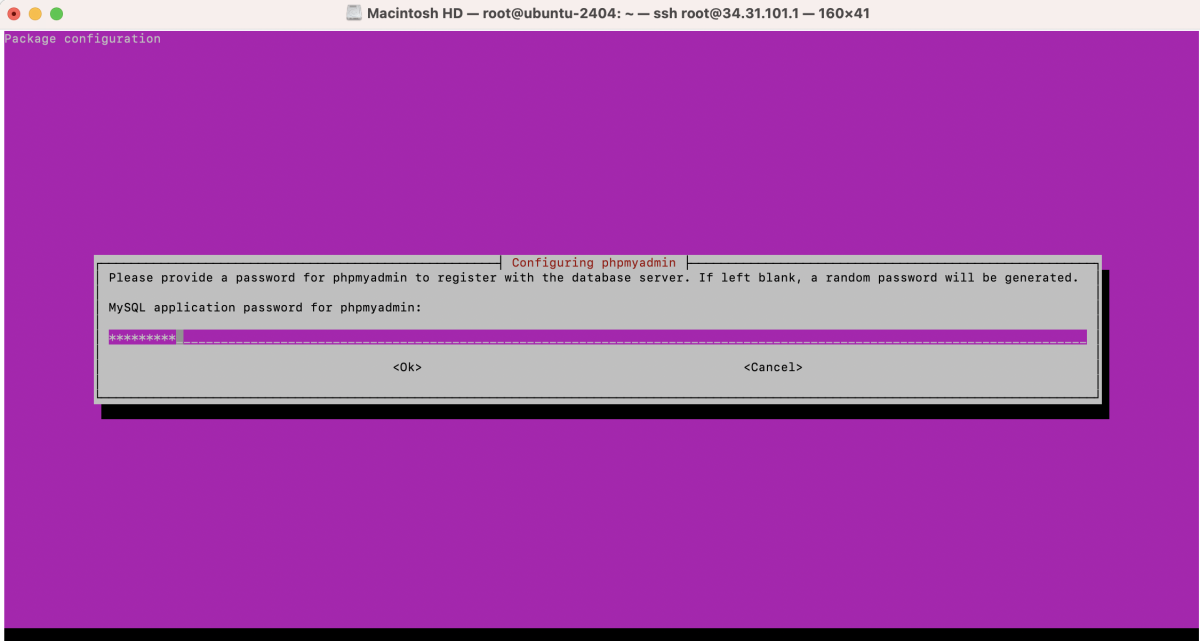
Step 2 : Install phpMyAdmin

sudo apt install phpmyadmin

- Web server selection: Do not choose any web server during installation.

- Configure database for phpmyadmin with dbconfig-common: yes

- Enter MySQL application password for phpmyadmin:

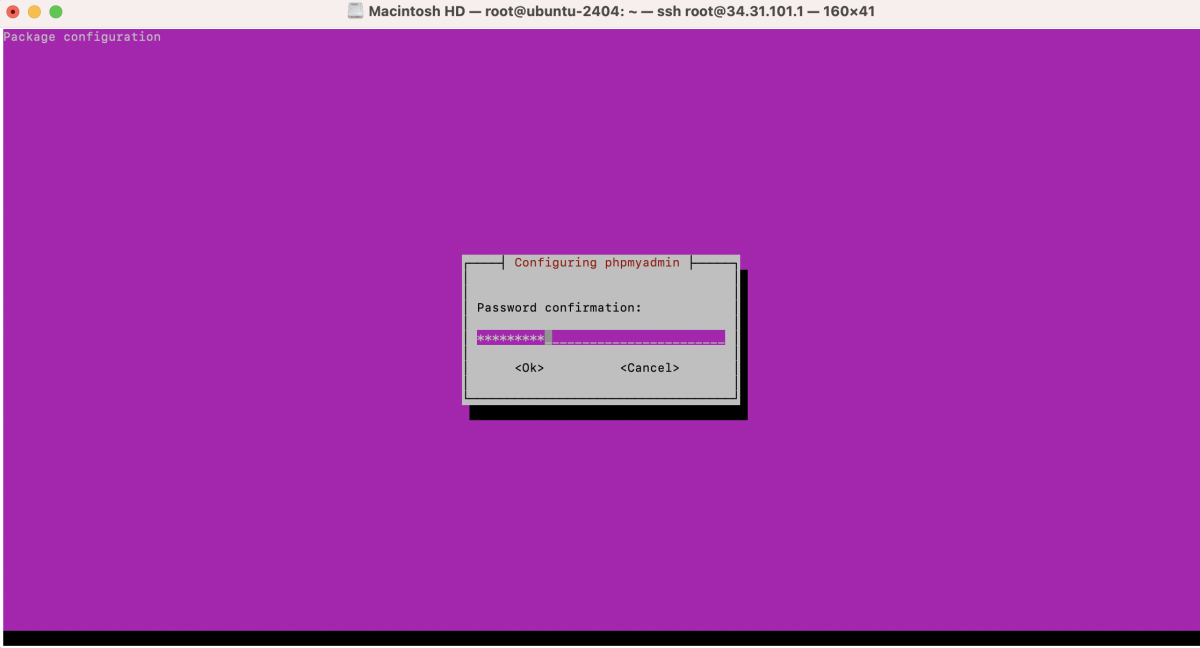
- Password confirmation

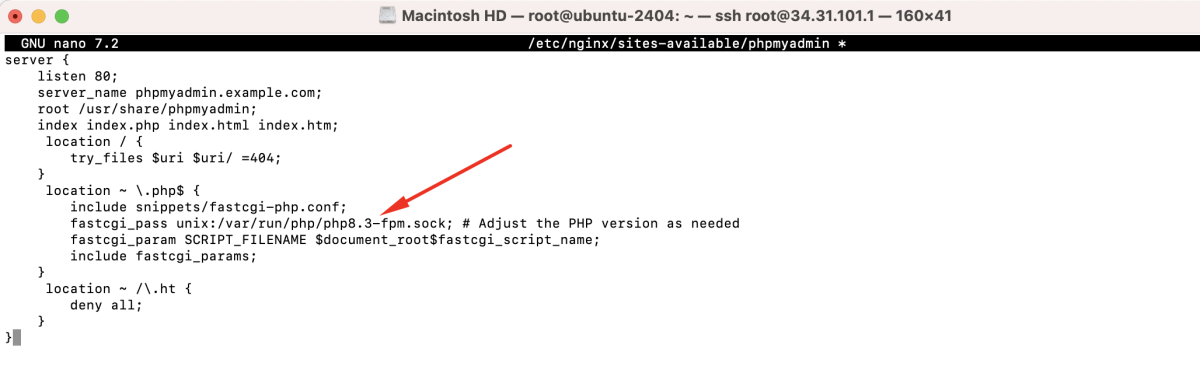
Step 3 : Create Nginx configuration for phpMyAdmin

sudo nano /etc/nginx/sites-available/phpmyadmin

Add the following configuration:

server {
    listen 80;
    server_name phpmyadmin.example.com;
    root /usr/share/phpmyadmin;
    index index.php index.html index.htm;
     location / {
        try_files $uri $uri/ =404;
    }
     location ~ \.php$ {
        include snippets/fastcgi-php.conf;
        fastcgi_pass unix:/var/run/php/php8.3-fpm.sock; # Adjust the PHP version as needed
        fastcgi_param SCRIPT_FILENAME $document_root$fastcgi_script_name;
        include fastcgi_params;
    }
     location ~ /\.ht {
        deny all;
    }
}

Step 4 : Enable the phpMyAdmin Nginx configuration

sudo ln -s /etc/nginx/sites-available/phpmyadmin /etc/nginx/sites-enabled/

Step 5 : Test Nginx configuration

sudo nginx -t

Step 6 : Restart Nginx

sudo systemctl restart nginx

Step 7 : Access phpMyAdmin

Open your web browser and navigate to http://phpmyadmin.example.com.

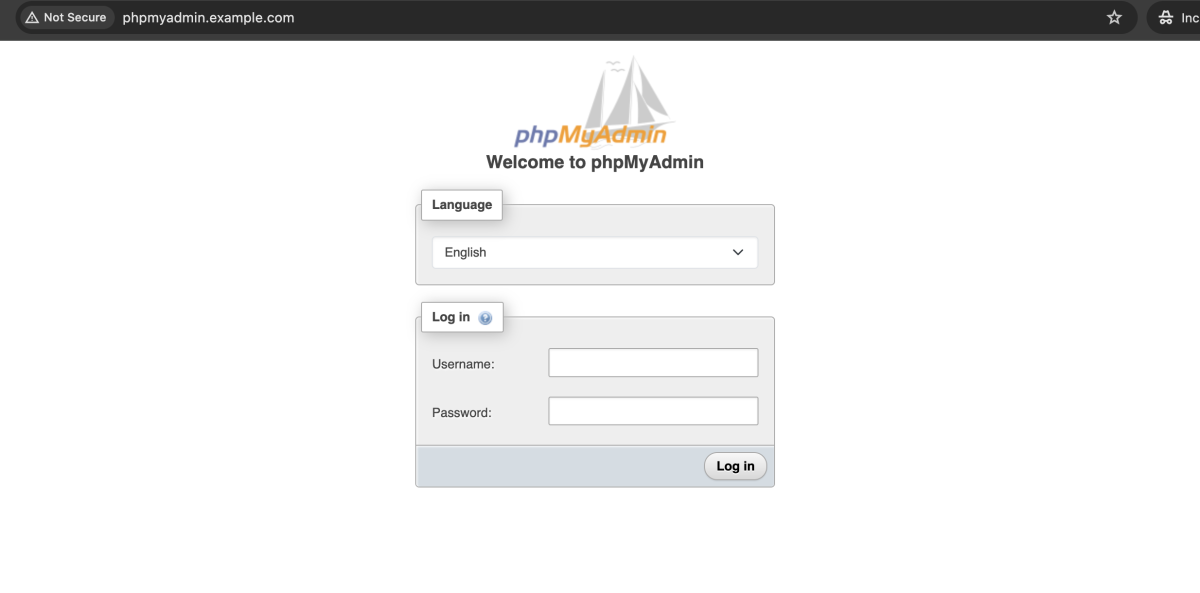
Log in with your MySQL account.

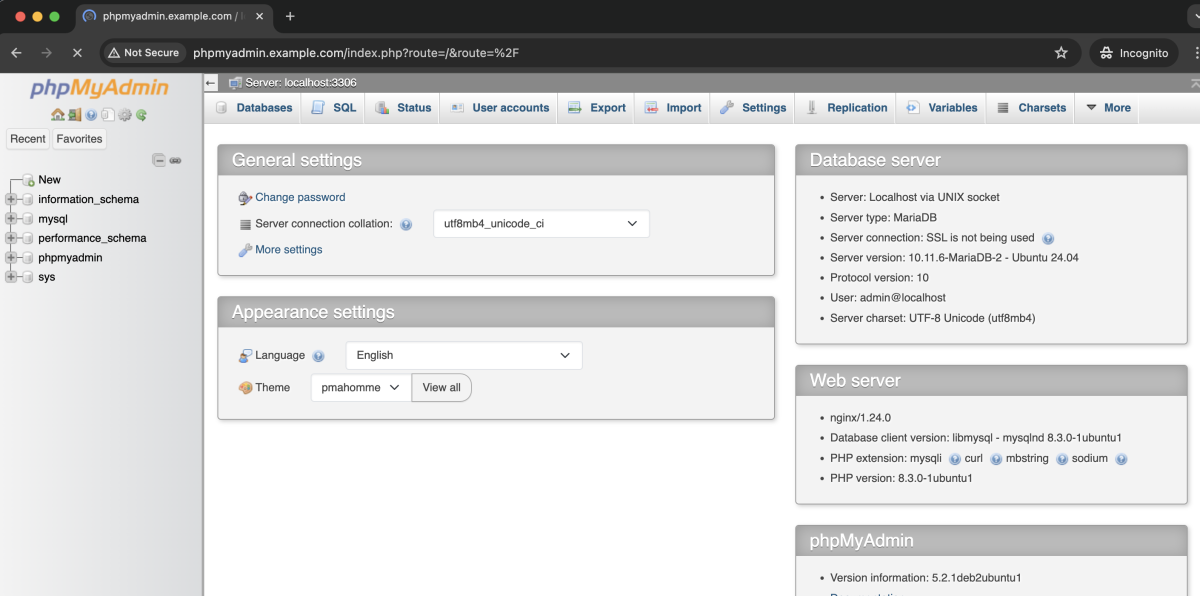
Congratulations! You have successfully installed phpMyAdmin with Nginx on Ubuntu 24.04.

Recommended