To configure a static IP address on Debian 12, you can follow these steps:
Step 1 : Open a terminal window.
Step 2 : Open the network configuration file for editing using a text editor like nano or vi. In this example, we'll use nano:

Step 3 : Locate the network interface you want to configure with a static IP address. It is usually named "eth0" for Ethernet connections or "wlan0" for wireless connections. You might have a different interface name depending on your setup.
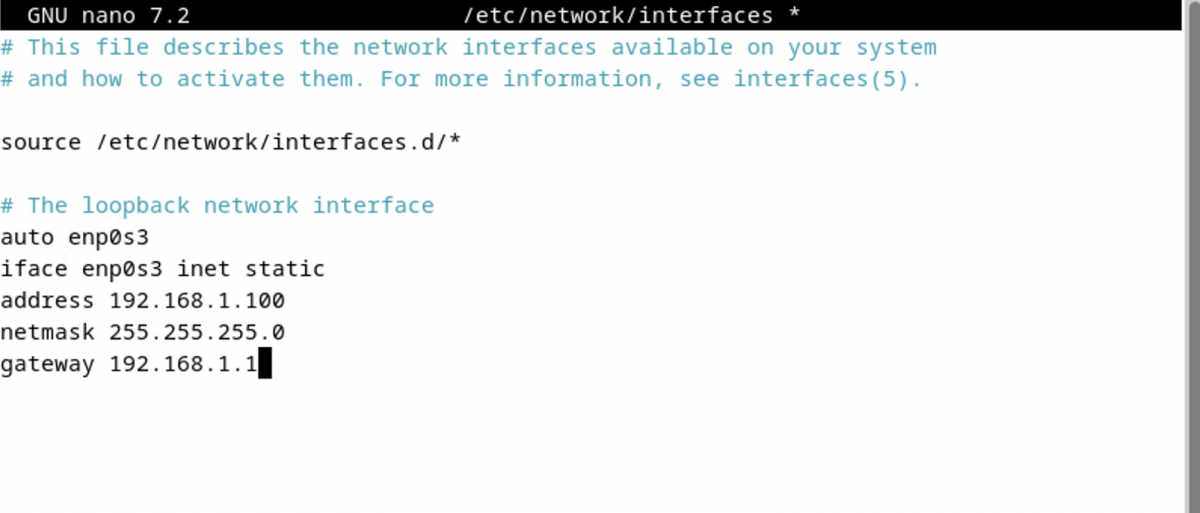
Step 4 : Replace the existing configuration with the following lines:
Replace <interface_name> with the actual name of your network interface, <desired_ip_address> with the IP address you want to assign to your Debian machine, <netmask_address> with the subnet mask, and <default_gateway_address> with the IP address of your router or gateway.
For example, the configuration for a static IP address of "192.168.1.100" with a subnet mask of "255.255.255.0" and a default gateway of "192.168.1.1" on the "eth0" interface would look like this:
Step 5 : Save the changes by pressing Ctrl+O, then exit the text editor by pressing Ctrl+X.
Step 6 : Restart the networking service to apply the new configuration:

Note: If you are using NetworkManager instead of the traditional networking service, you can restart it using the following command:
Step 7 : Verify the changes by running the following command:
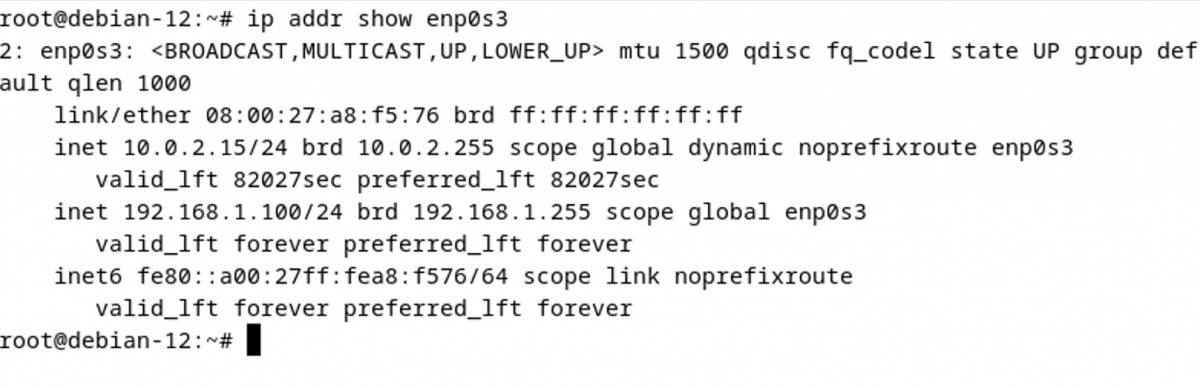
Replace <interface_name> with the actual name of your network interface. You should see the configured static IP address in the output.
That's it! You have successfully configured a static IP address on Debian 12.