An alias is a nice way to configure long and/or complicated Git commands to represent short useful ones. An alias is simply a configuration entry under the alias section. It is usually configured to --global to apply it everywhere.
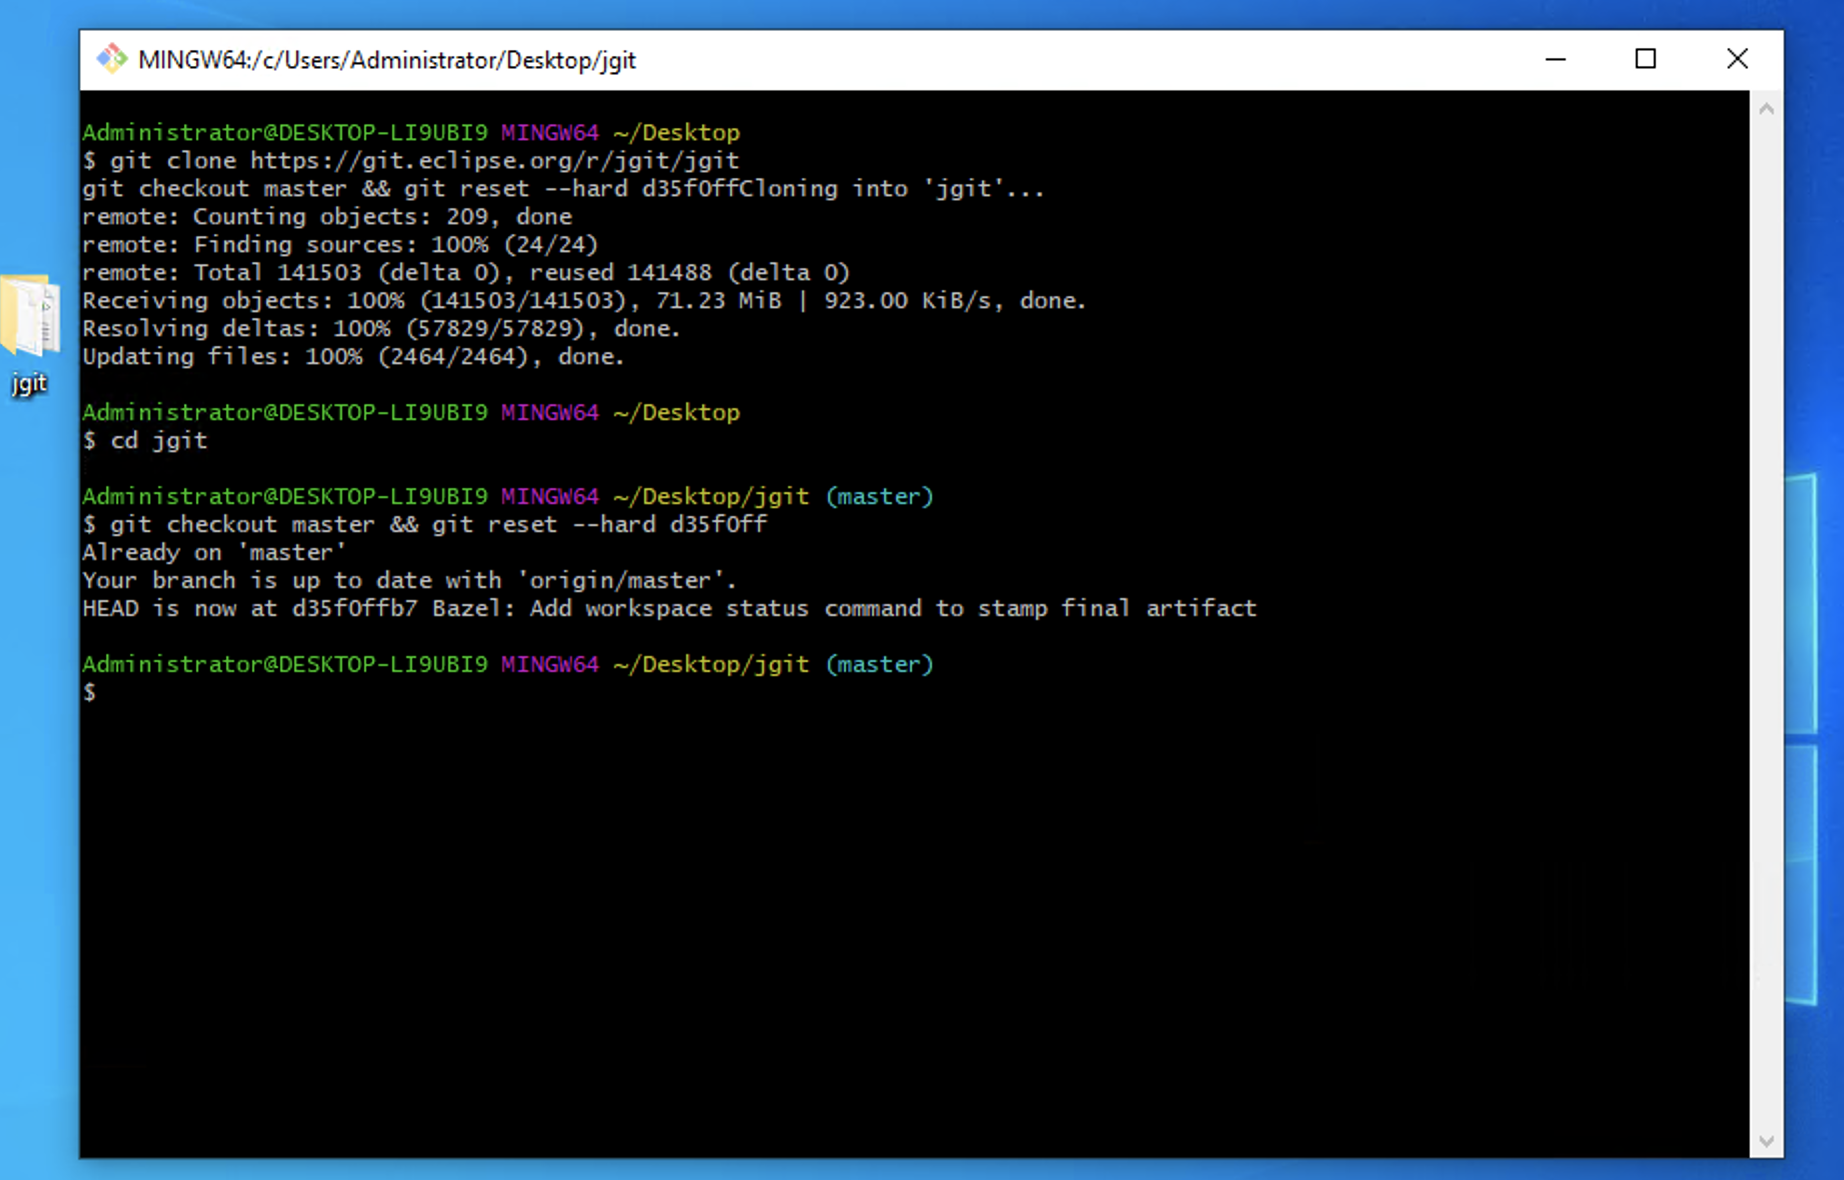
Step 1 : In this post, we will use the jgit repository, with the master branch pointing at d35f0ff. As follows:
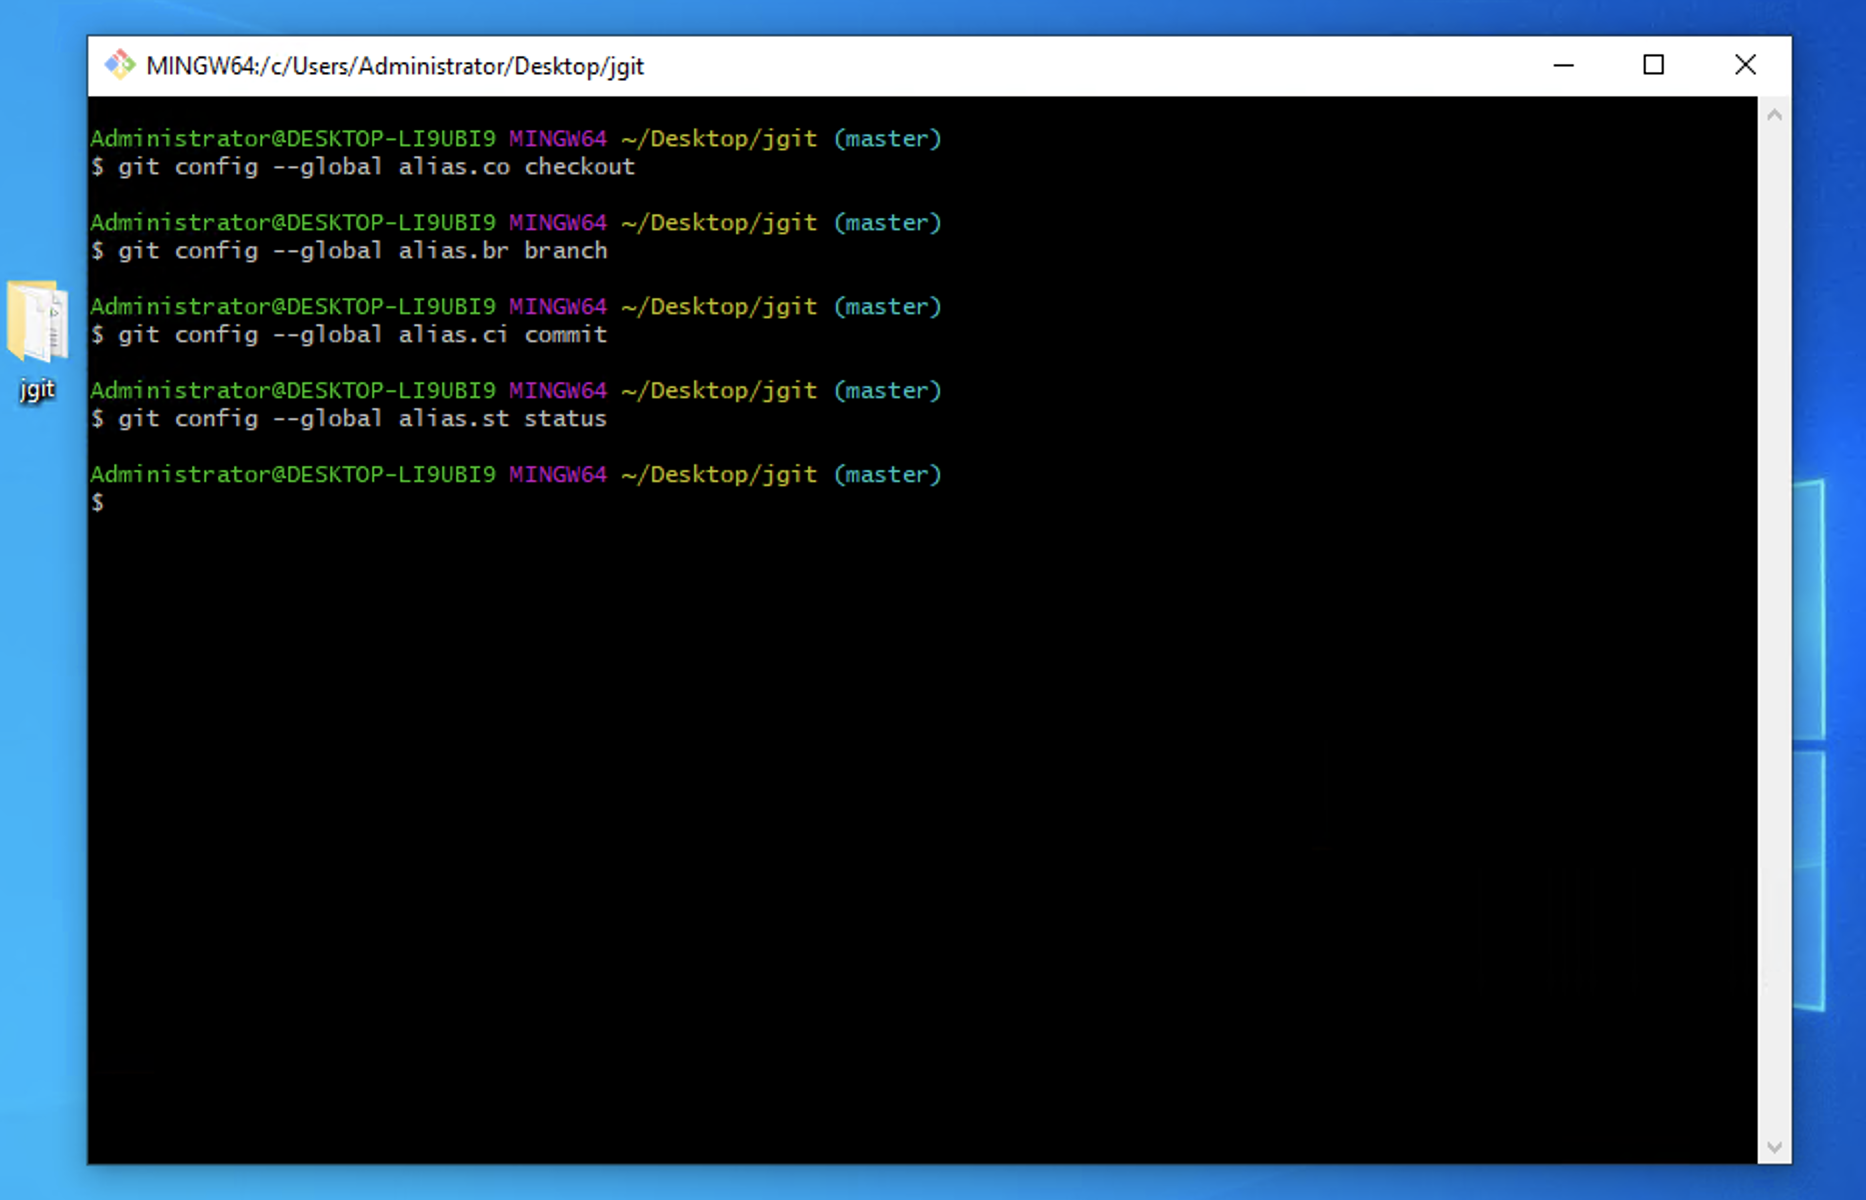
Step 2 : First, we'll create a few simple aliases, then a couple of more special ones, and finally, a couple of aliases using external commands. Instead of writing git checkout every time we need to switch branches, we can create an alias of that command and call it git co. We can do the same for git branch, git commit, and git status as follows:
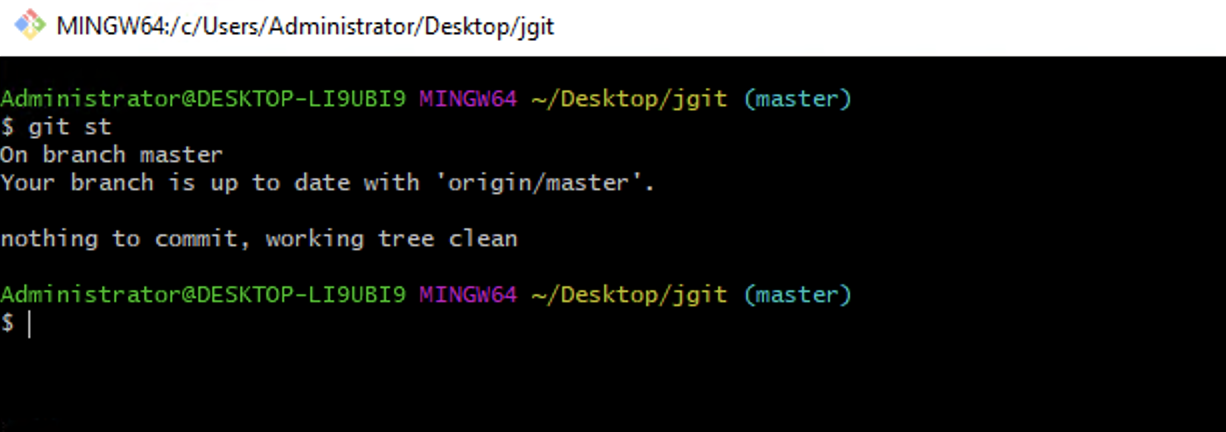
Step 3 : Now, try to run git st in the jgit repository as follows:
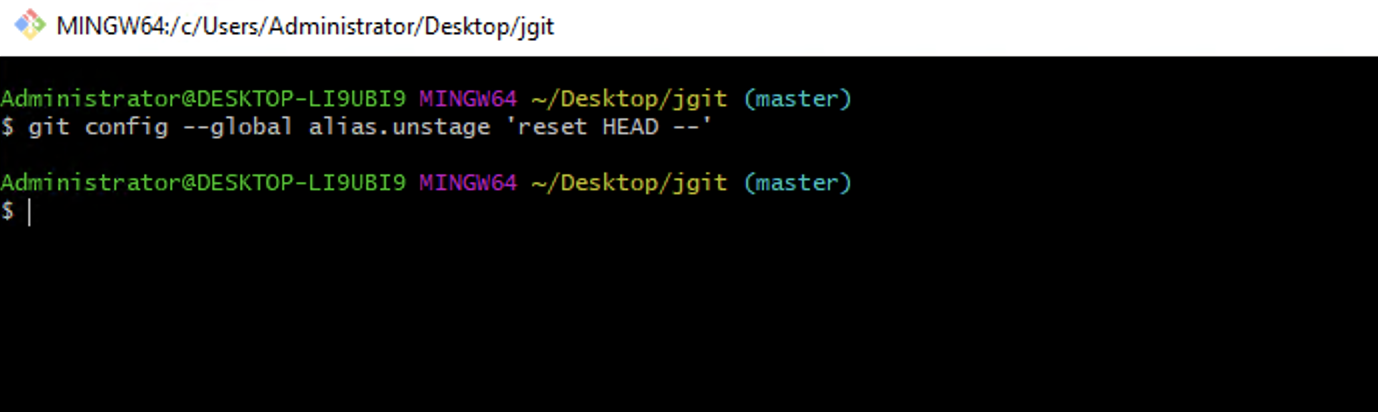
Step 4 : The alias method is also good for creating the Git commands you think are missing in Git. One of the common Git aliases is unstage, which is used to move a file out of the staging area, as shown in the following command:
Step 5 : Now, Try to edit the README.md file in the root of the jgit repository and add it to the root.
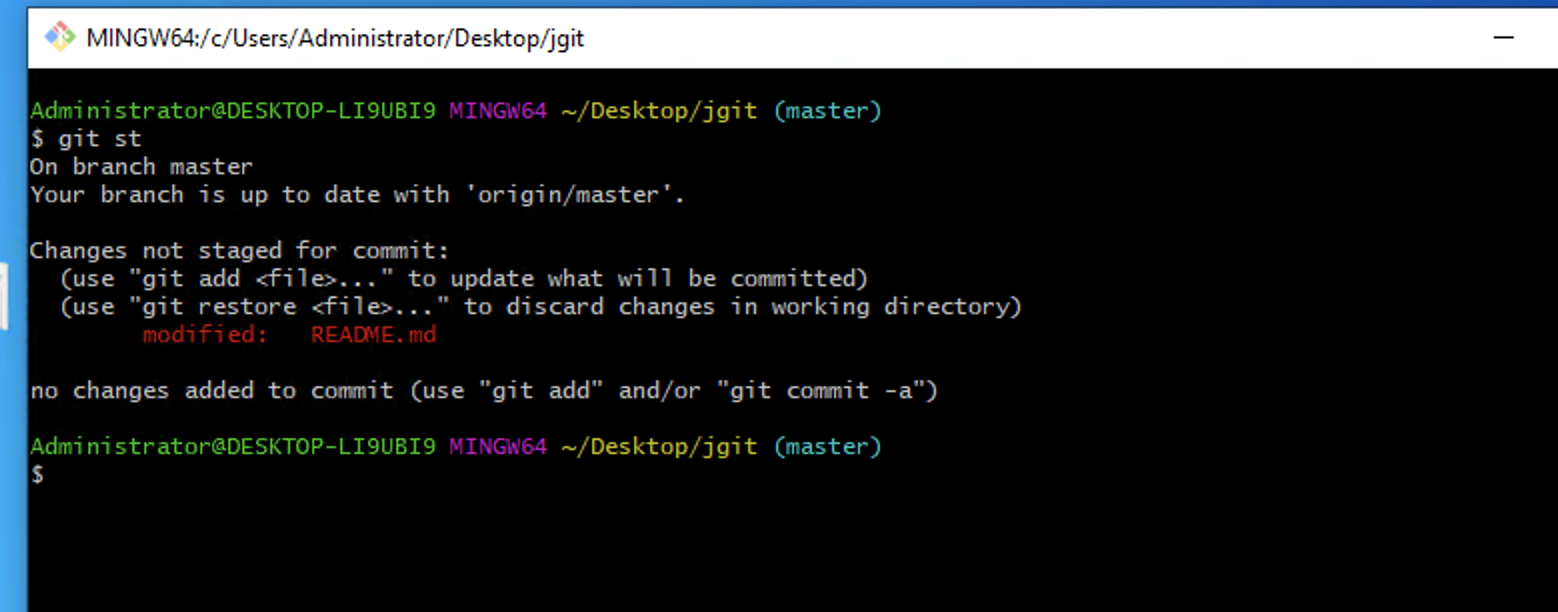
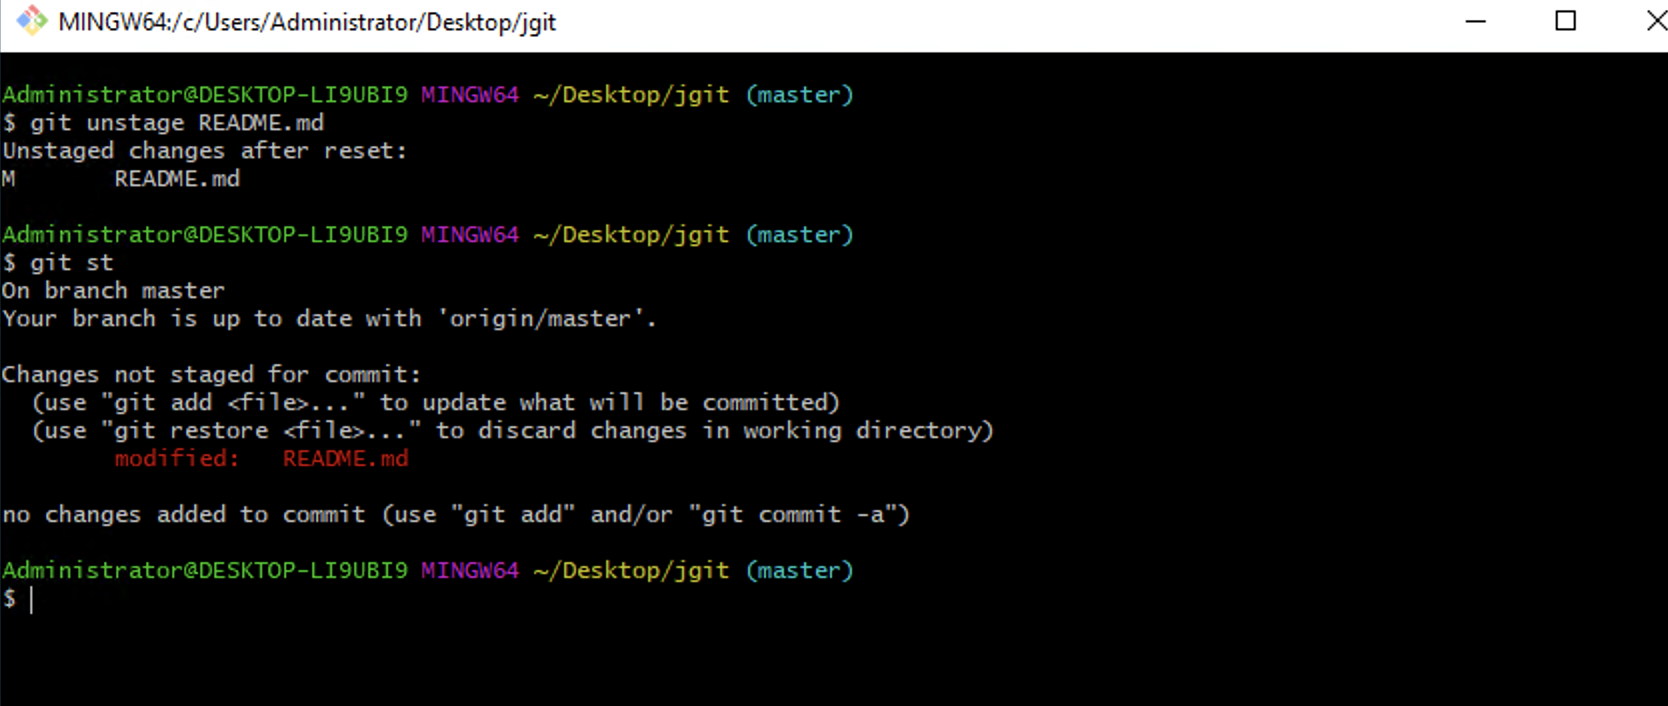
Step 6 : Let's try to unstage README.md and then look at git st as follows:
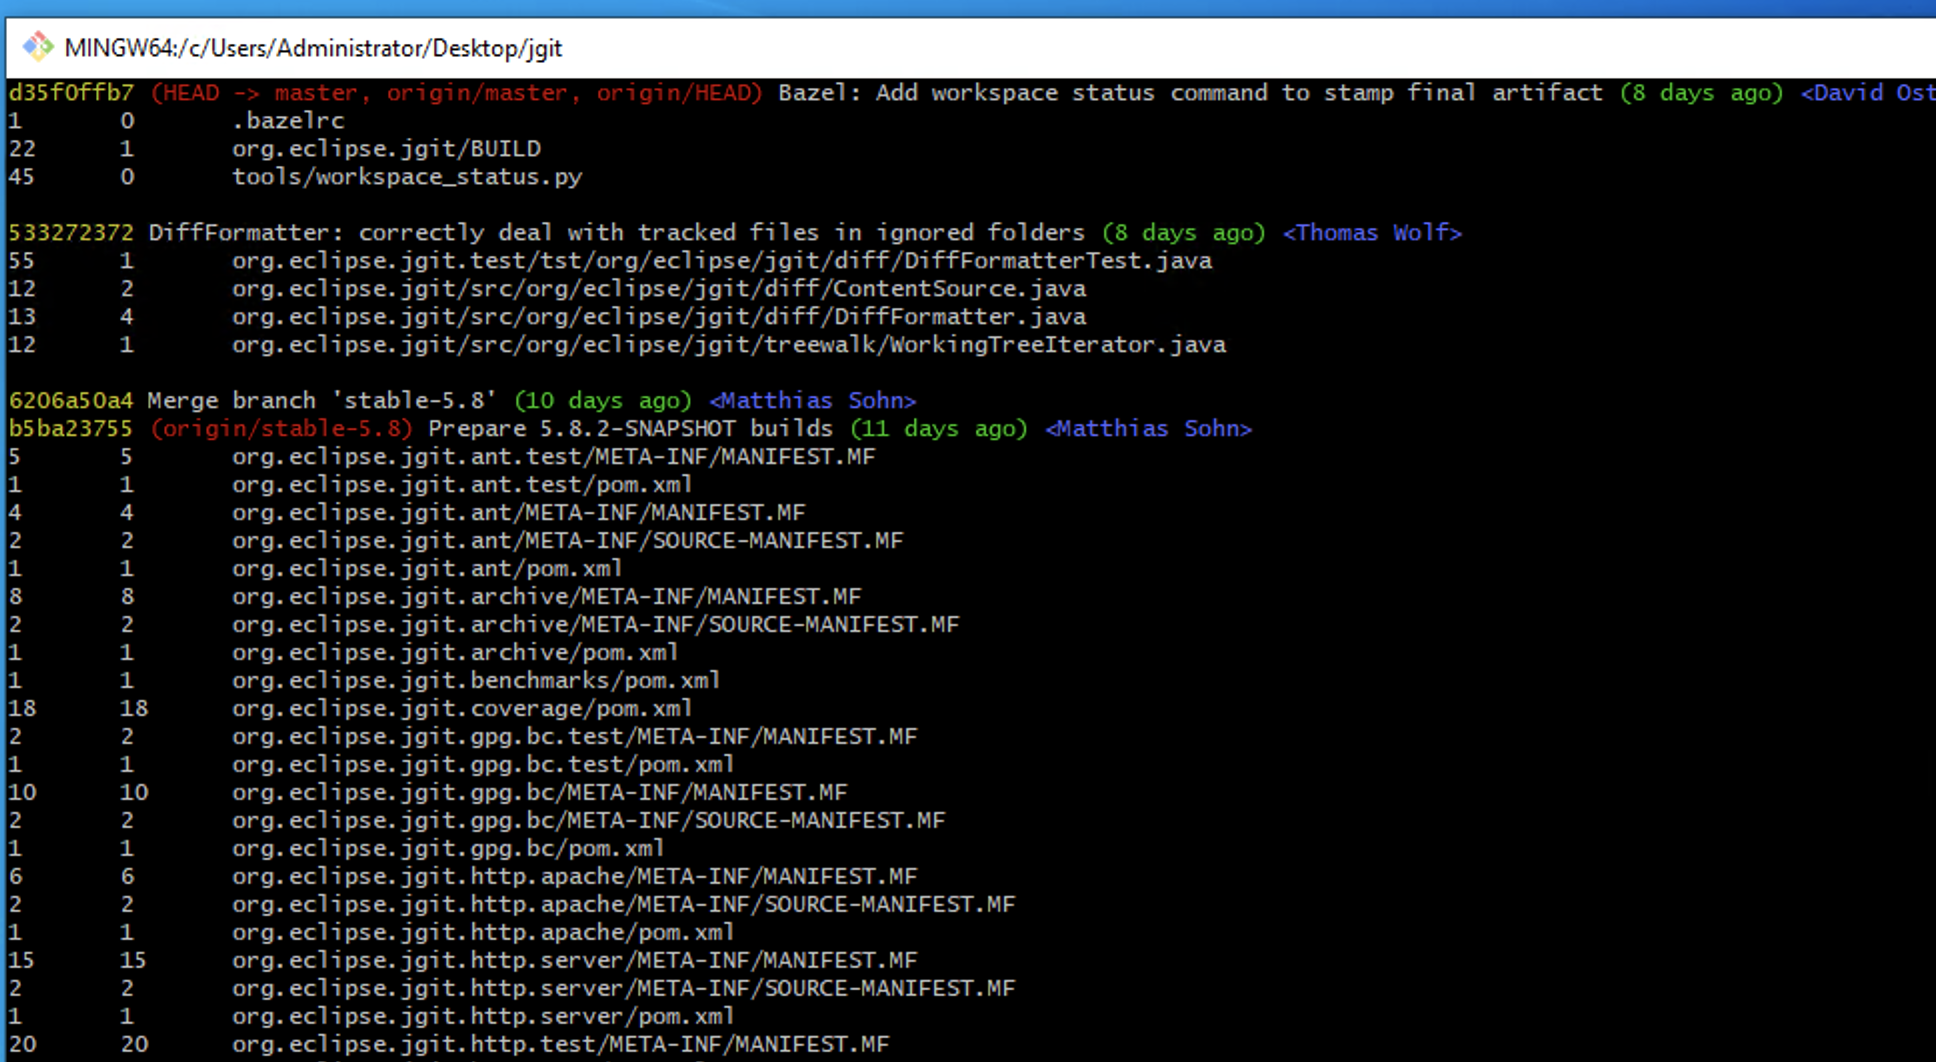
Step 7 : A common use case for aliases is to format the history of Git in specific ways. Let's say you want the number of lines added and deleted for each file in the commit displayed along with some common commit data. For this, we can create the following alias so we don't have to type everything each time:

Step 8 : Now, we can execute git ll in the terminal and get a nice stat output, as shown in the following command:
Step 9 : It is also possible to use an external command instead of a Git command. So, small shell scripts and so on can be embedded. To create an alias method with an external command, the alias must start with an exclamation mark !. The examples can be used when resolving conflicts from a rebase or merge. In your ~/.gitconfig file under [alias], add the following:
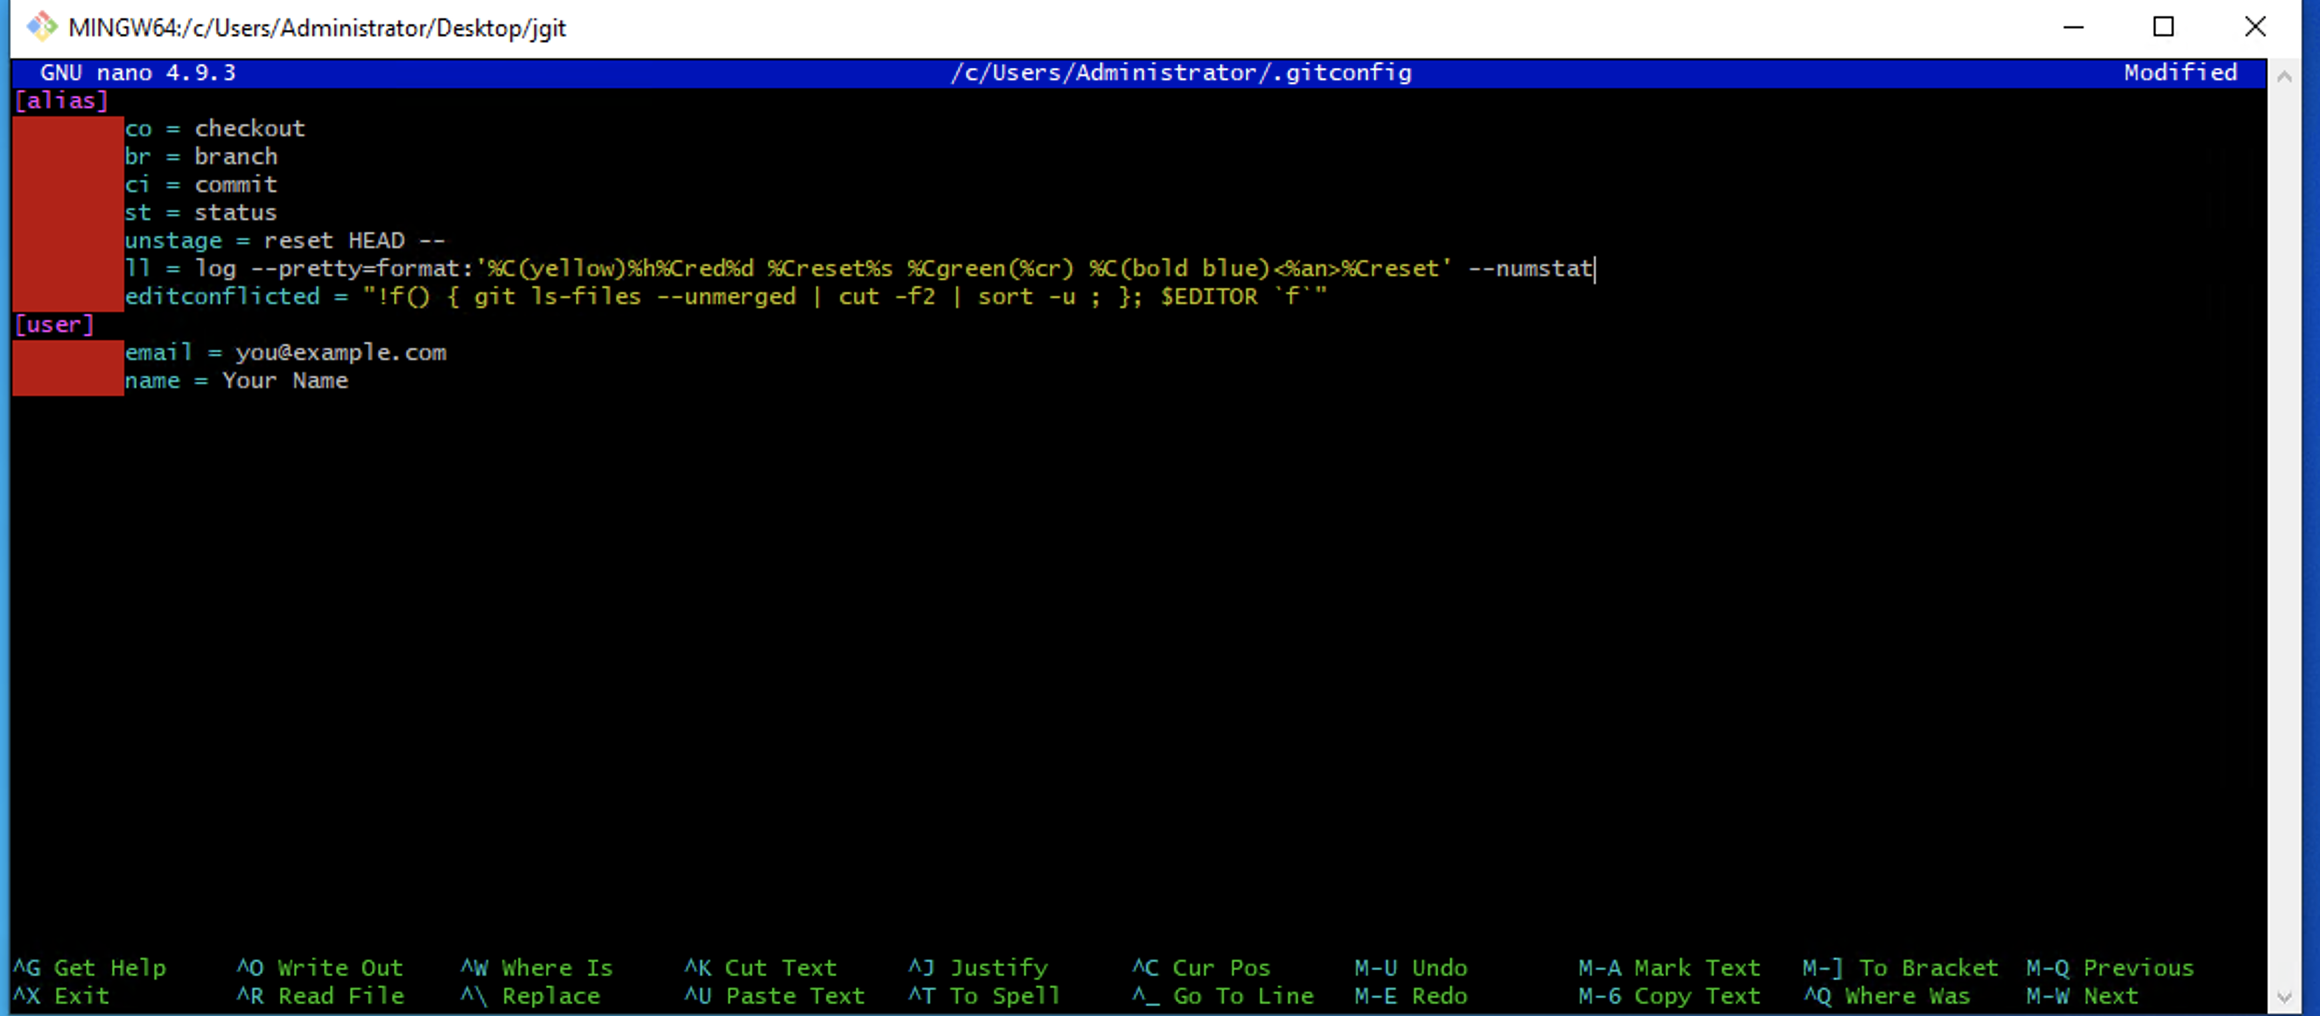
This will bring up your configured $EDITOR with all the files that are in the conflict state due to the merge/rebase. This quickly allows you to fix the conflicts and get on with the merge/rebase.
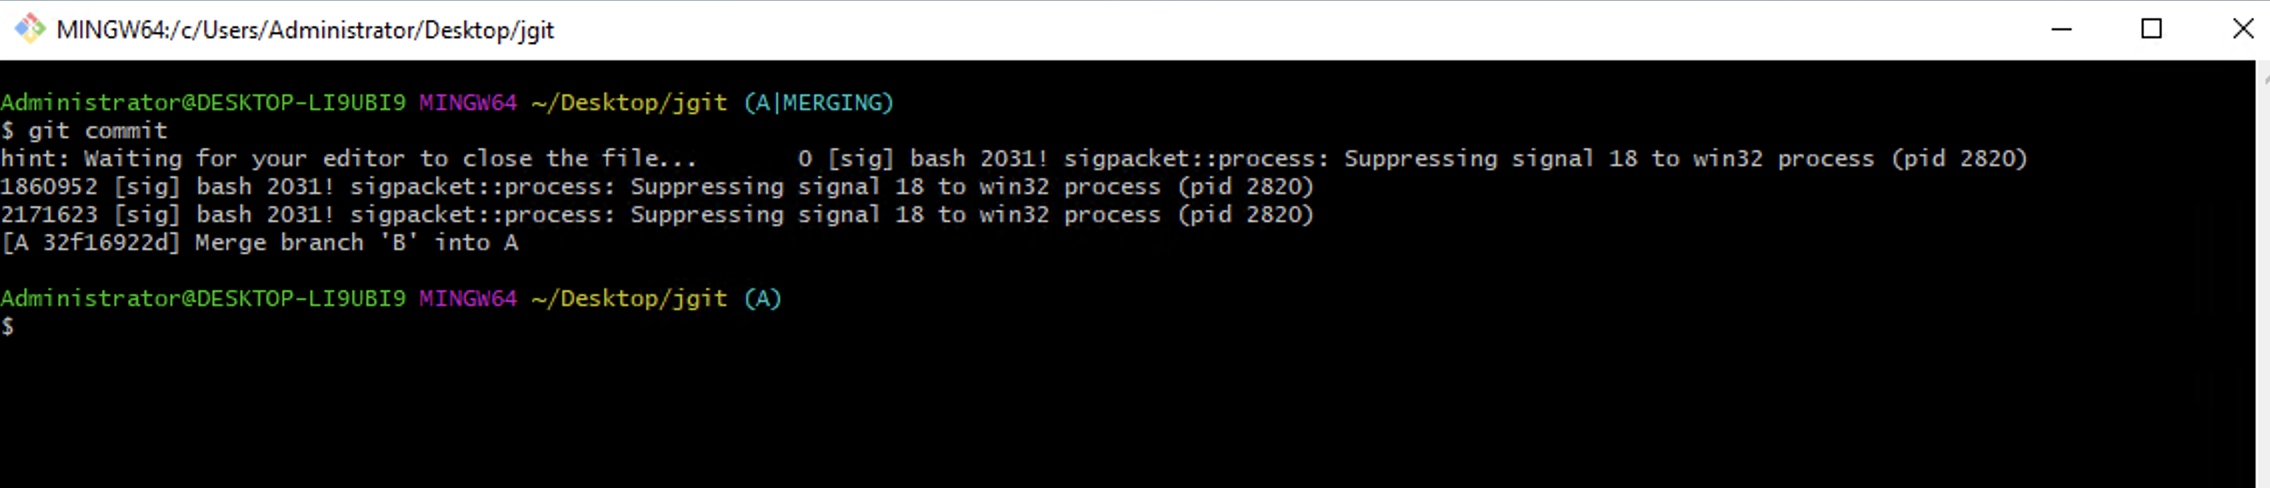
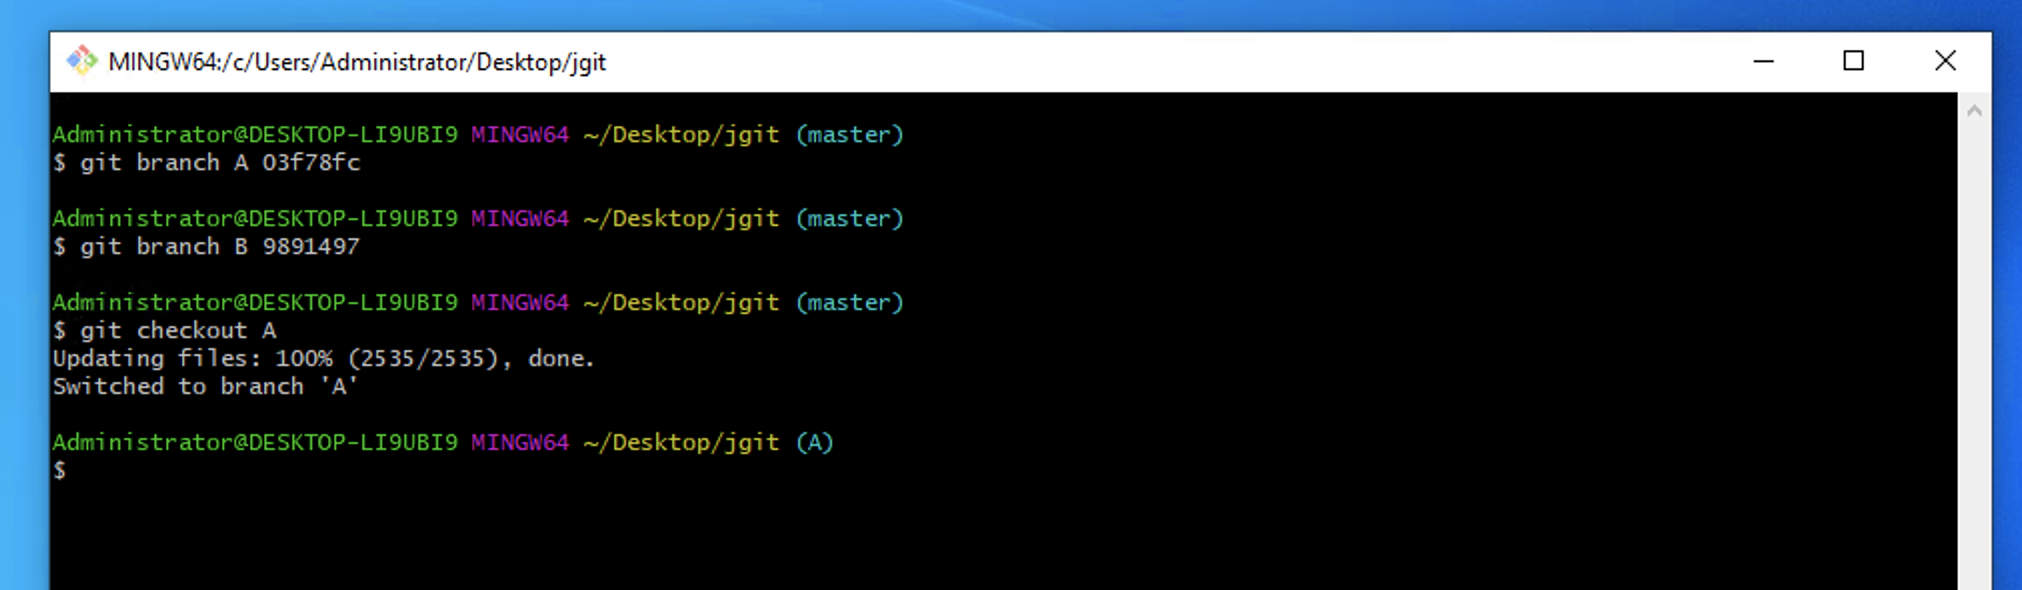
Step 10 : In the jgit repository, we can create two branches at an earlier point in time and merge these two branches:
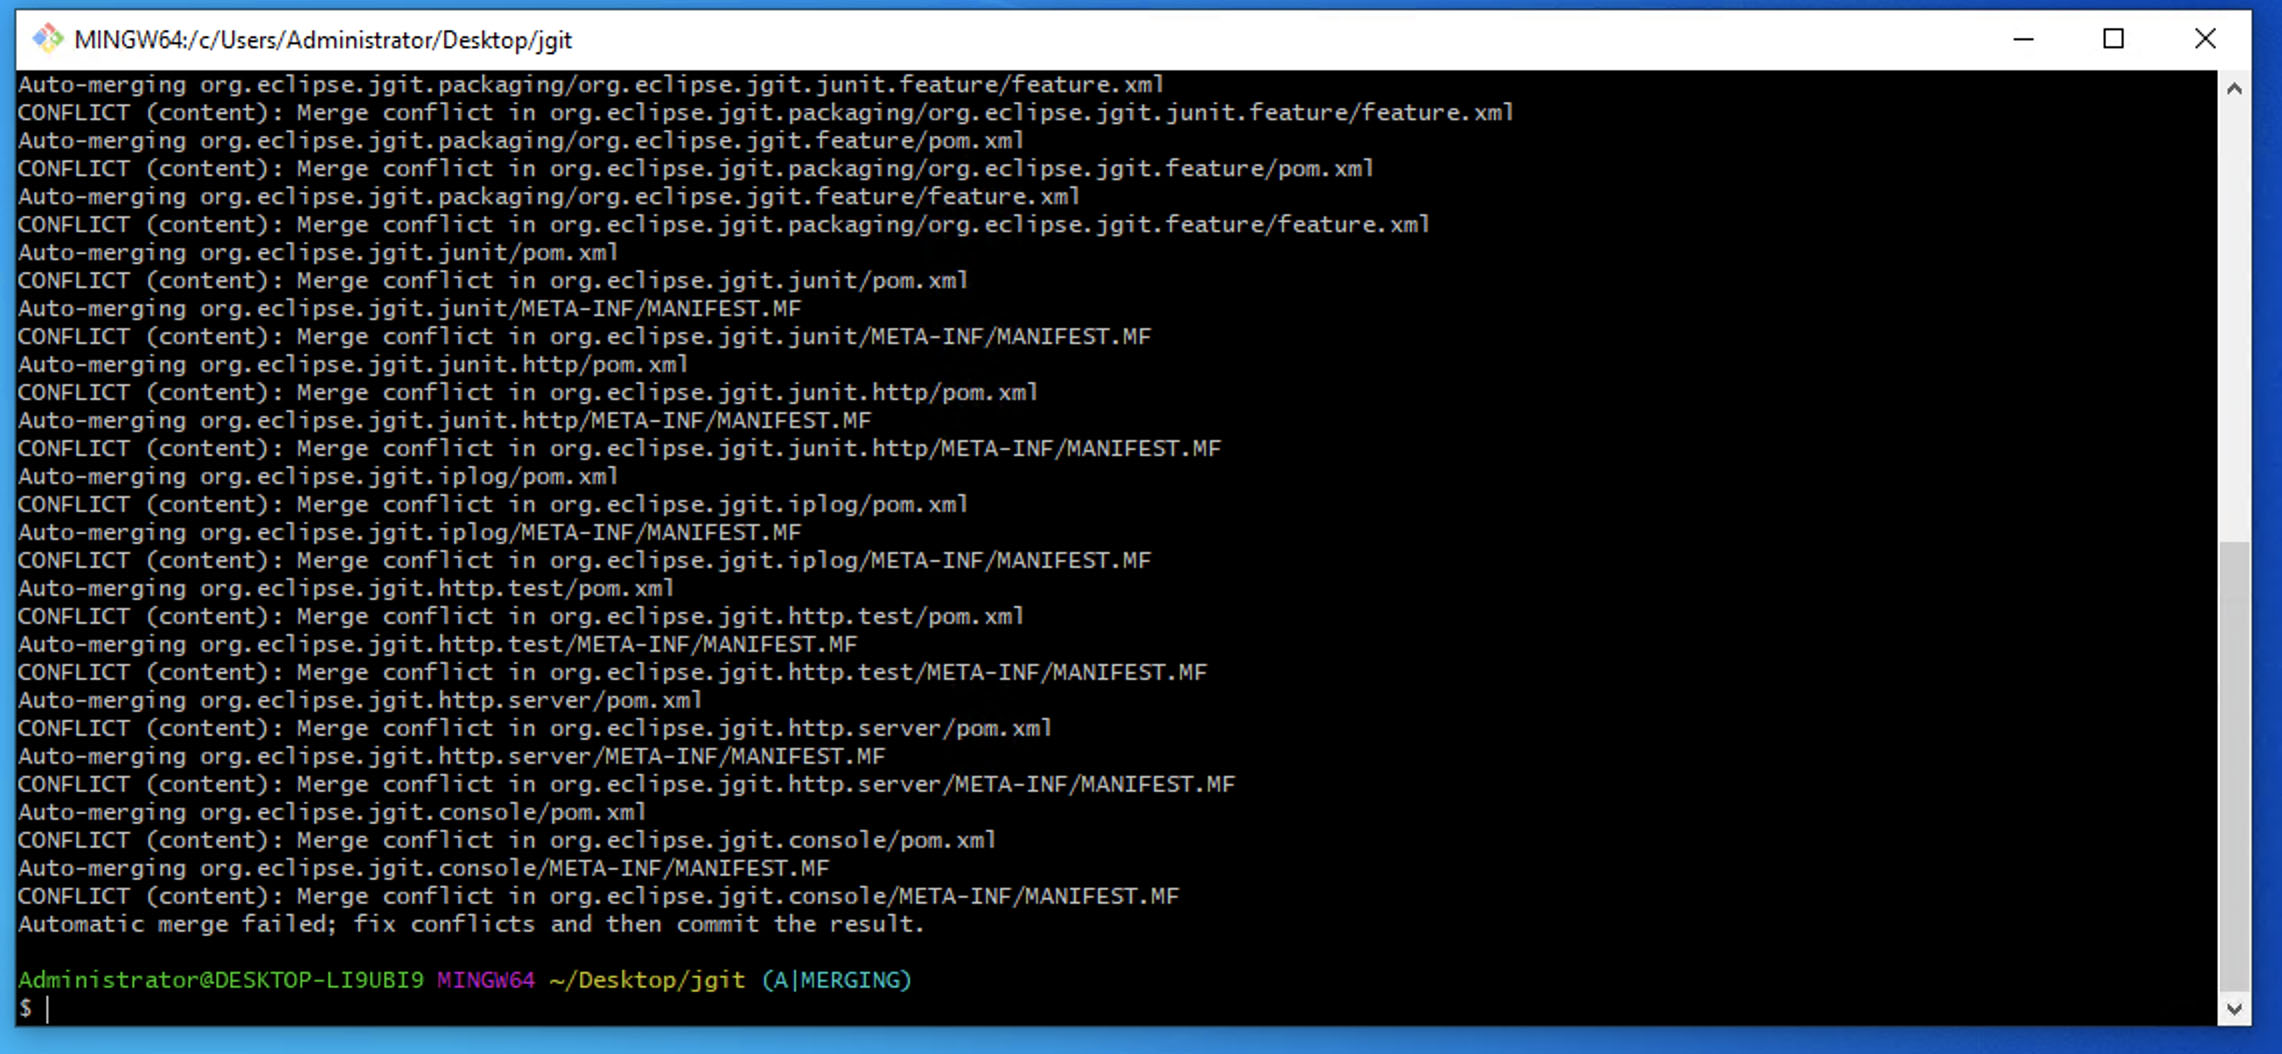
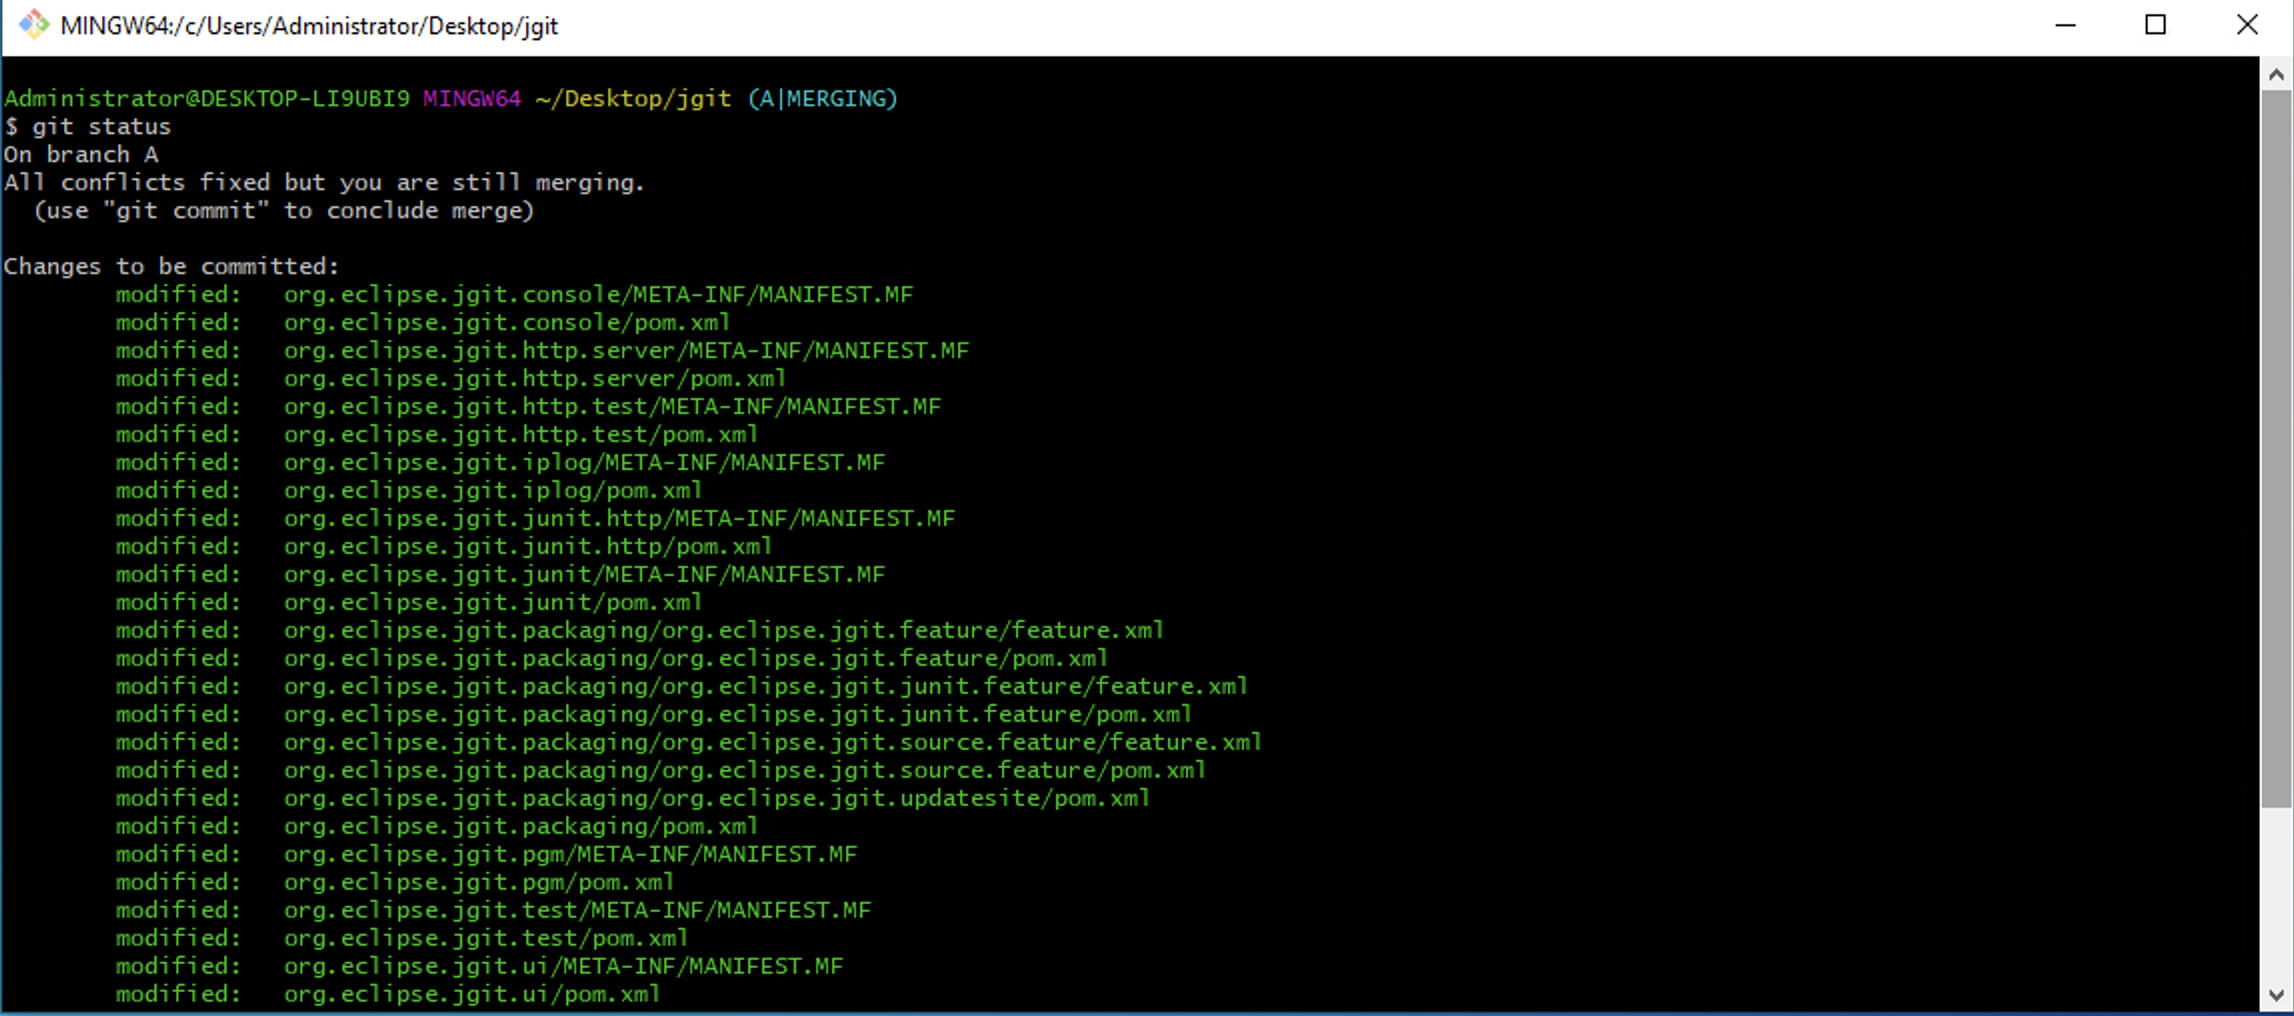
Step 11 : Now, you'll see that this fails to perform the merge, and you can run git st to check the statuses of a lot of files that are in a conflicted state, both modified. To open and edit all the conflicted files, we can now run git editconflicted. This brings up $EDITOR with the files. If your environment variable isn't set, use the EDITOR=<your-favorite-editor> export to set it.
Step 12 : Now that we have solved all the merge conflicts, it is time to add all of those files before we conclude the merge. Luckily, we can create an alias method that can help us with that, as follows:

Step 13 : Now, we can run git addconflicted. Later, git status will tell us that all the conflicted files are added: