You are now familiar with Git's data model, the DAG. You have seen that objects have a parent. When you create a new branch, the commit is its parent. However, in some situations, it is useful to have a branch with no parent.
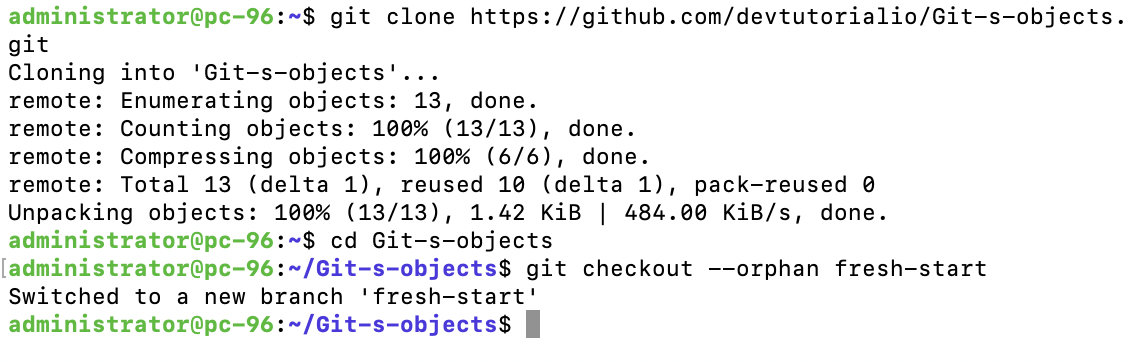
Step 1 : It is actually easy to create an orphan branch. The flag --orphan to checkout will do it. It can be executed as follows:
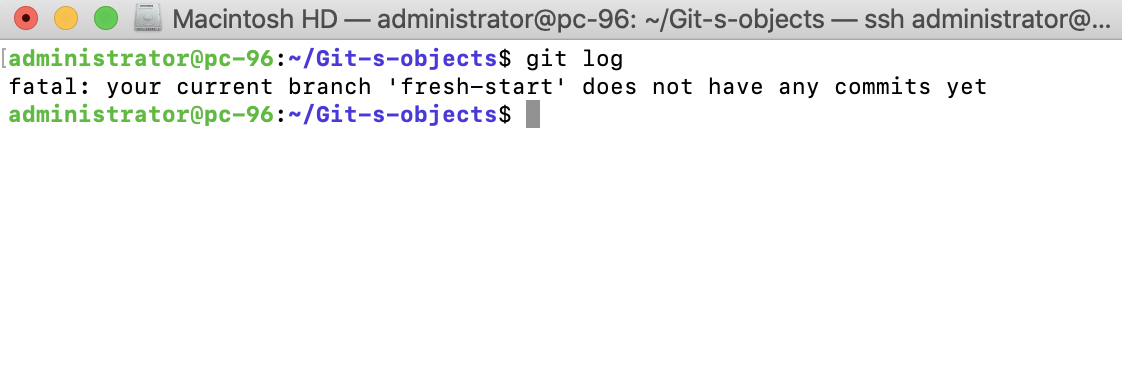
Step 2 : We now have a branch with no parent. You can verify it by examining the commit log as follows:
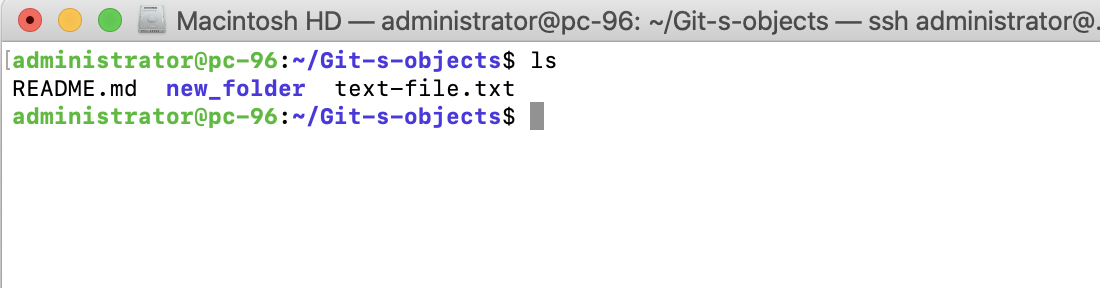
Step 3 : fresh-start does not mean that you are starting from scratch. The files and directories that have been added to the repository still exist:
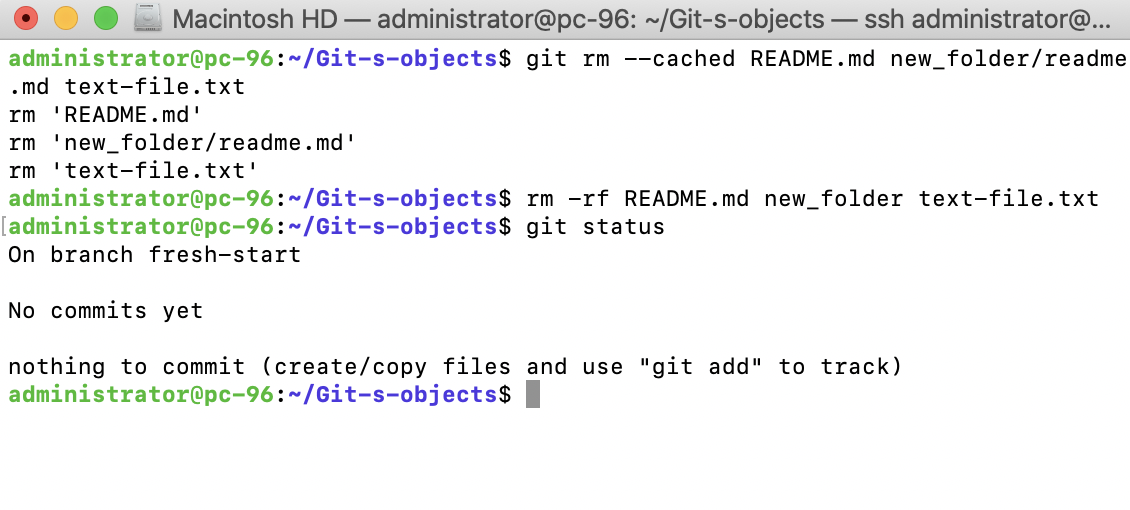
Step 4 : If you need a fresh-start, you can delete the files (but remember not to delete .git) as follows:
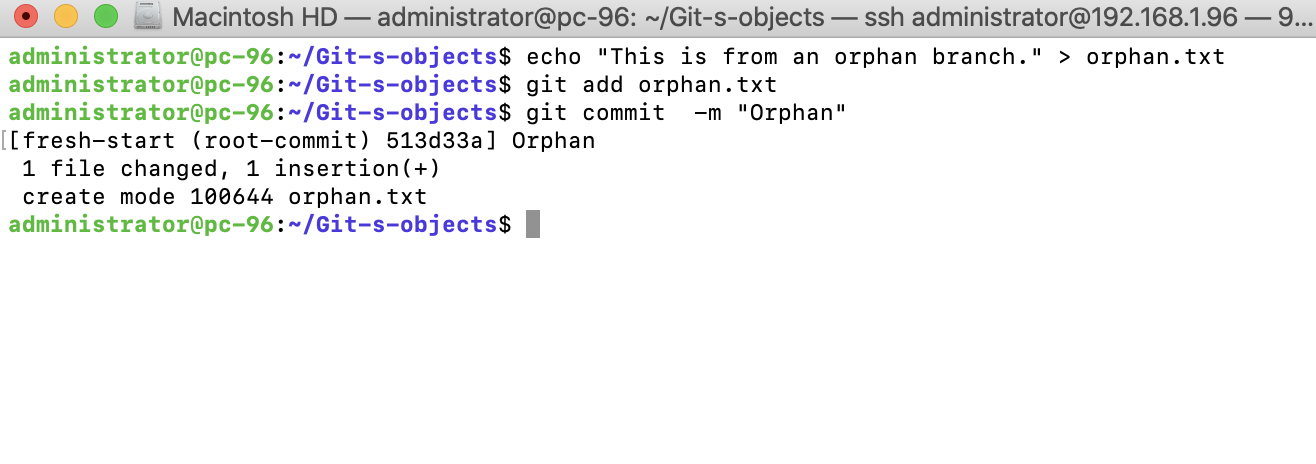
Step 5 : You have a branch with no files and no commits. Moreover, the branch does not share any commit history with your master branch. You could add another repository and fetch all its commits using git remote add and git fetch. Instead, we will simply add a text file to illustrate it as follows:
Step 6 : Once you have your commits in place on the orphan branch, it is time to merge them into your master branch. However, your first attempt will fail. For example, check the following:
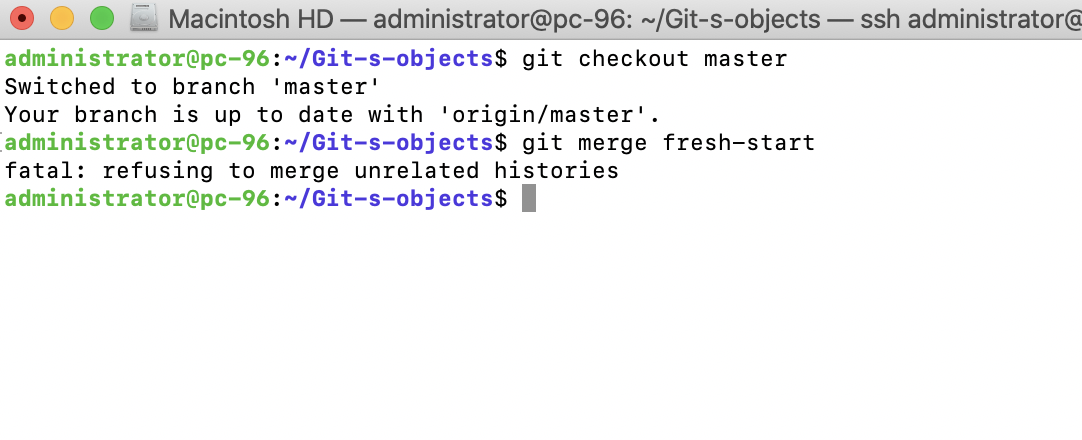
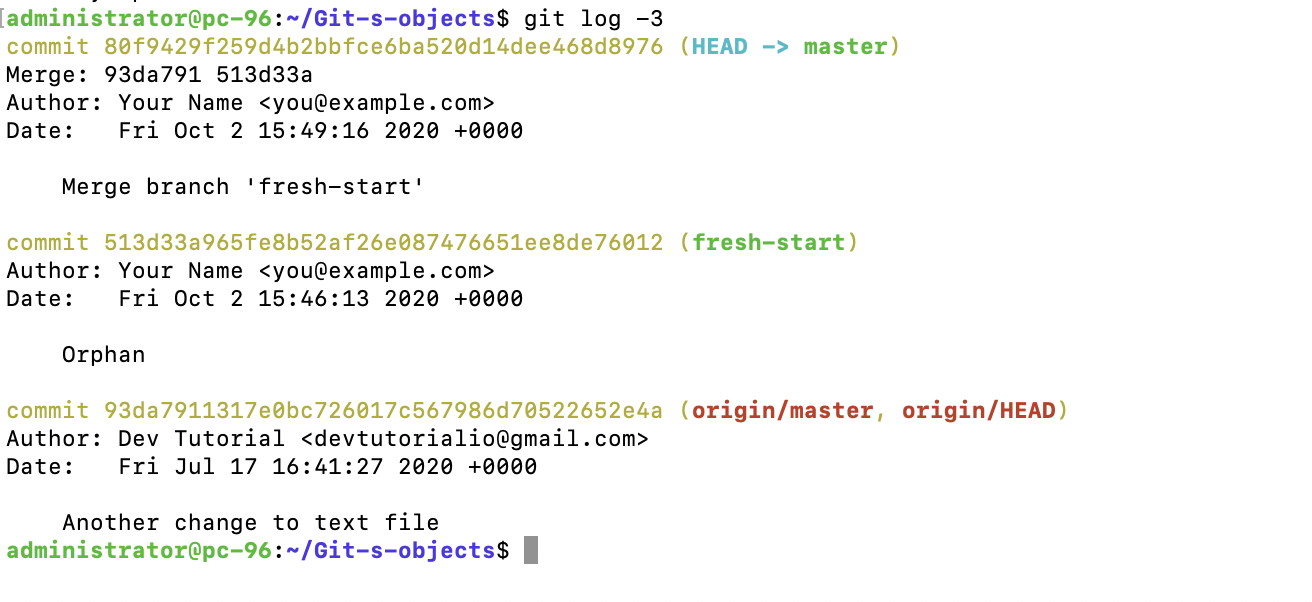
Step 7 : As you can see, the orphan branch does not share history with the master branch, and git will not allow you to merge the branch. However, you can still merge an orphan branch by allowing unrelated histories to be merged:
It is unlikely that you will use orphan branches on a daily basis, but it is a strong feature to know when you need to reorganize your code base.