The application requires a Windows server for successful installation. It also requires some configuration changes to the operating system. Ensure you have the necessary permissions to make these changes.
The first step is using the Google Compute Engine to set up a virtual Windows server on the Google Cloud Console. This method provides unlimited access to the OS so that you can configure the system in any way you want.
Step 1 : Launch Google Cloud Console and log in.
Step 2 : Select Compute on the primary menu. Then, select Compute Engine

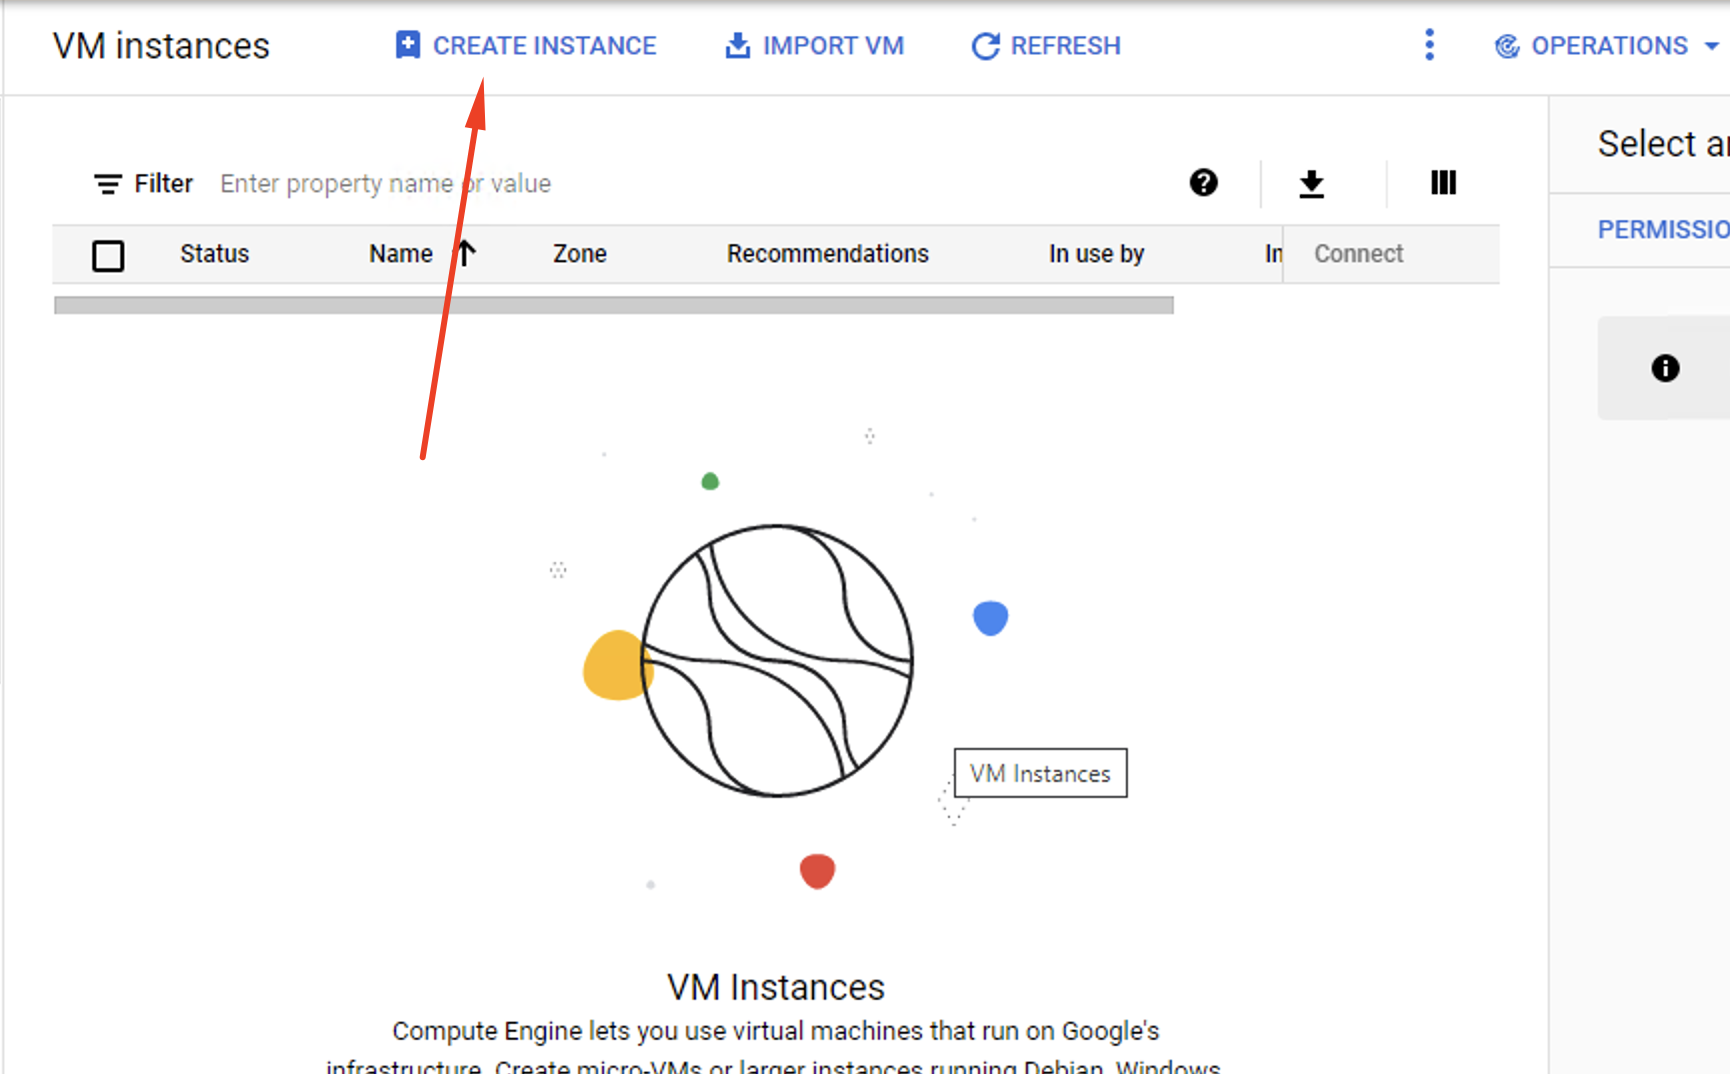
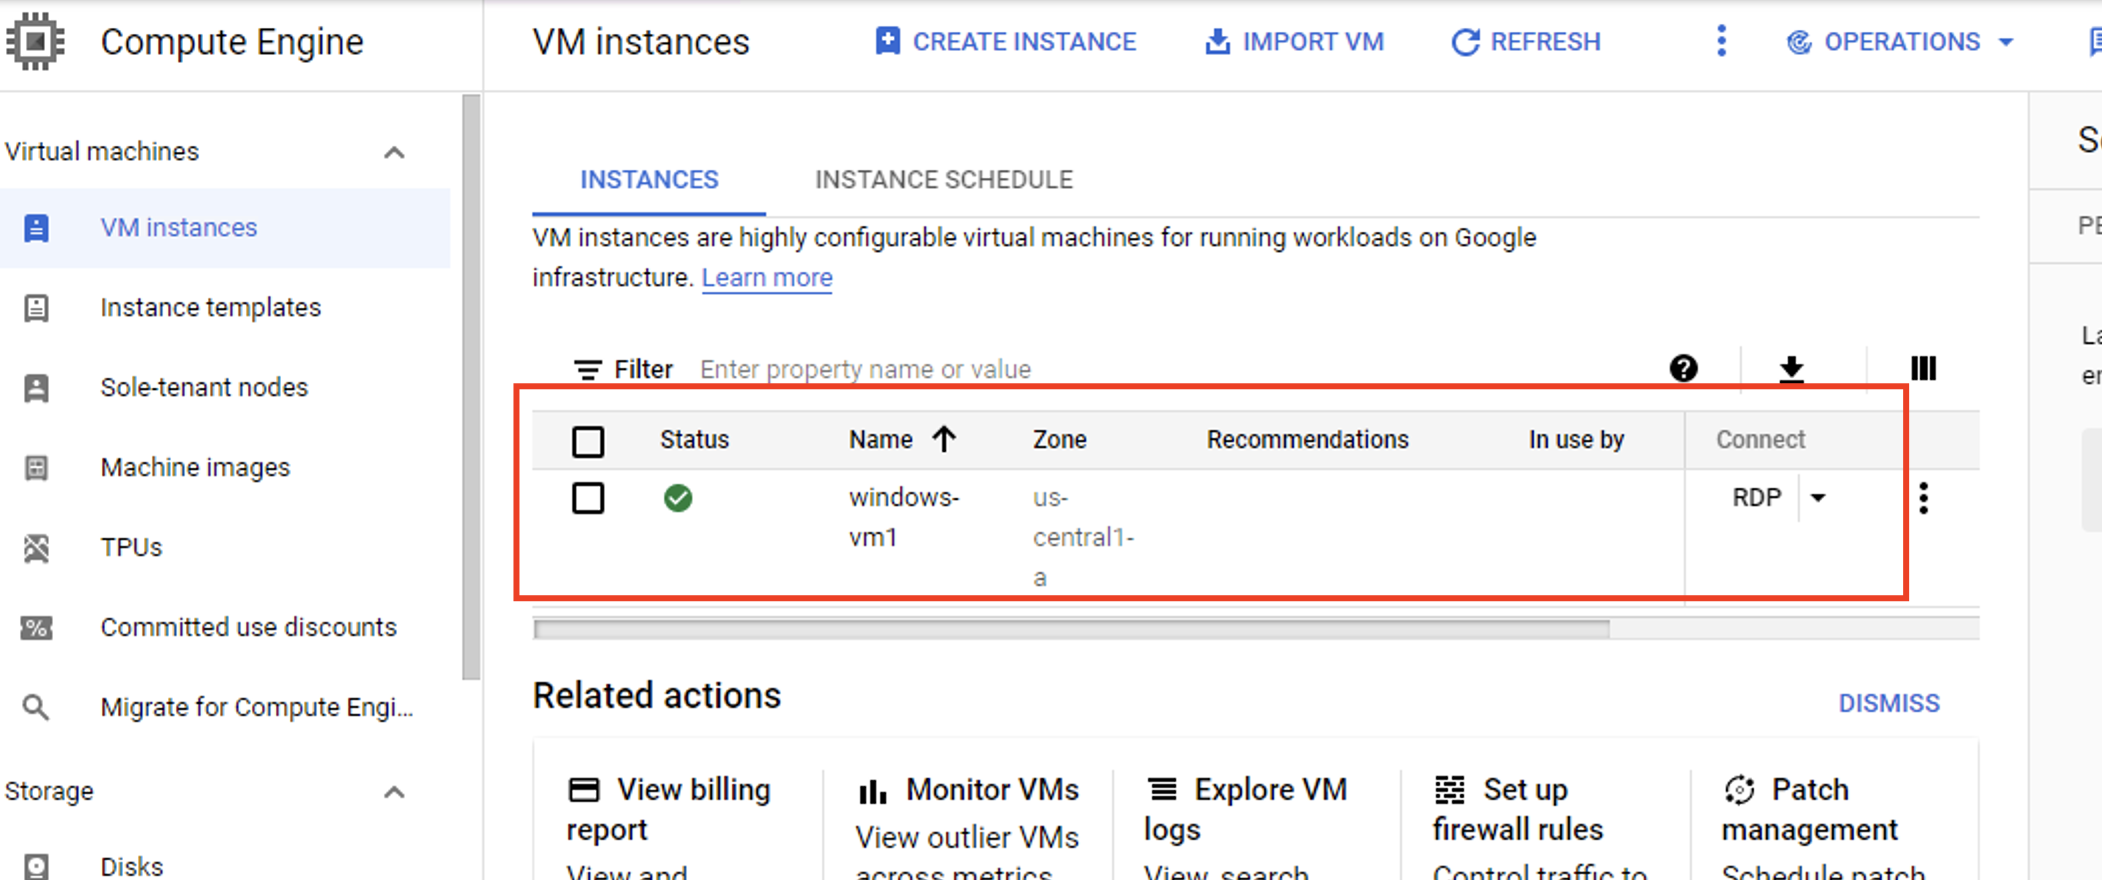
Step 3 : In the next menu, find and click the option VM instances. Select Create Instance.
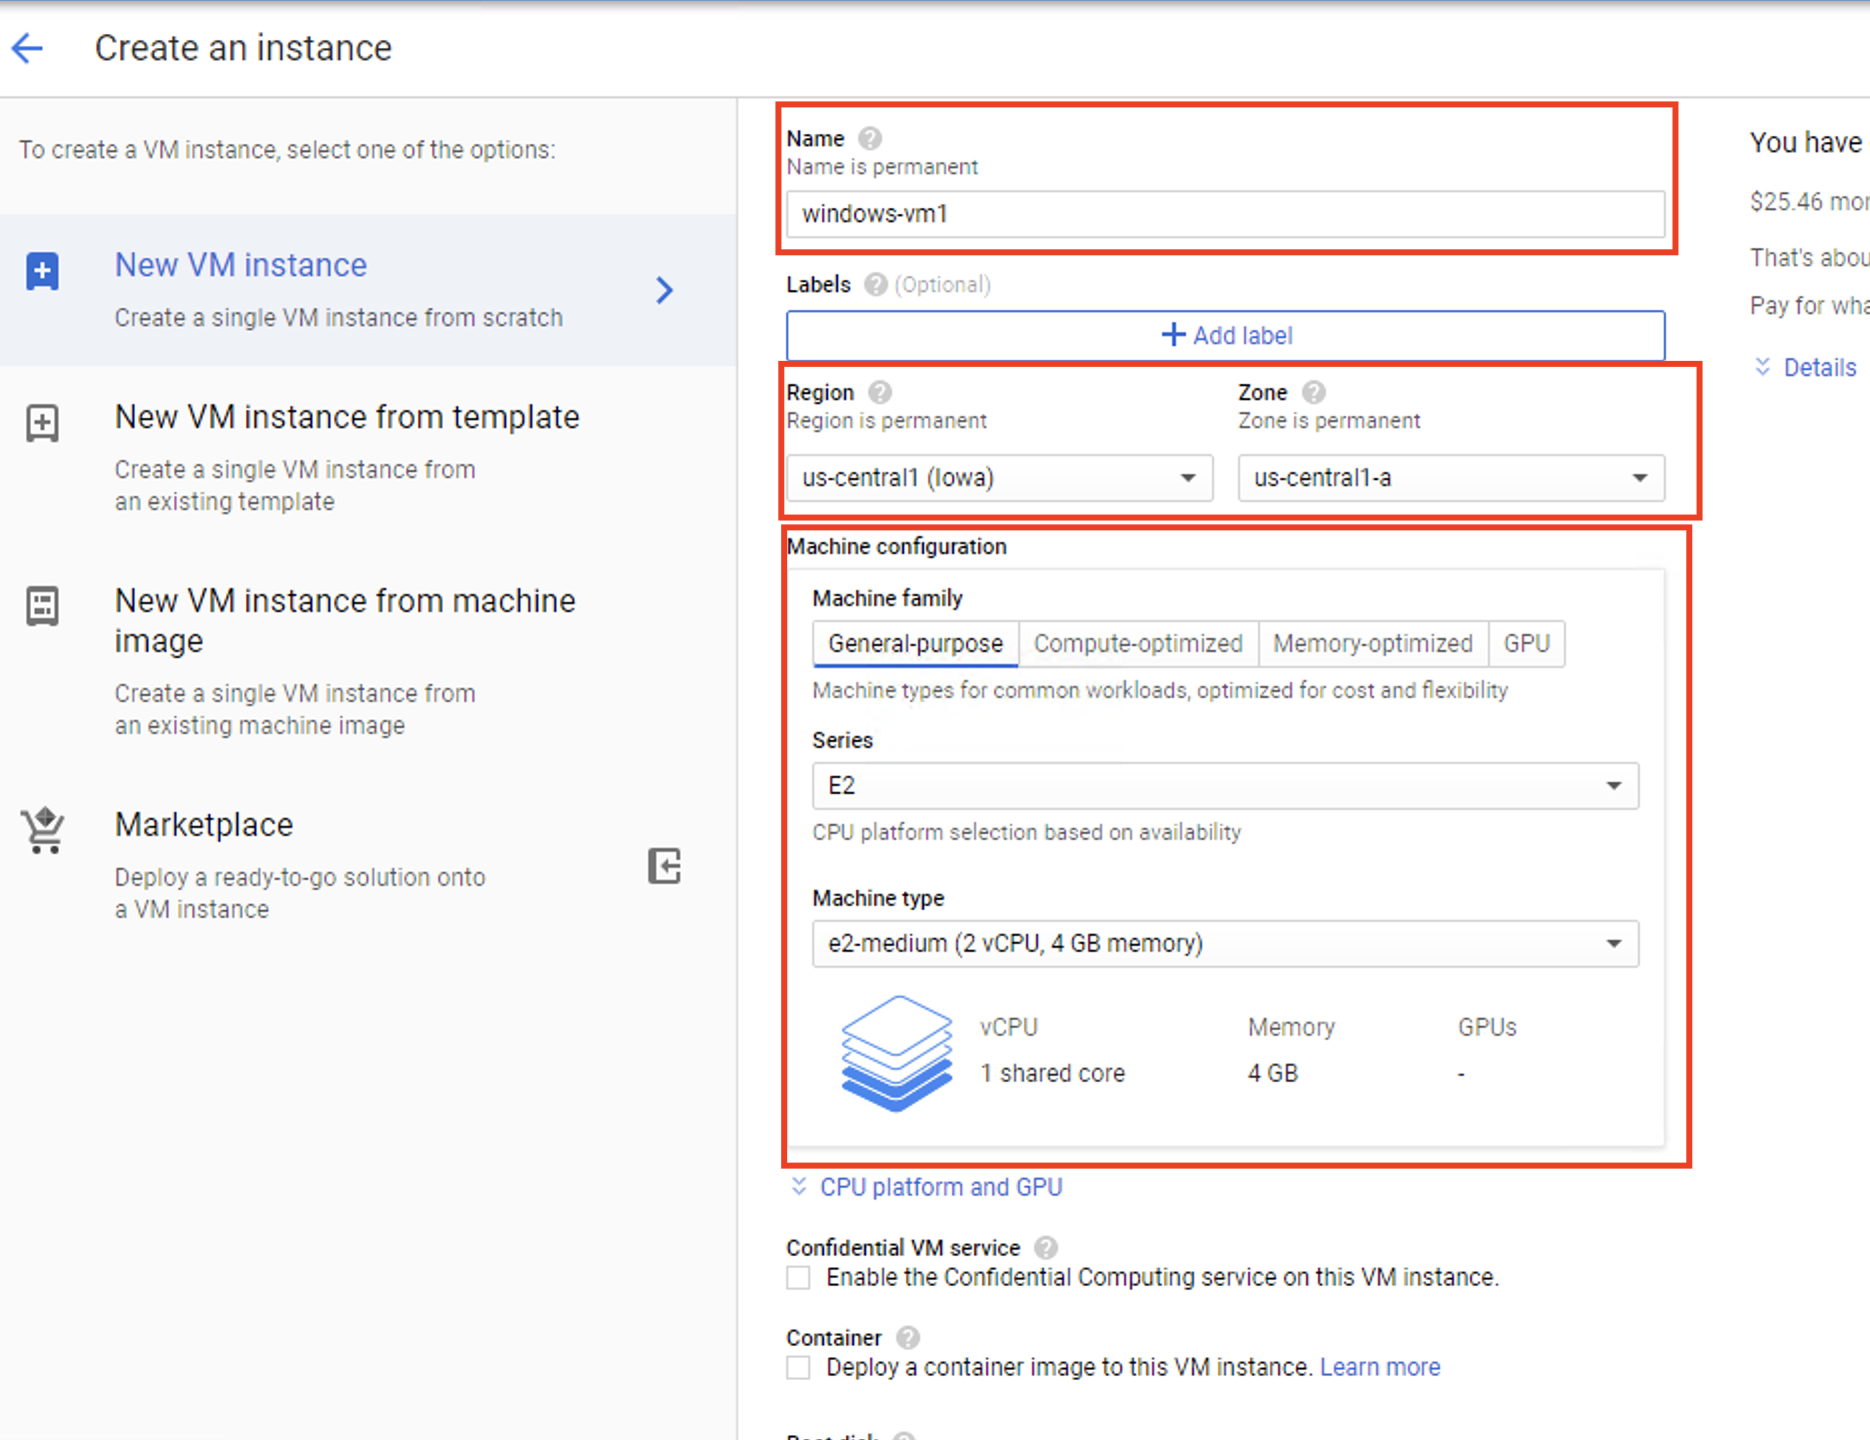
Step 4 : Pick a name for your Virtual Machine.
Step 5 : Select a Region and Zone for your Virtual Machine.
Step 6 : Browse the Machine configuration options and pick one which suits your requirements. Or create a custom configuration if you know how.
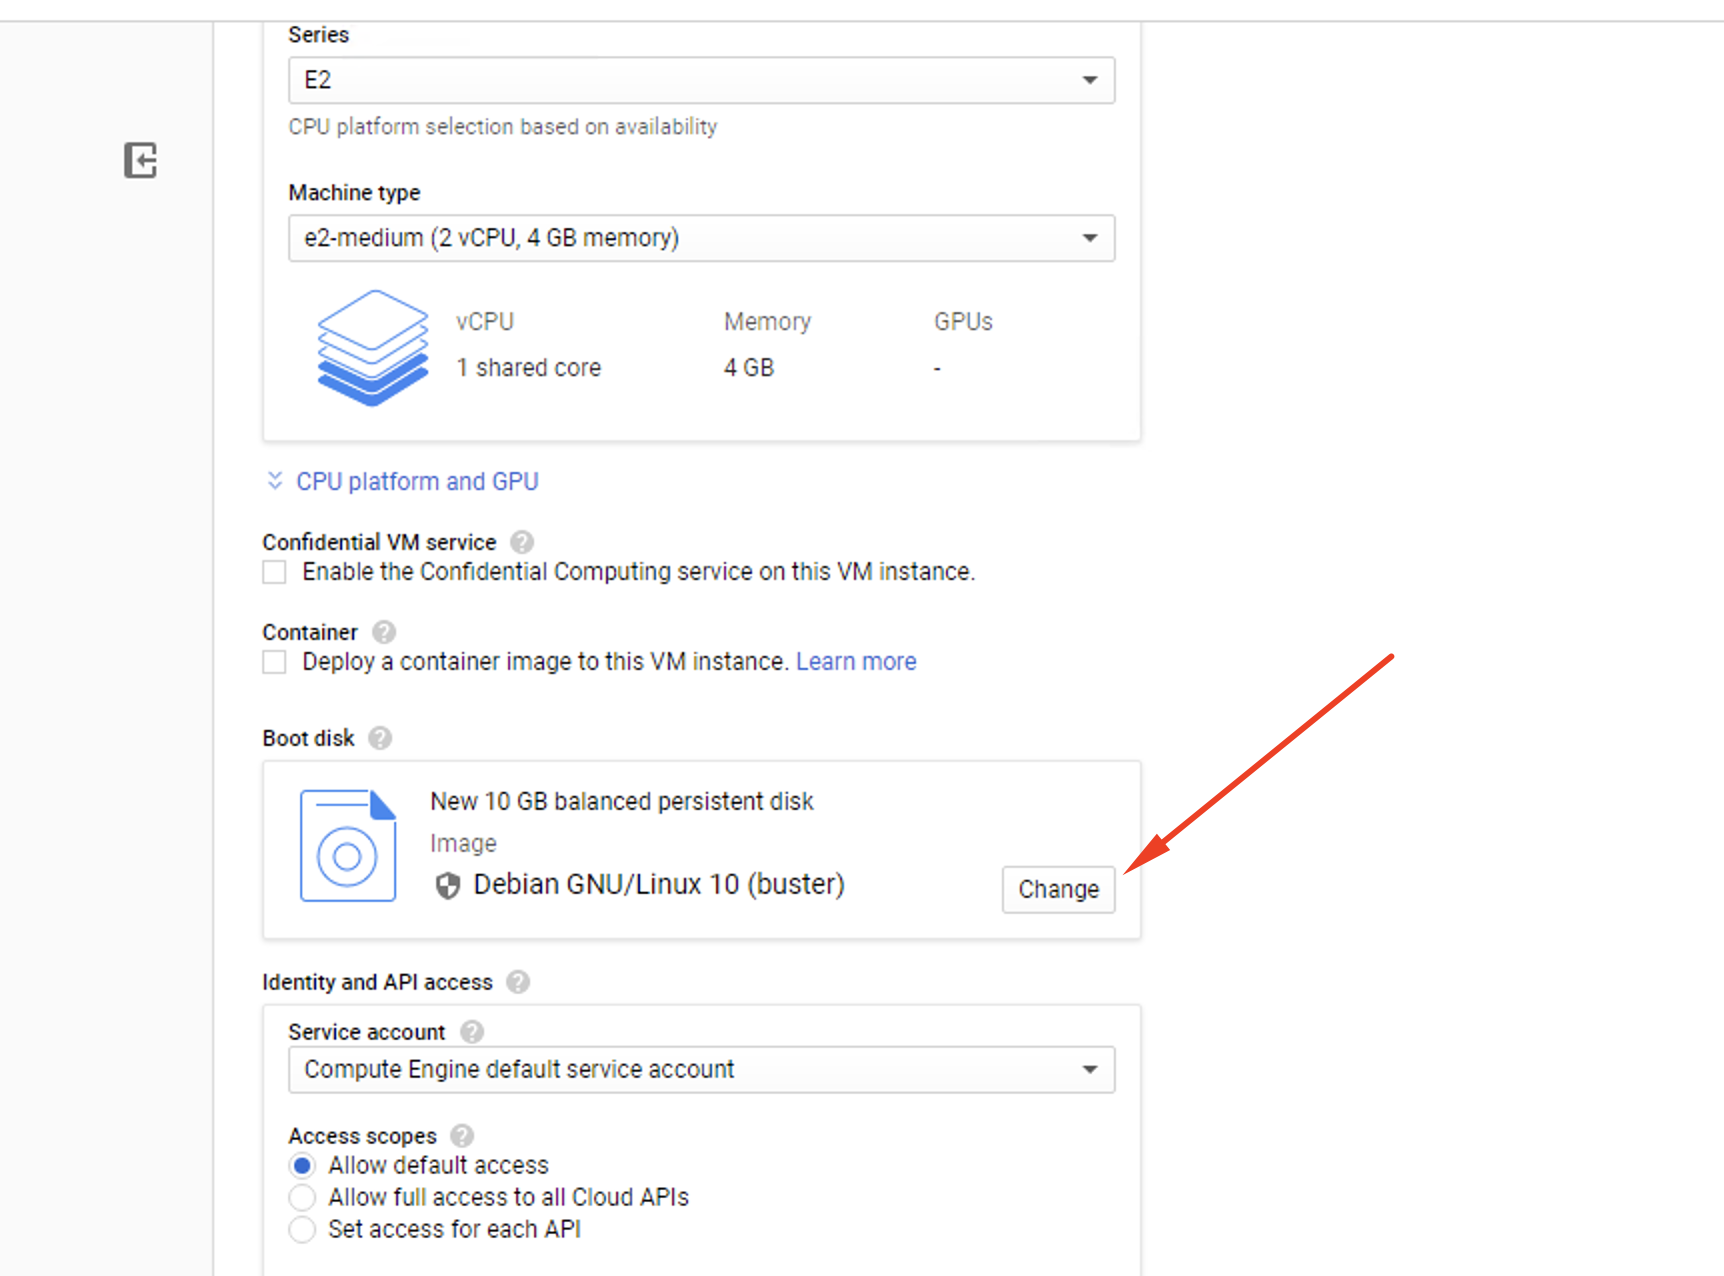
Step 7 : Select Change to save the new settings.
Step 8 : Select Windows Server to set it as the active OS.
Step 9 : Pick the most appropriate version of Windows for your computer and a compatible disk size from the options available.
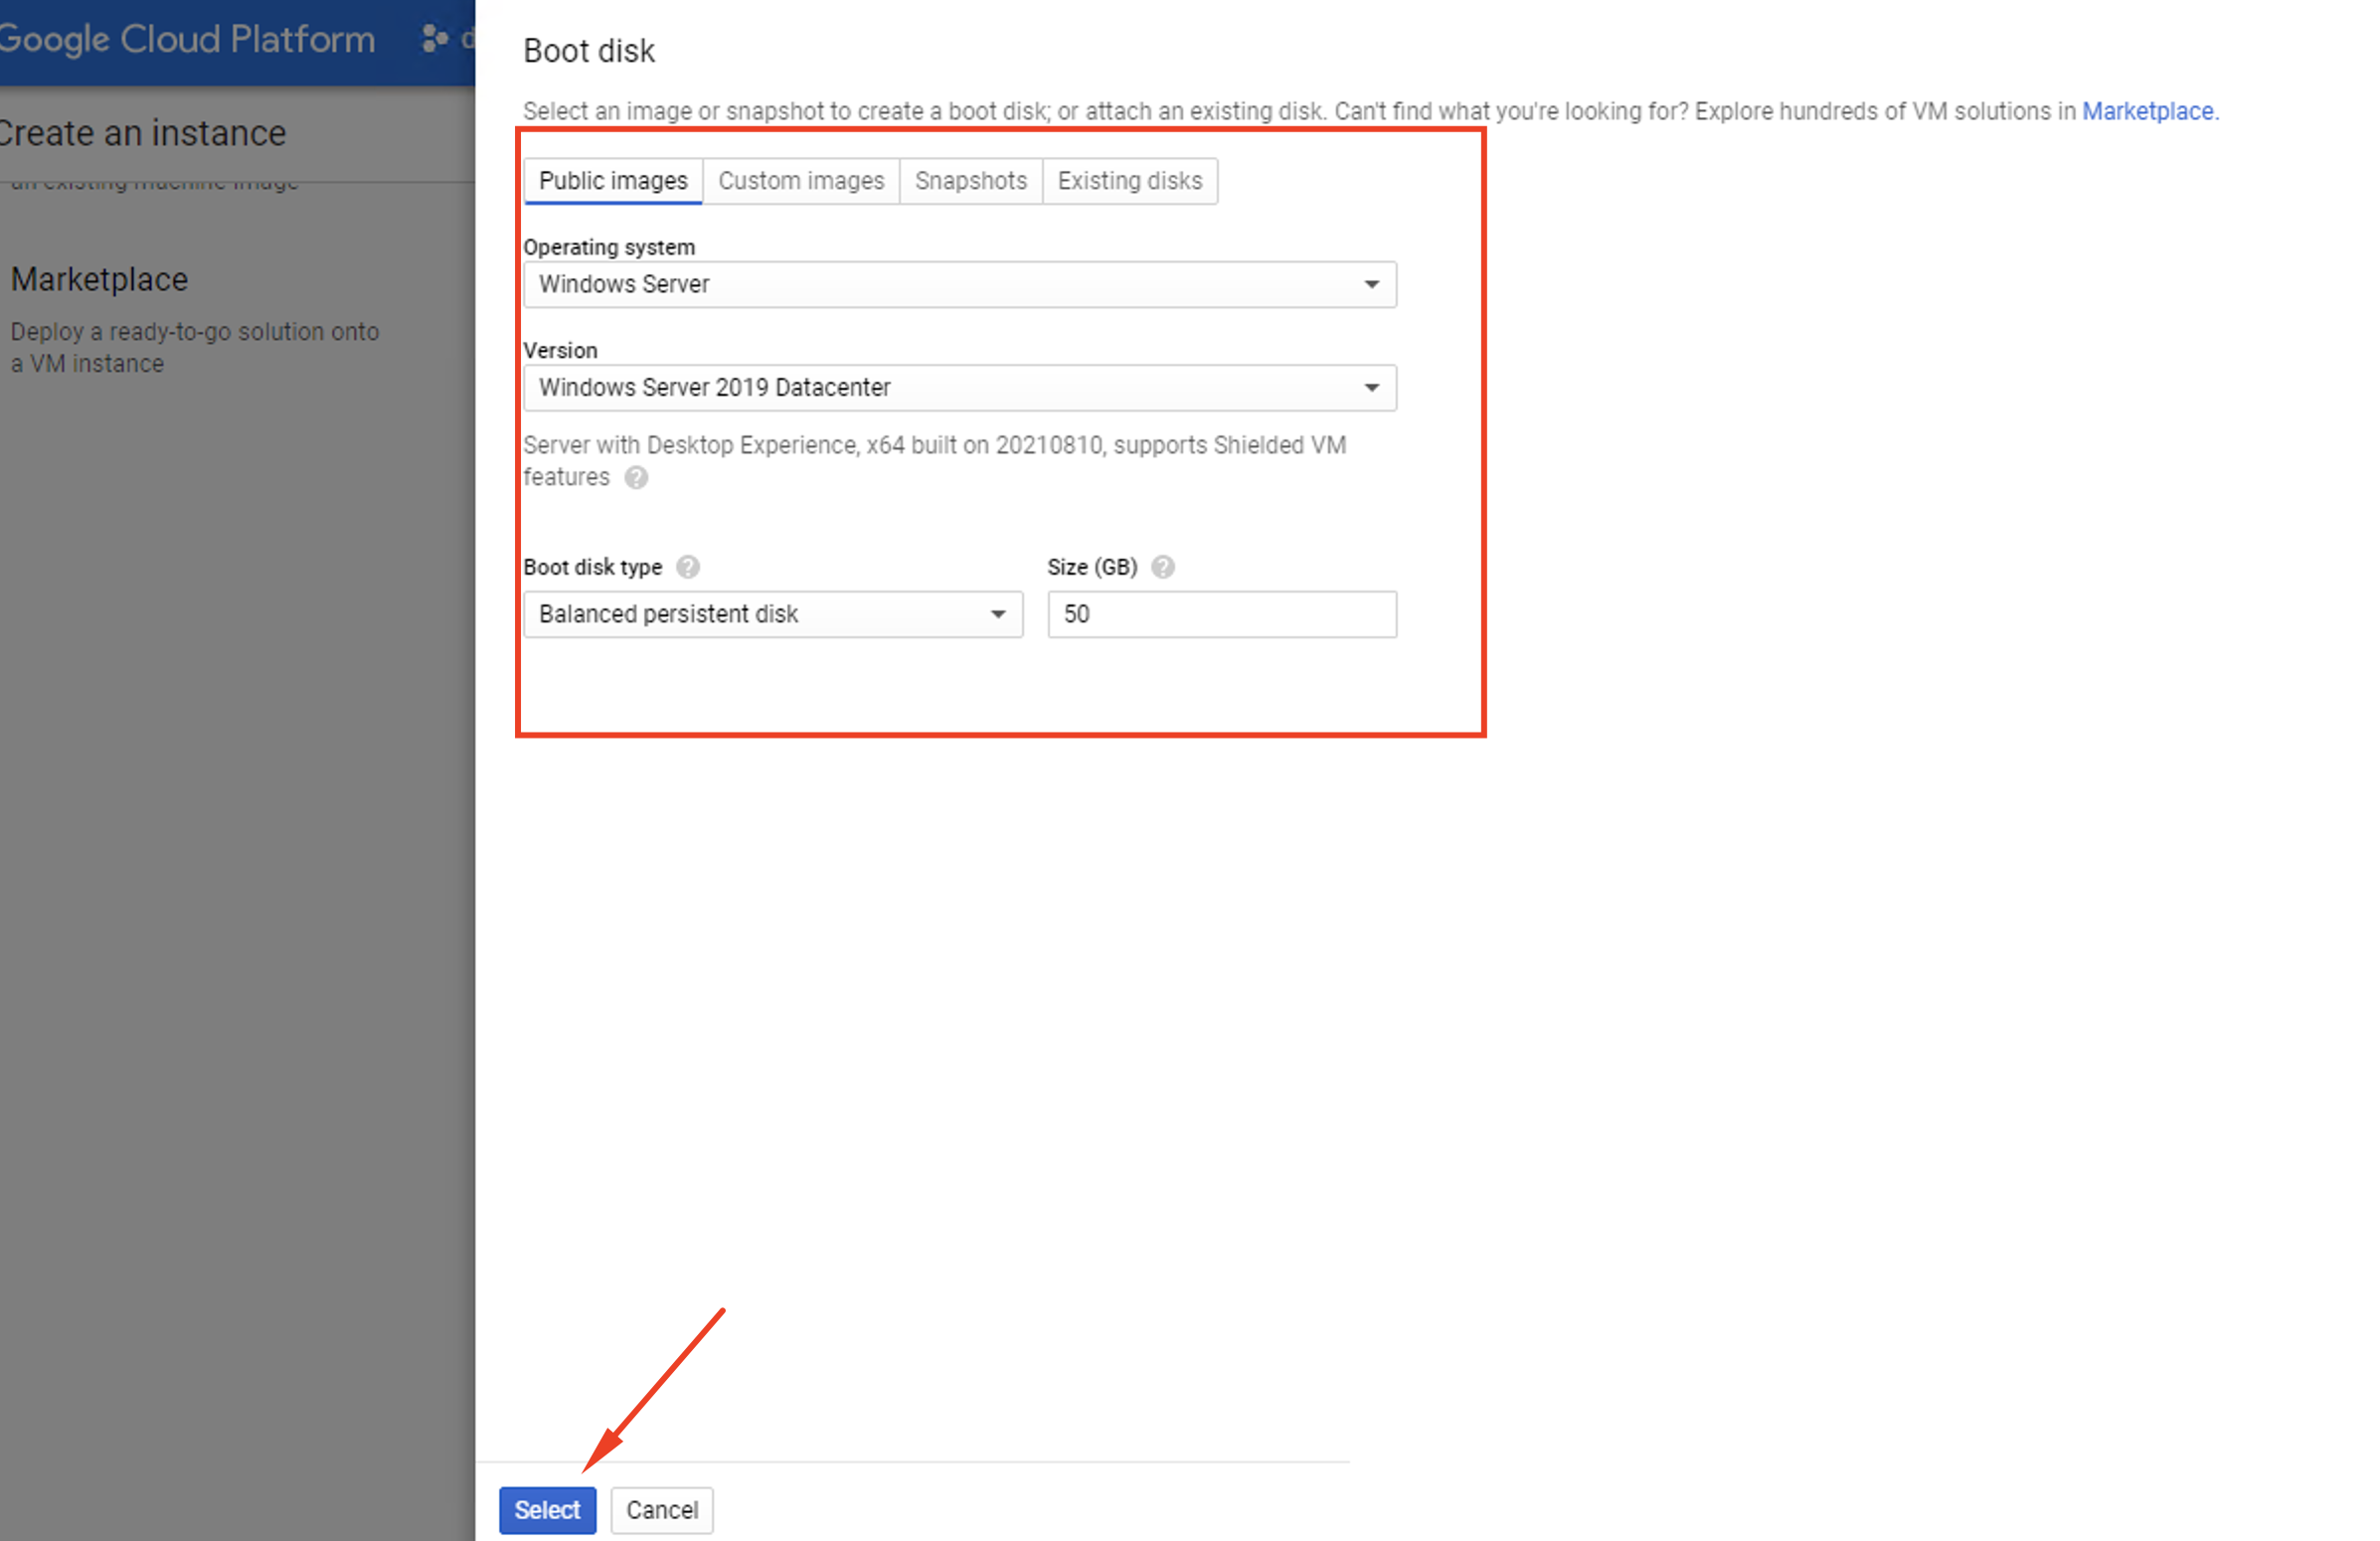
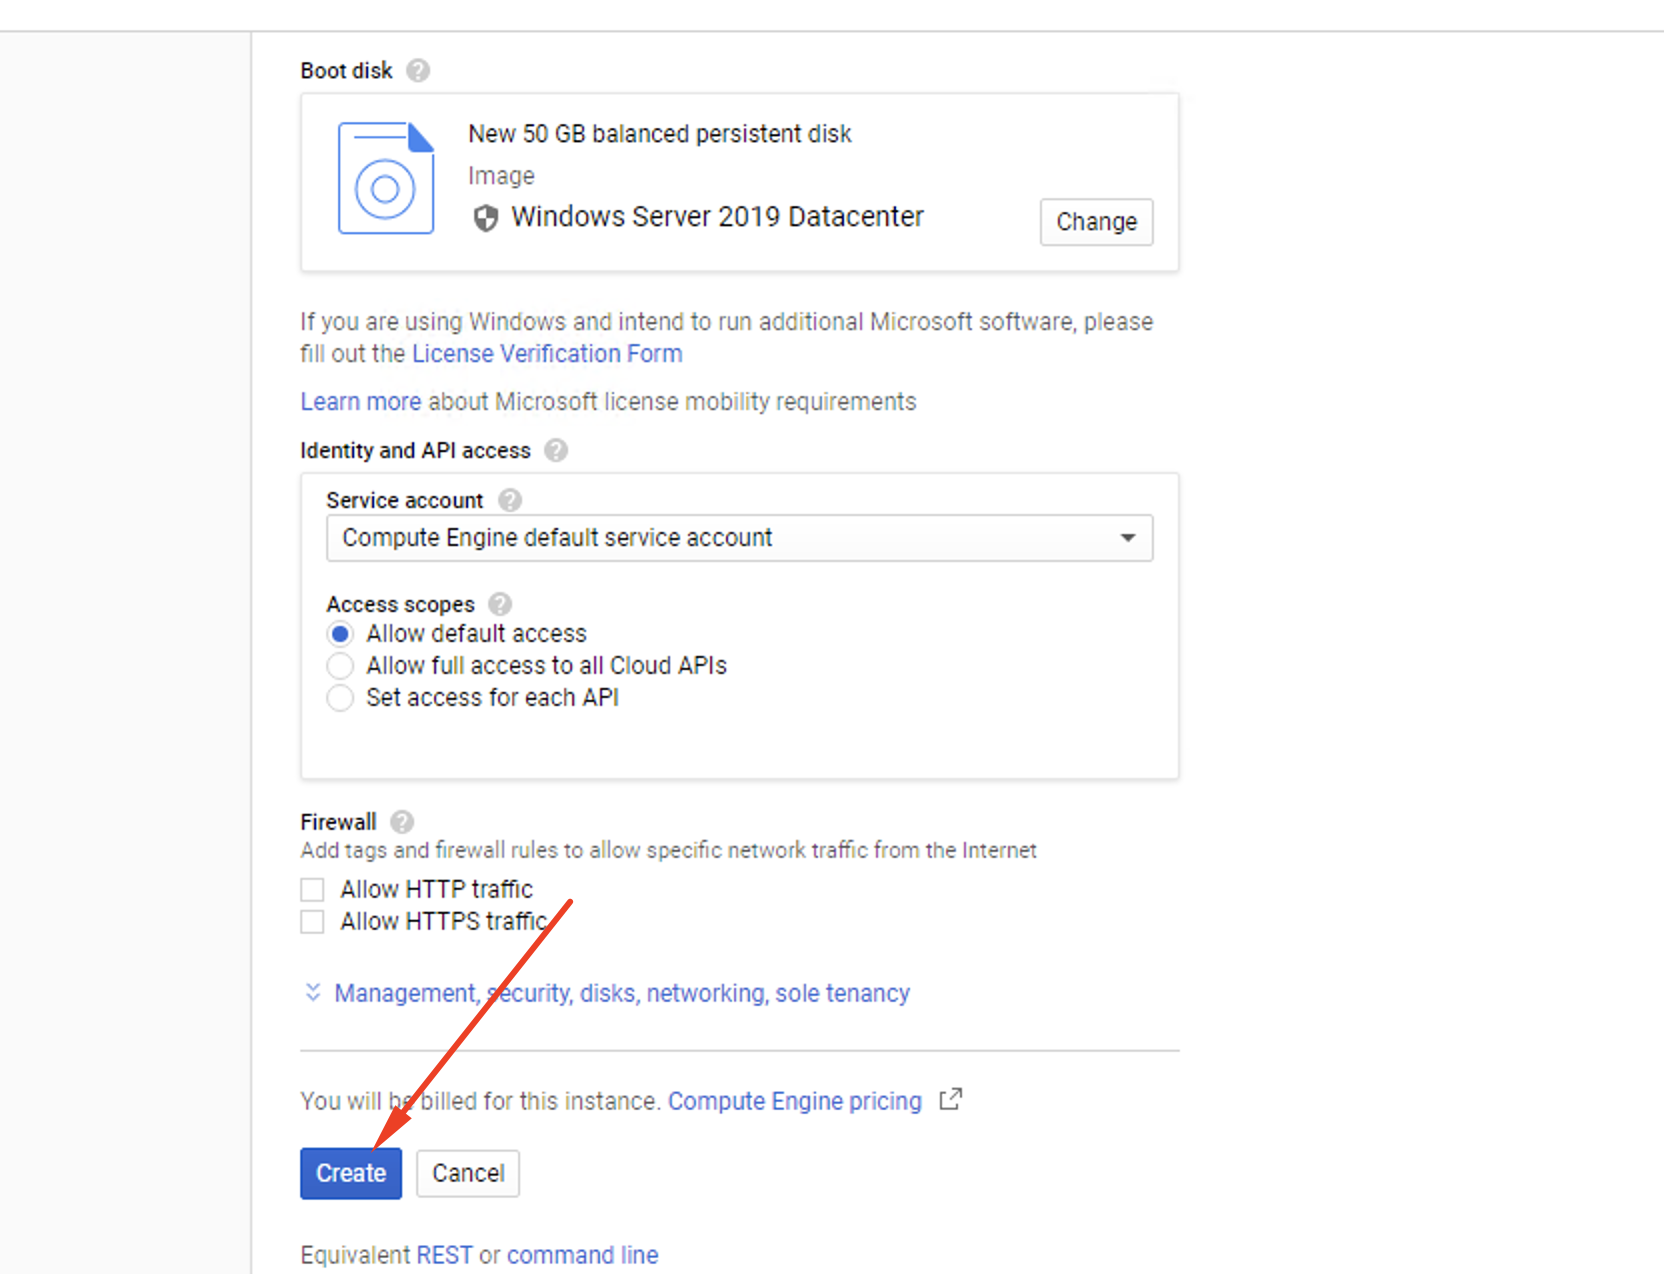
Step 10 : Hit the Select button.
Step 11 : Leave them as they are. Hit the Create button to start building your VM.
Step 12 : Be patient while your Virtual Machine launches.
It’s relatively easy to use Google Compute Engine to create a virtual Windows machine. Once you understand the steps involved, it shouldn’t take longer than 10 to 15 minutes. It’s a quick and easy way to transfer power-hungry Windows tasks to a managed infrastructure.