Bridged networking allows your VMs to receive an IP address from the DHCP server on your network instead of its internal one, which will allow you to communicate with your VMs from any other machine on your network.
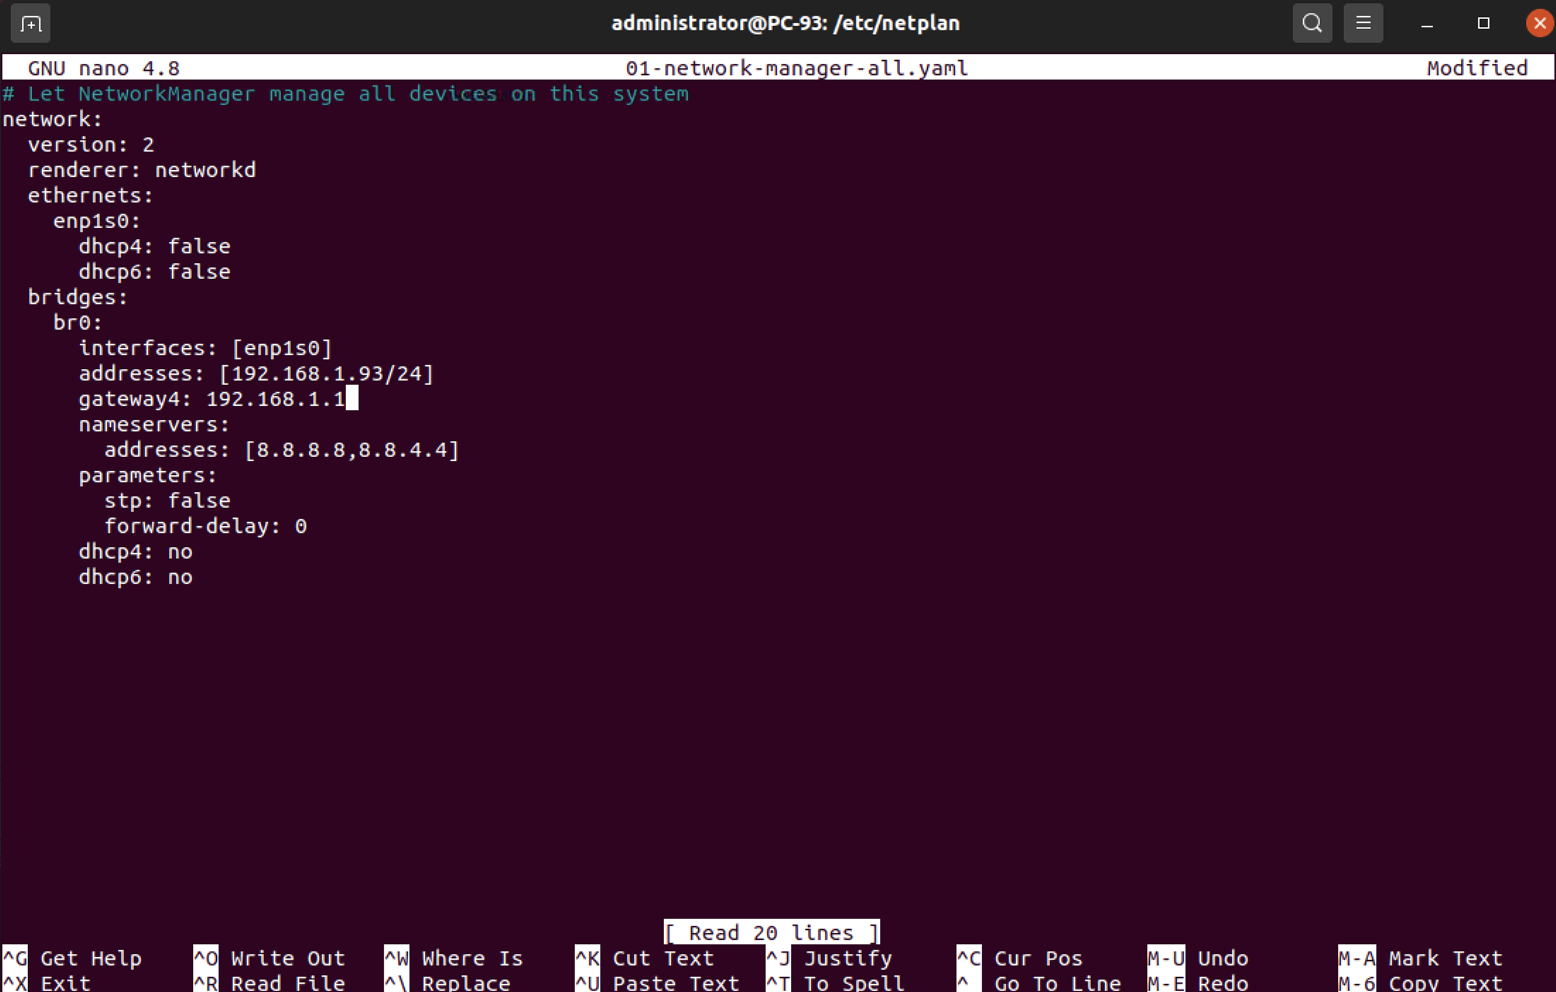
Step 1 : To set up bridged networking, we'll need to create a new interface on our server. Open up the /etc/netplan/01-network-manager-all.yaml file in your text editor with sudo.

Step 2 : Make sure you make a backup of the original Netplan configuration file, and then replace its contents with the following. Be sure to replace enp0s3 (the interface name) with your actual wired interface name if it's different.
Step 3 : After you make the change, you can apply the new settings immediately

Configuring a virtual machine to use network bridge
If you have a virtual machine you've already created that you'd like to switch to utilize your bridged networking, you can use the following steps to convert it:
Step 1 : First, open virt-manager and double-click on your virtual machine. A new window with a graphical console of your VM will open.
Step 2 : The second button along the top will open the Virtual Hardware Details tab, which will allow you to configure many different settings for the VM, such as the CPU count, RAM amount, boot device order, and more.
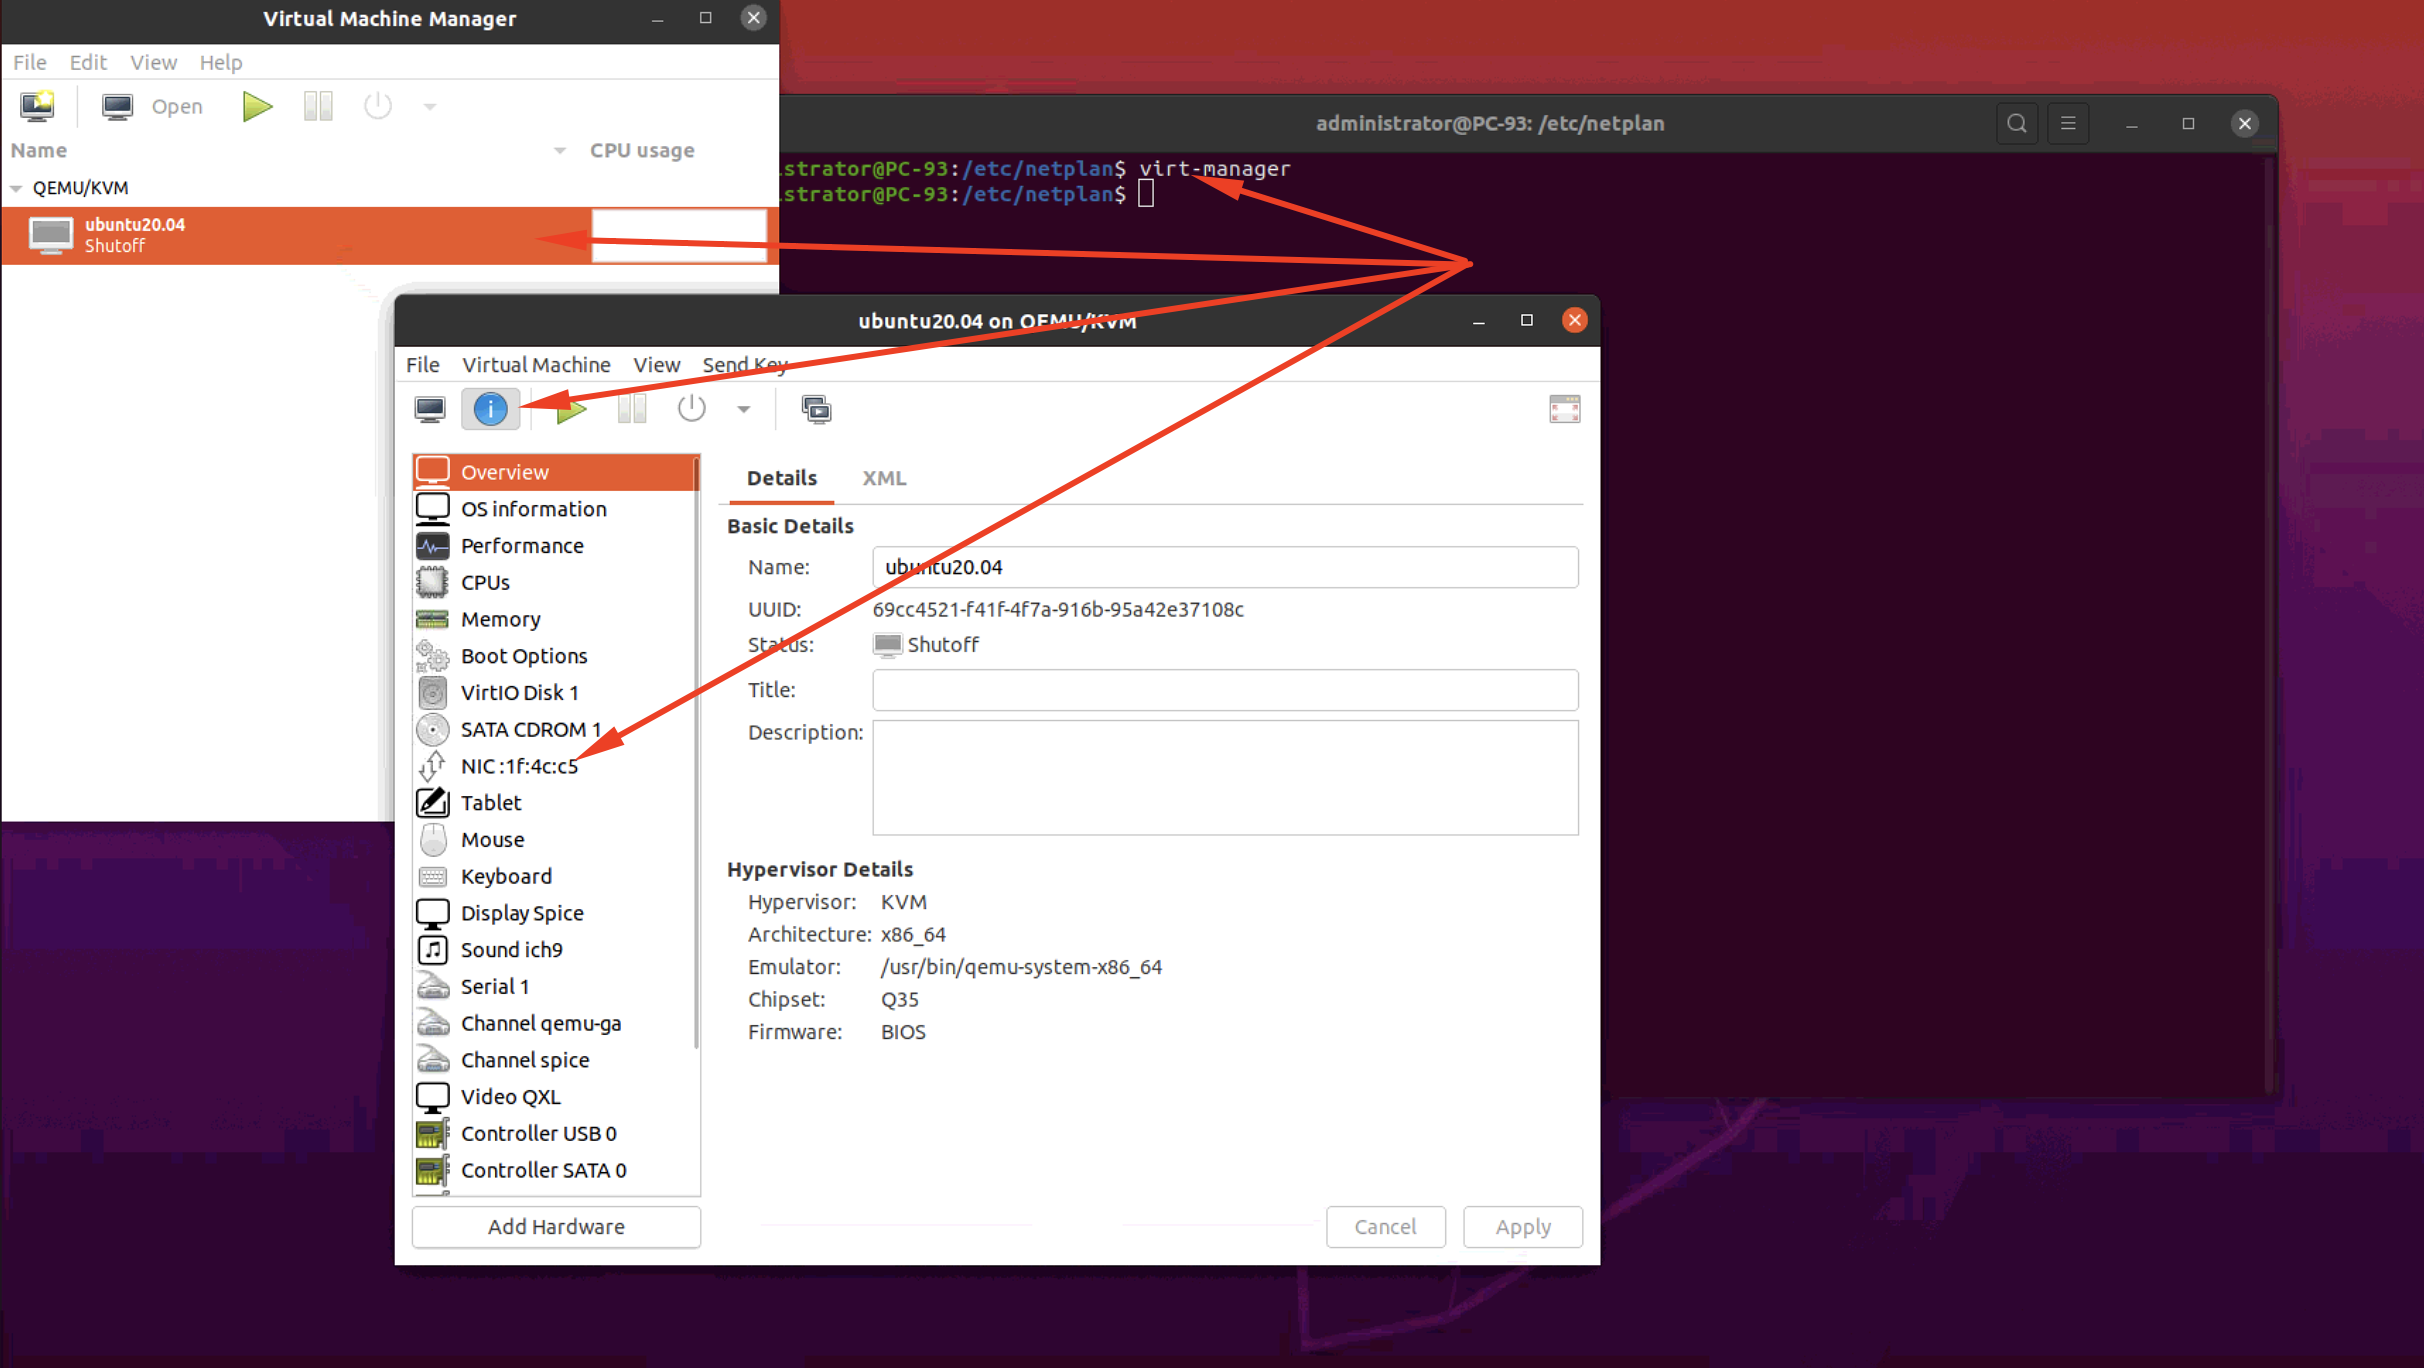
Step 3 : Among the options on the left-hand side of the screen, there will be one that reads NIC and shows part of the virtual machine's network card's MAC address. If you click on this, you can configure the virtual machine to use your new bridge.
Step 4 : Under the Network source drop-down menu, select the option Specify shared device name. This will allow you to type an interface name in the Bridge name text box; Make sure that the Device model is set to virtio.
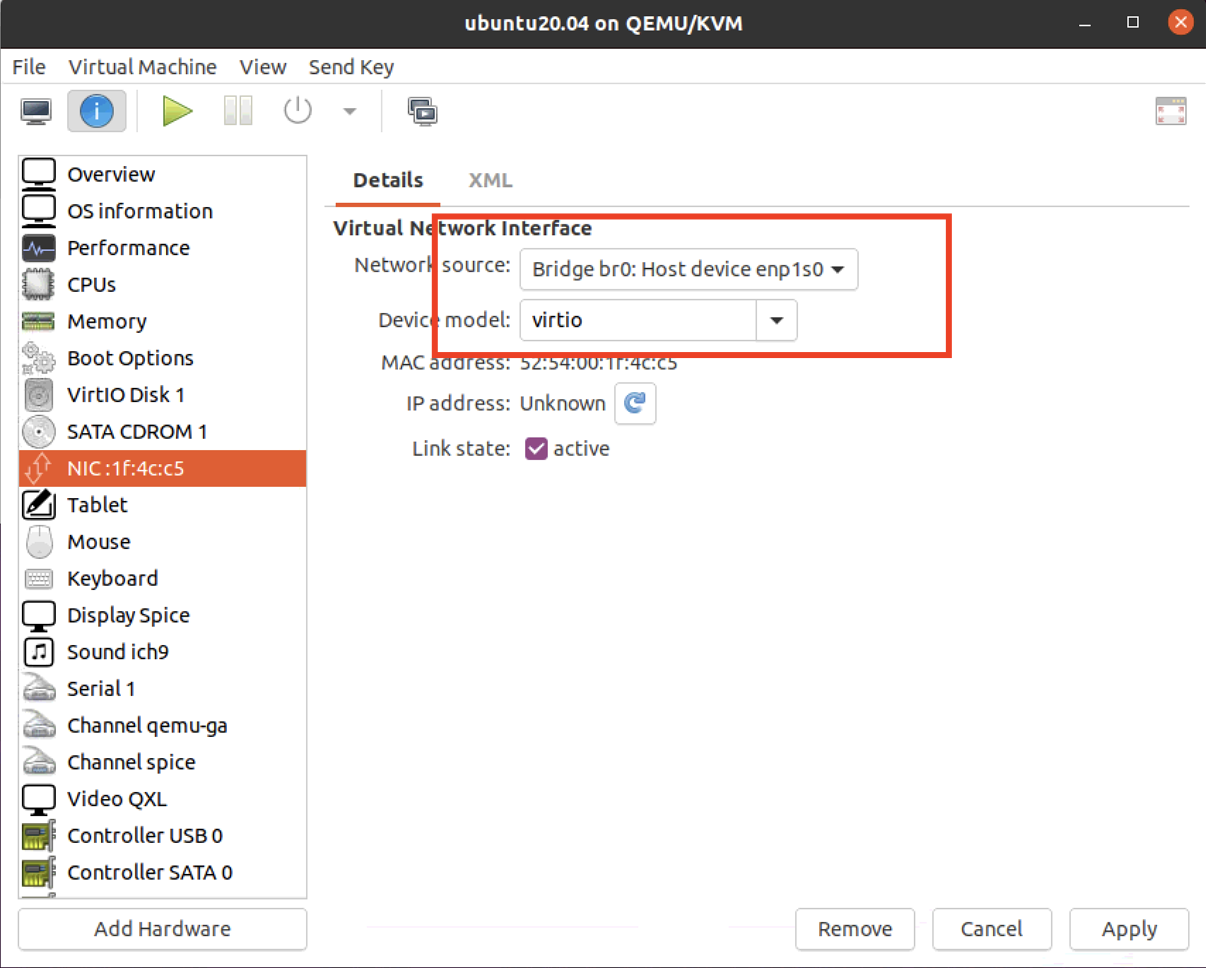
Step 5 : Finally, click on Apply. You may have to restart the virtual machine for the changes to take affect: