So we've made sure the new IIS role is added and operating correctly. In response to this change, you'll notice a basic website has been launched. This is a default action and we're going to swap it for a website we actually need to get maximum value out of our new server.
This is how you launch a website on the new IIS server:
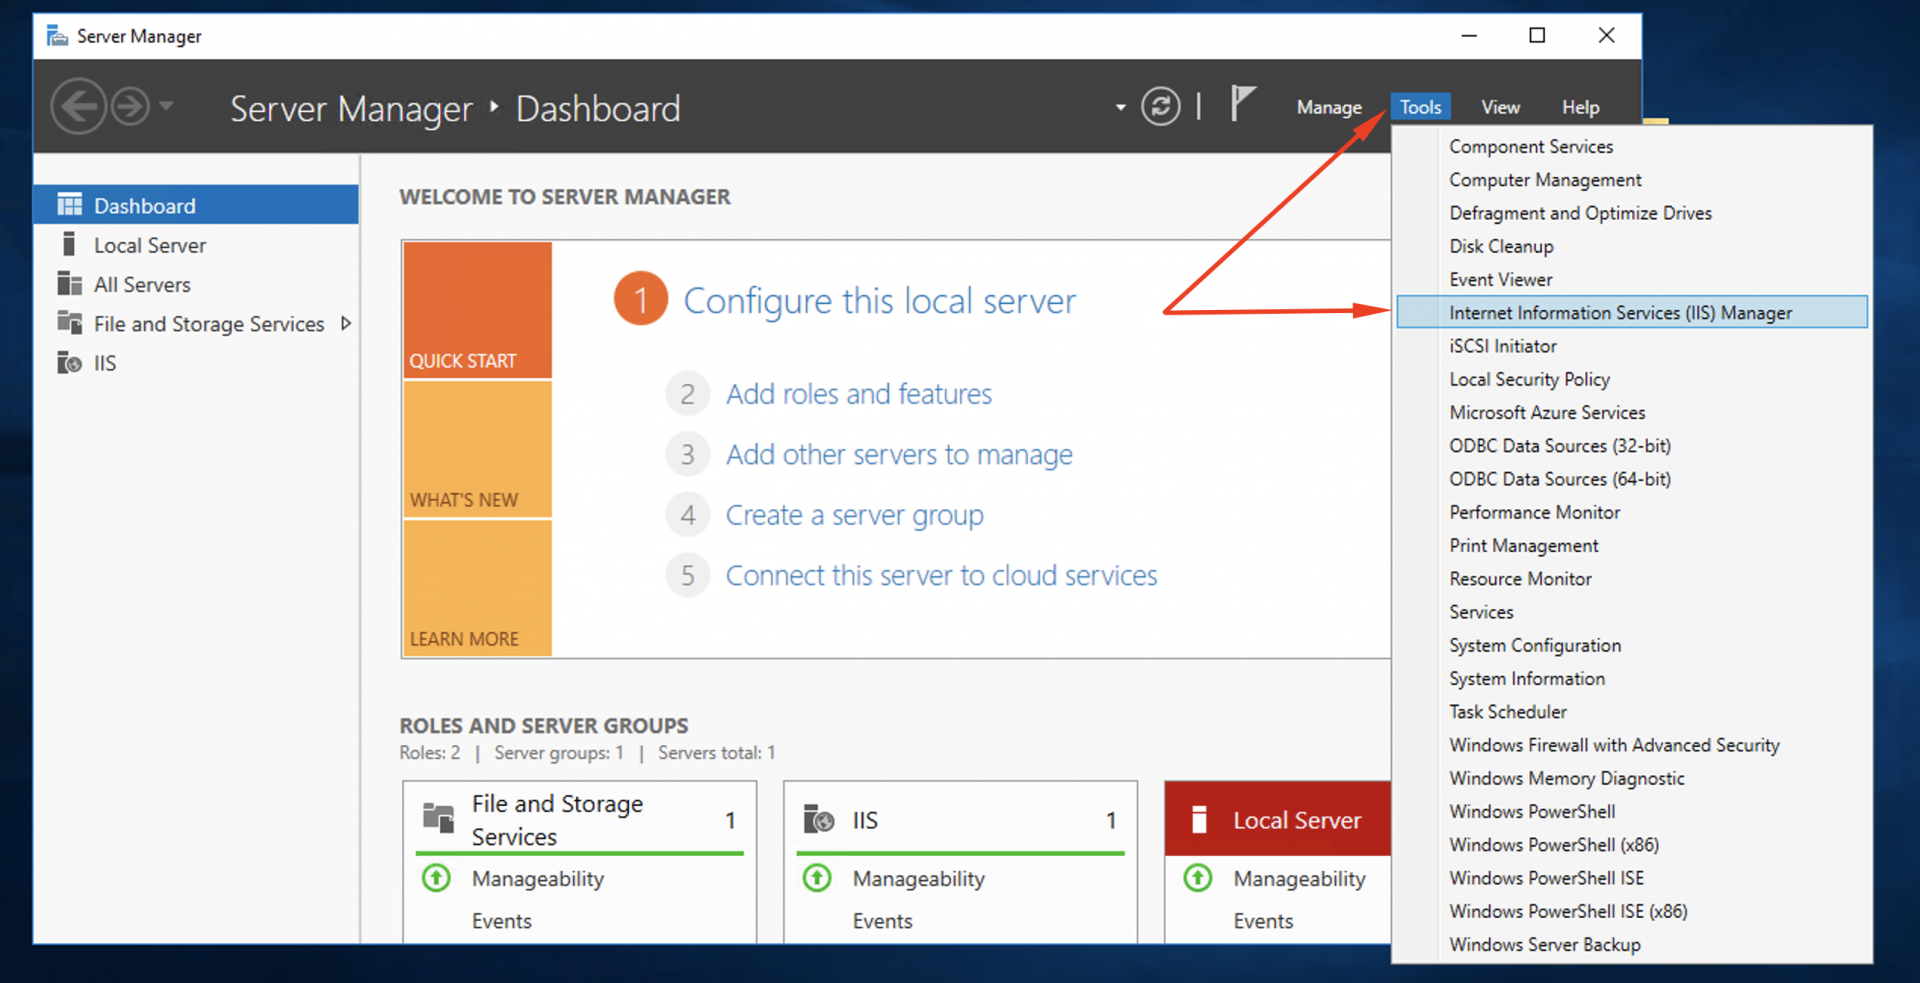
Step 1: Run the Server Manager. Navigate to Tools. Select the option: Internet Information Services (IIS) Manager.
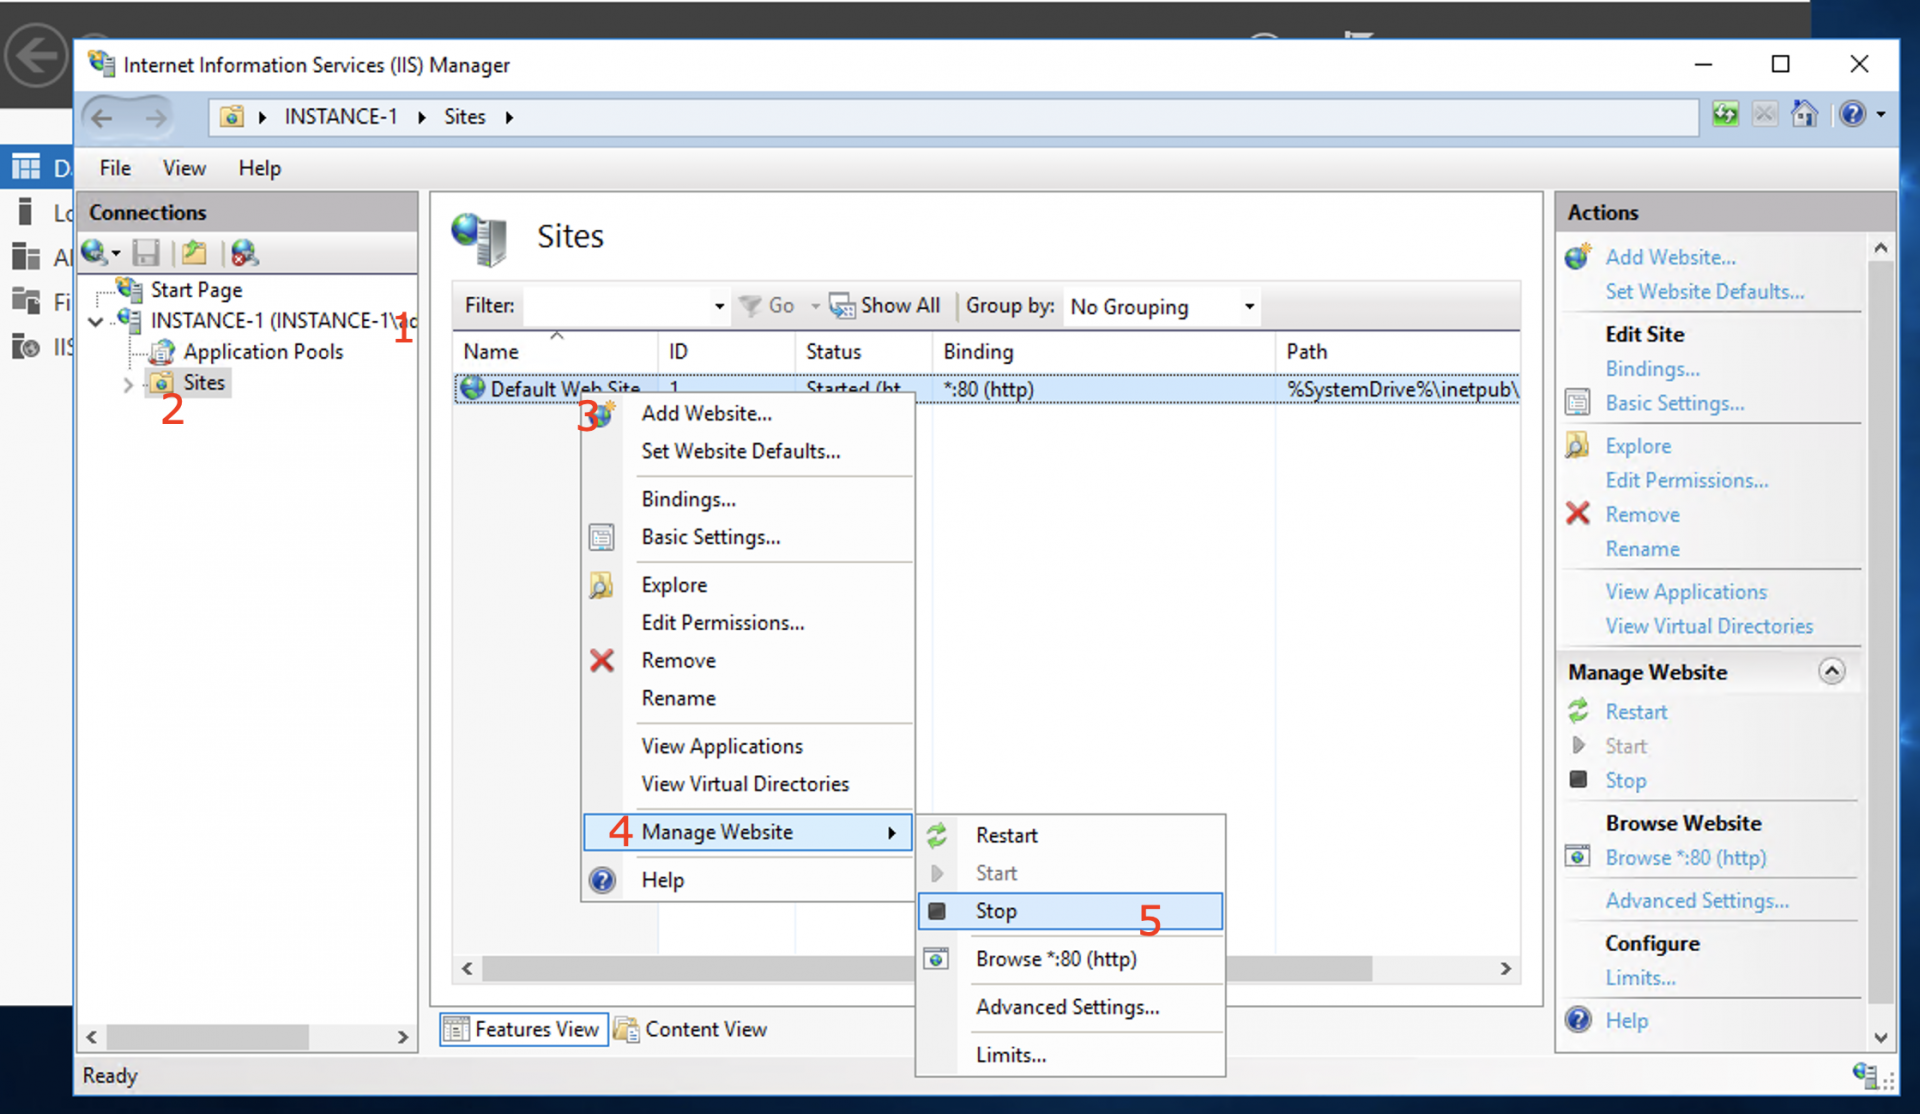
Step 2: Find the name of your server in the left-side window. Open its menu and select a folder labelled 'Sites'.
Step 3: Find 'Default Web Site' and select it. Look for the 'Manage Website: Stop' option. This is going to terminate the basic website we saw earlier and stop it from interfering with any new websites we launch in the future:
Step 4: Next, we're going to navigate away from the IIS Manager. Don't close it, just navigate away from the program. Open File Explorer. Use the search tool to open: C:\inetpub
The IIS creates this folder automatically and it can be really a helpful foundation for website building.
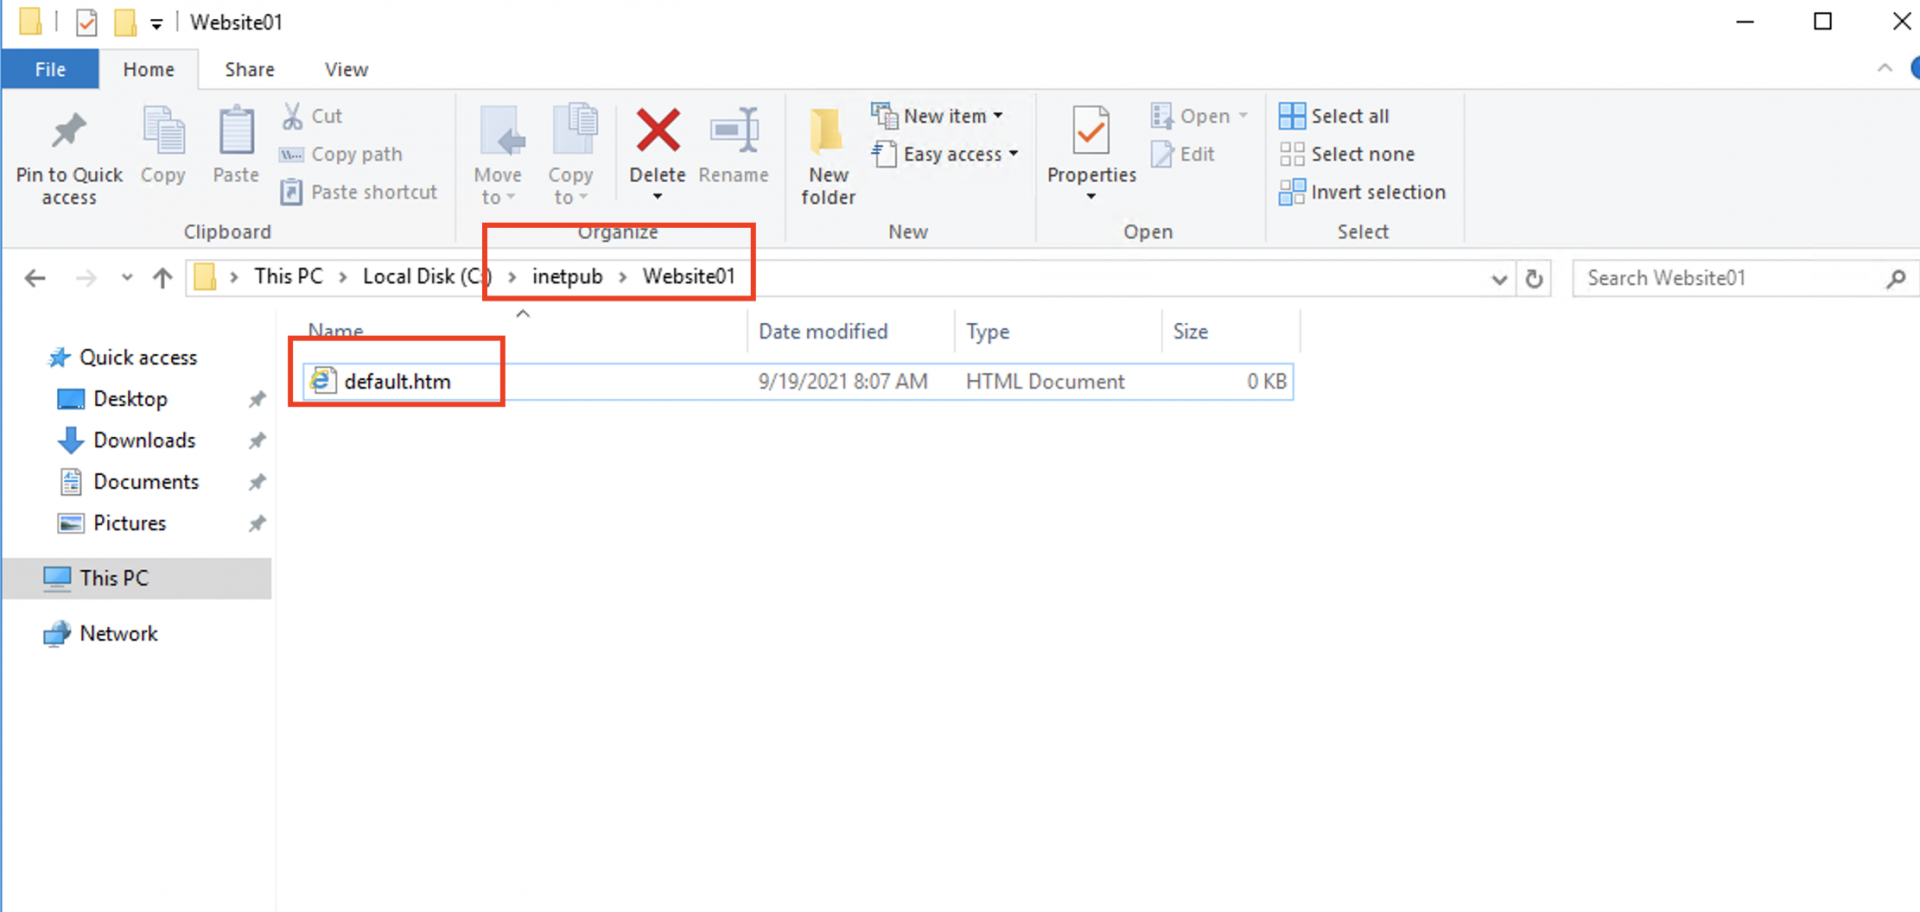
Step 5: Create a new folder here. Name it something relevant like 'Website01'. The name isn't important as long as it's distinct.
Step 6: Create a new file inside this new folder. Name it: default.htm.
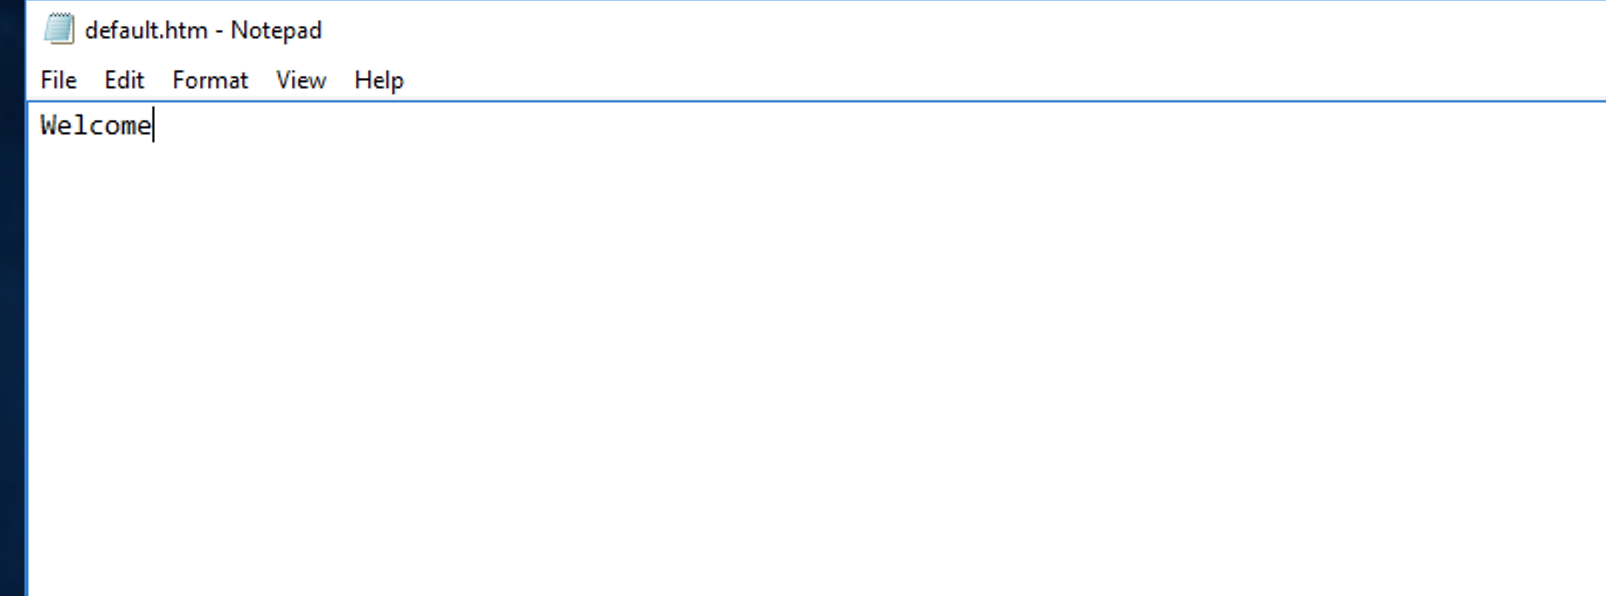
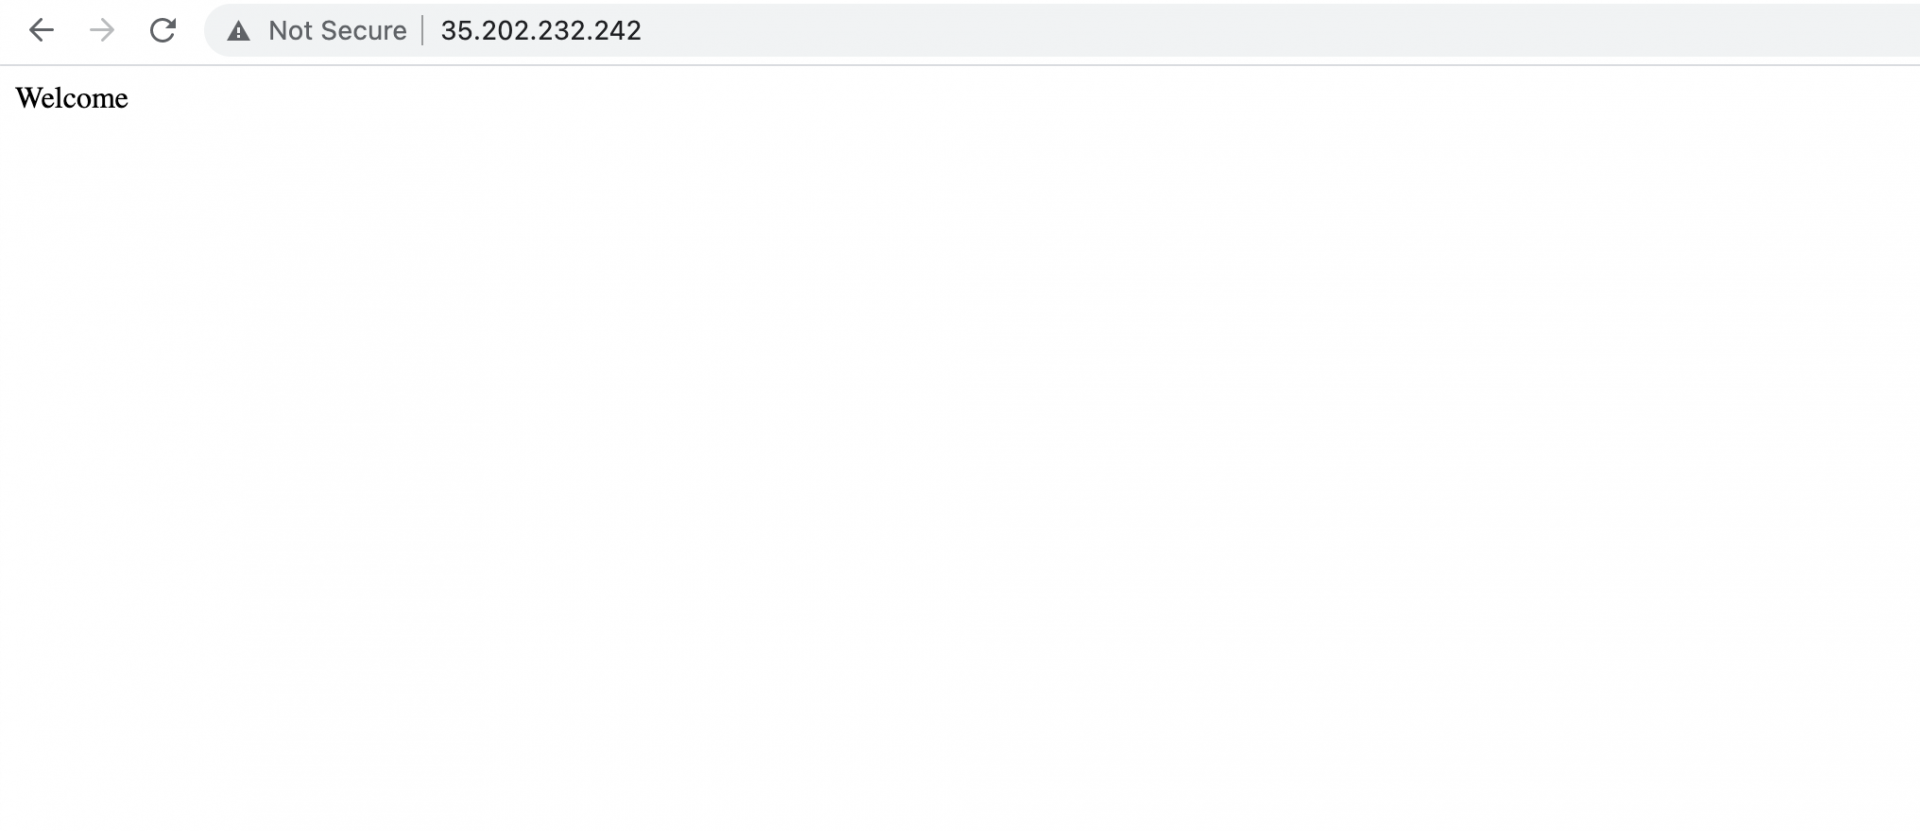
Step 7: Next, make a change/edit to your 'default.htm' file. The quickest way is to use Notepad but any text editor will do. I just opened the blank file and typed the word 'Welcome' but you can write whatever you like.
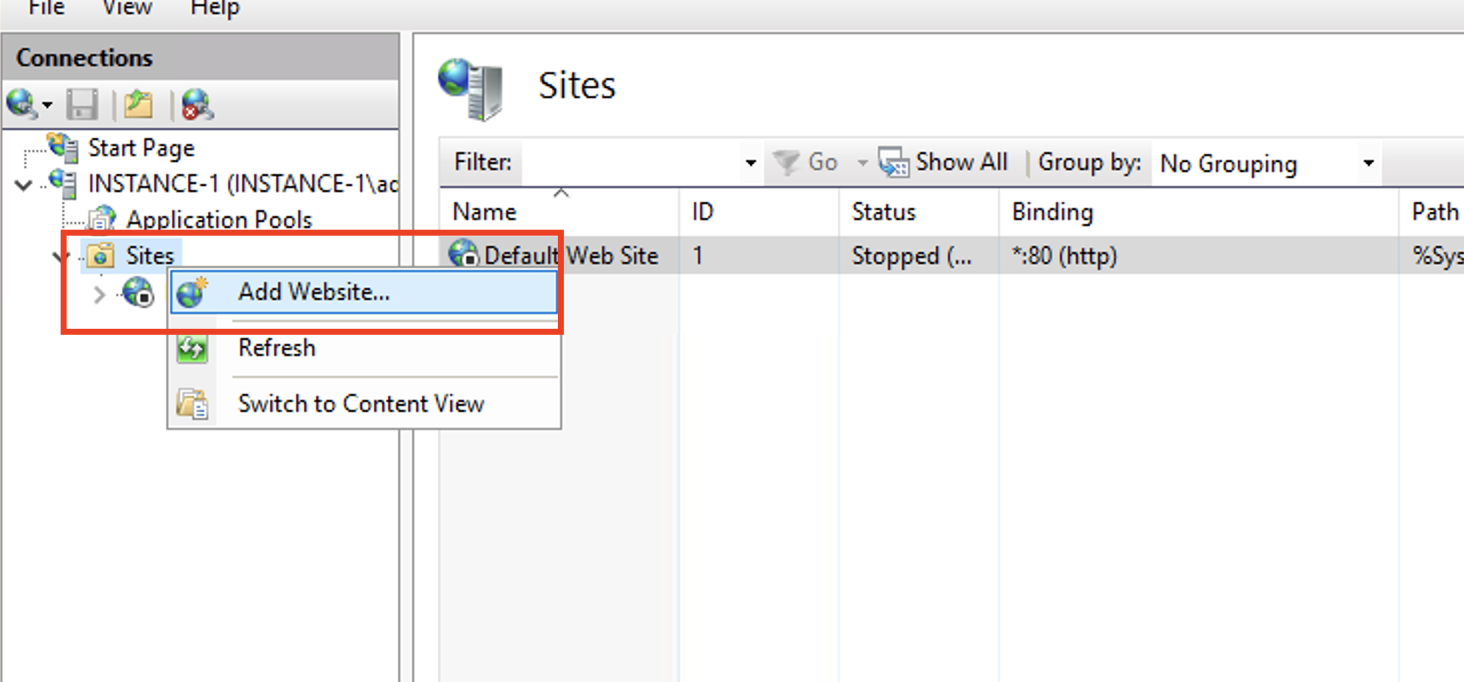
Step 8: Now, let's leave this window and go back to our IIS window. It's nearly time to launch our website. Go back through the Internet Information Services (IIS) Manager interface until you're at the Sites menu for your server again. Open up its menu again and find the folder labelled 'Sites'. Right click on it. Then, select Add Website.
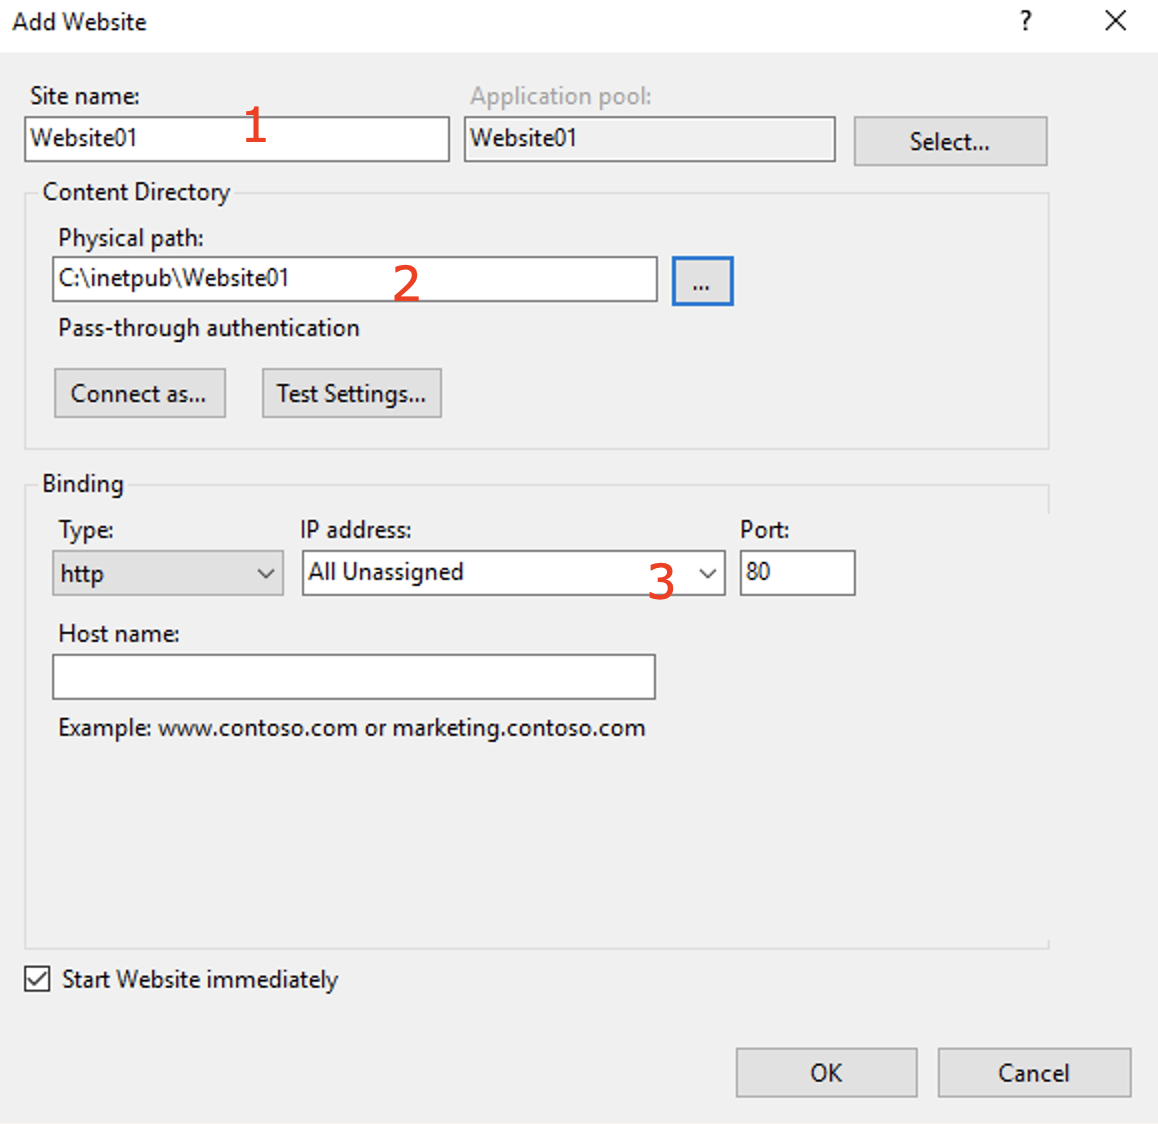
Step 9: Type in a new website name when prompted. It doesn't really matter what this name is as long as you can find it in the IIS later.
Step 10: Change Physical Path to the location of the new website. For example: C:\inetpub\Website01 (or whatever you named the new folder back in step 5).
Step 11: If your web server is hosting more than one IP address, you have the option to assign one specific address to the new site. Just open up the 'IP Address' box and select one. If there's only one IP address running anyway, don't change it. Leave the setting on All Unassigned.
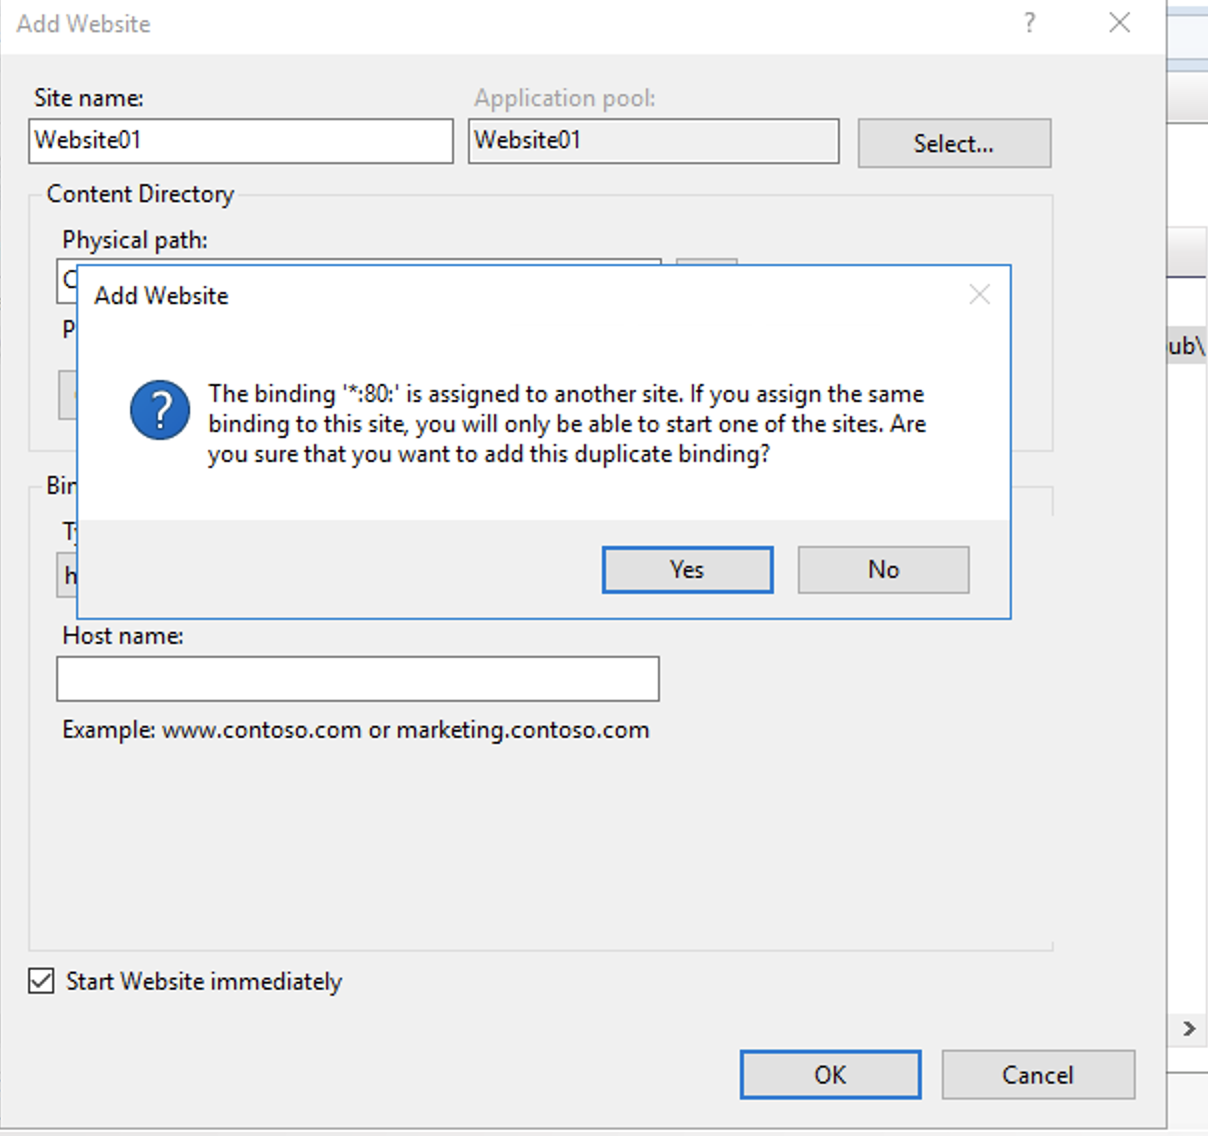
Step 12: Don't worry if you see an error message pop up. It relates to the default website we deactivated earlier. This is what we want to happen so select YES when prompted.
Step 13 : For this next step you need to switch to a different machine but one that's on the same network as the other computer. Launch your preferred internet browser. Enter: http:// in the search bar.
When it comes to all the many things IIS is capable of, launching a website is a pretty basic achievement. However, it's a useful process because it reveals the key functionalities of the role. And, let's not forget, the primary job of IIS is to launch new websites.