Network File System (NFS) is a distributed filesystem protocol that allows clients to access remote files and directories as if they are available on the local system
You will need two Ubuntu systems: one as a central NFS server and another as a client.
Follow these steps to install NFS:
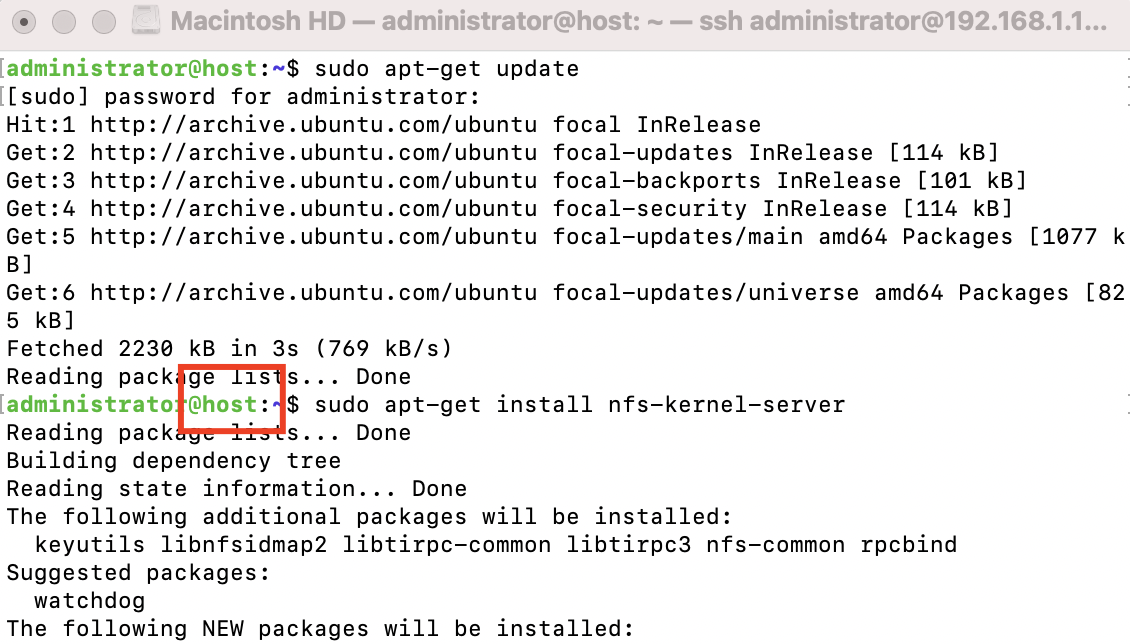
Step 1 : First, we need to install the NFS server
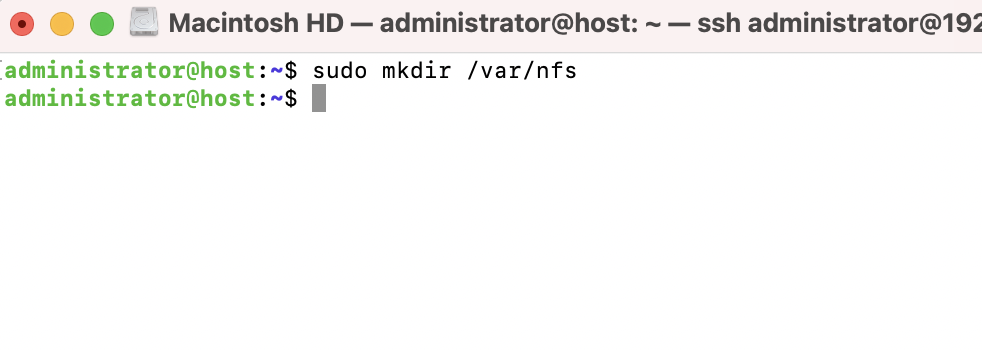
Step 2 : Create the directories to be shared
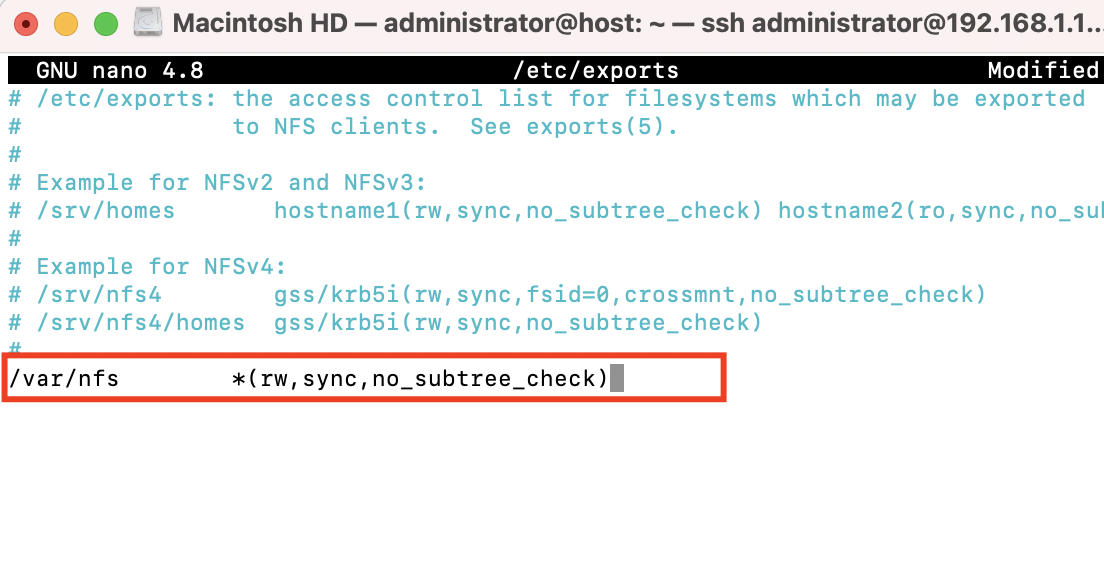
Step 3 : Add this directory to NFS exports under /etc/exports
Step 4 : Add the following line to /etc/exports
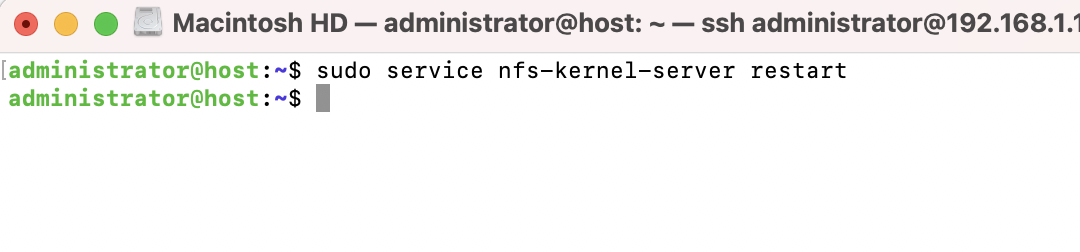
Step 5 : Save and close the exports file. Now, restart the NFS service
Step 6 : Next, we need to configure the client system to access NFS shares.
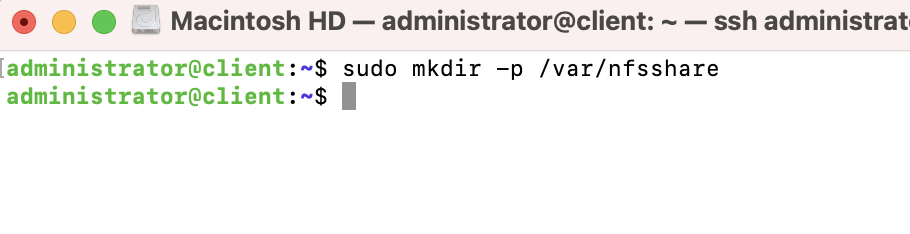
Step 7 : Create a mount point for NFS shares.
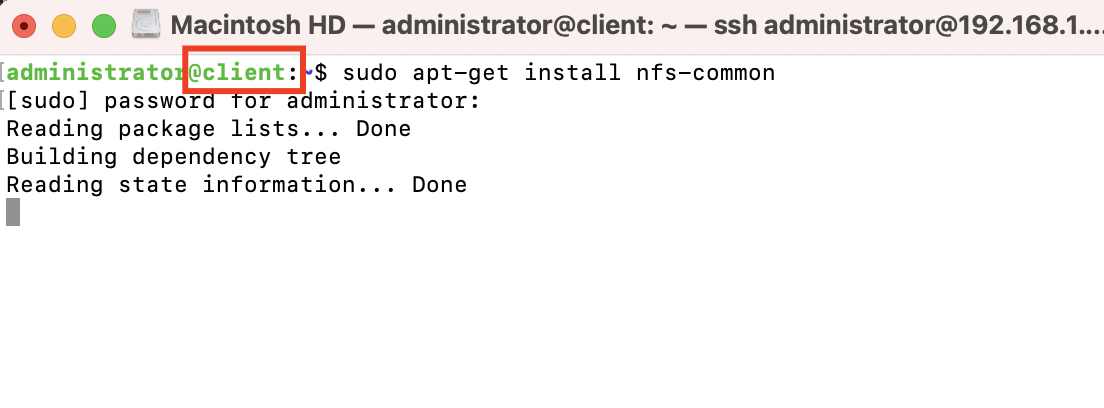
Step 8 : Install the nfs-common package on the client side:
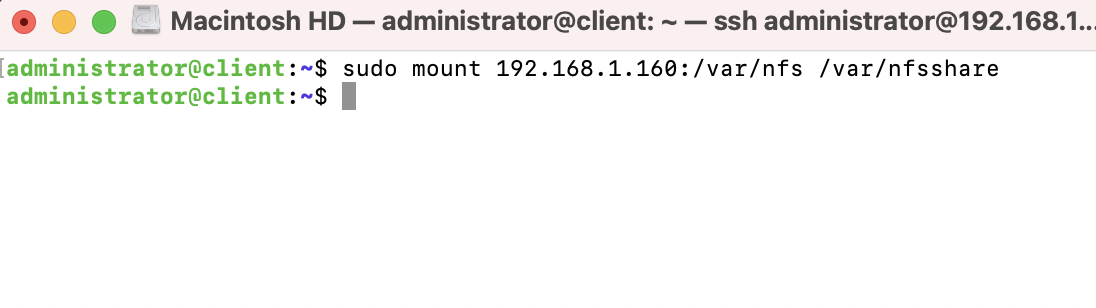
Step 9 : Mount the NFS shared directory on the newly-created mount point:
Step 10 : Confirm the mounted share with the following command
Step 11 : Now, change the directory to /var/nfsshare, and you are ready to use NFS.