First, we'll use PowerShell to install a new web server - Windows Server 2019 - on our computer. We can launch this IIS role in the 'WEB01' environment.
Complete these actions to use PowerShell to install Windows Server 2019 to WEB01:
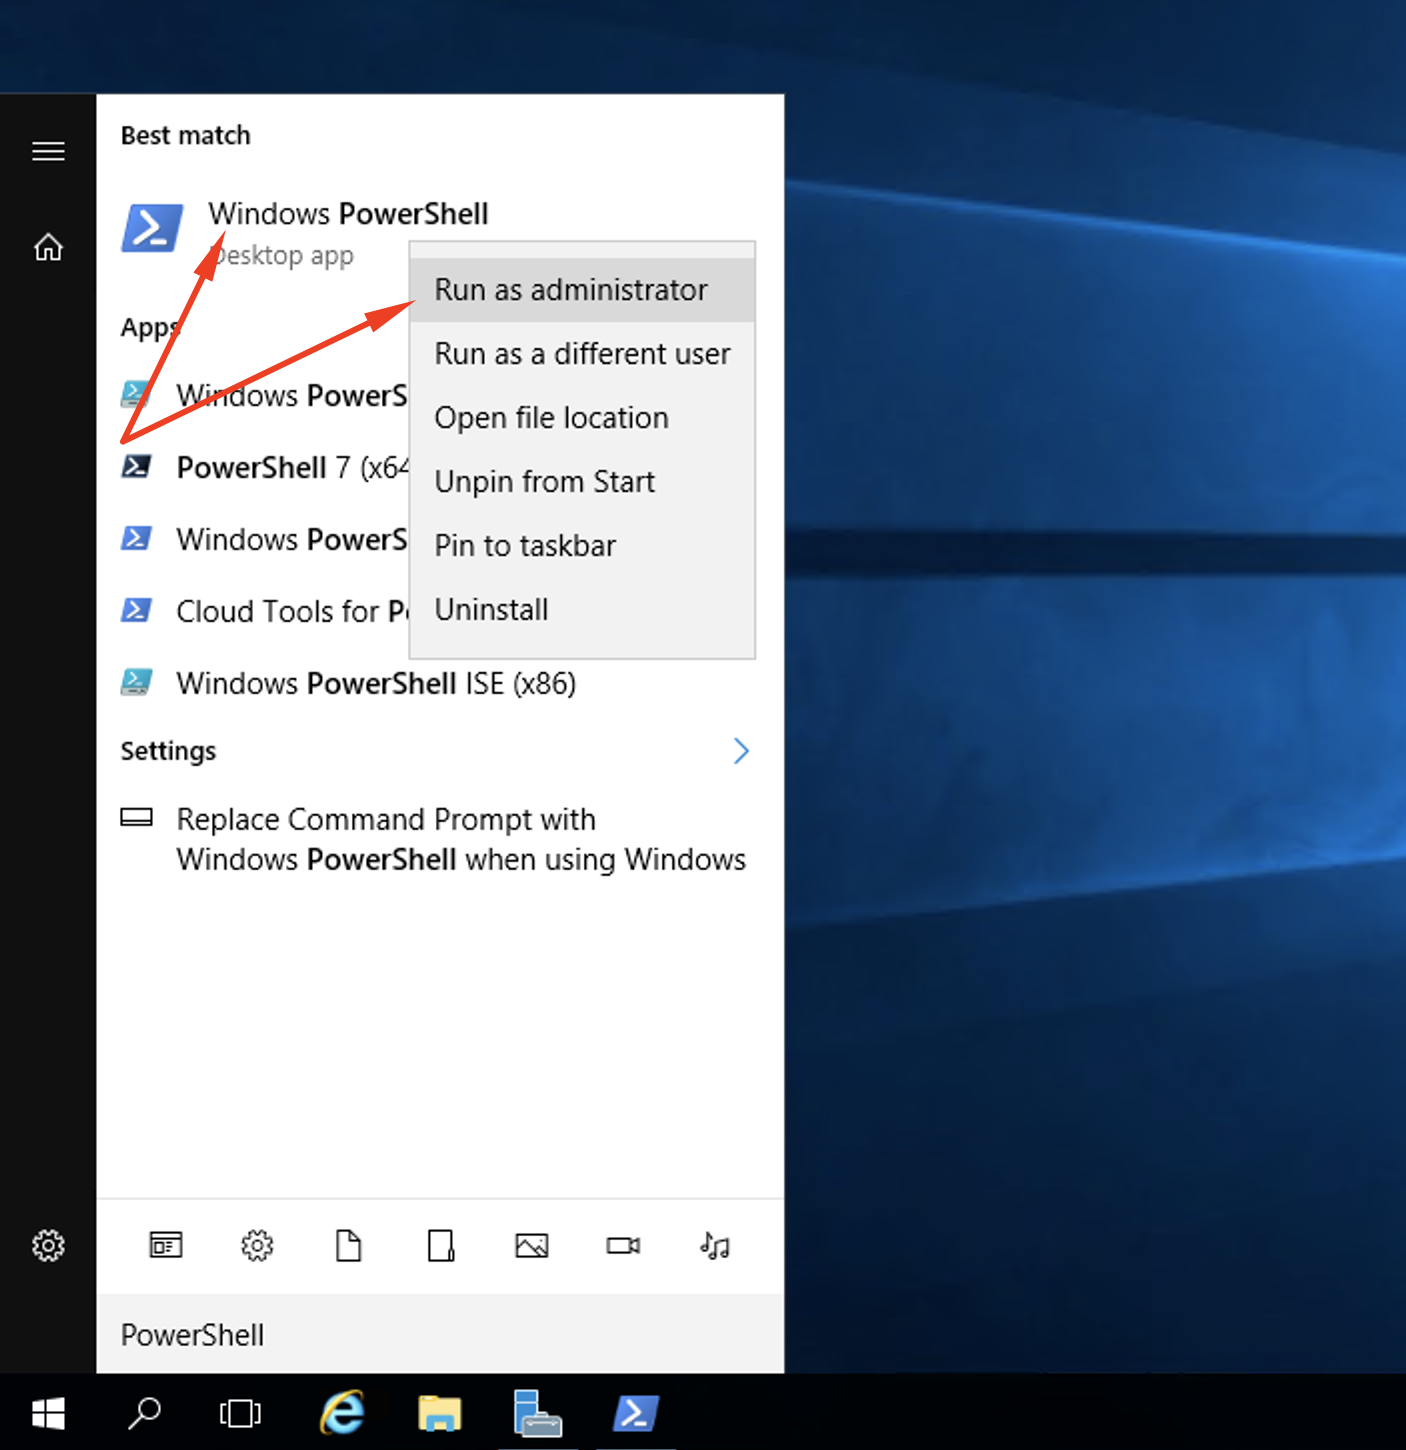
Step 1 : Open WEB01 and log in. Launch a new Powershell prompt using administrator settings and privileges.
Step 2 : This straightforward task requires only a specified role name and the launch of a suitable cmdlet. Yet, let's imagine for a minute we don't know which role to assign. In this scenario, we can use a different command to open up a list of all the accessible roles. Input this command to bring up the list:
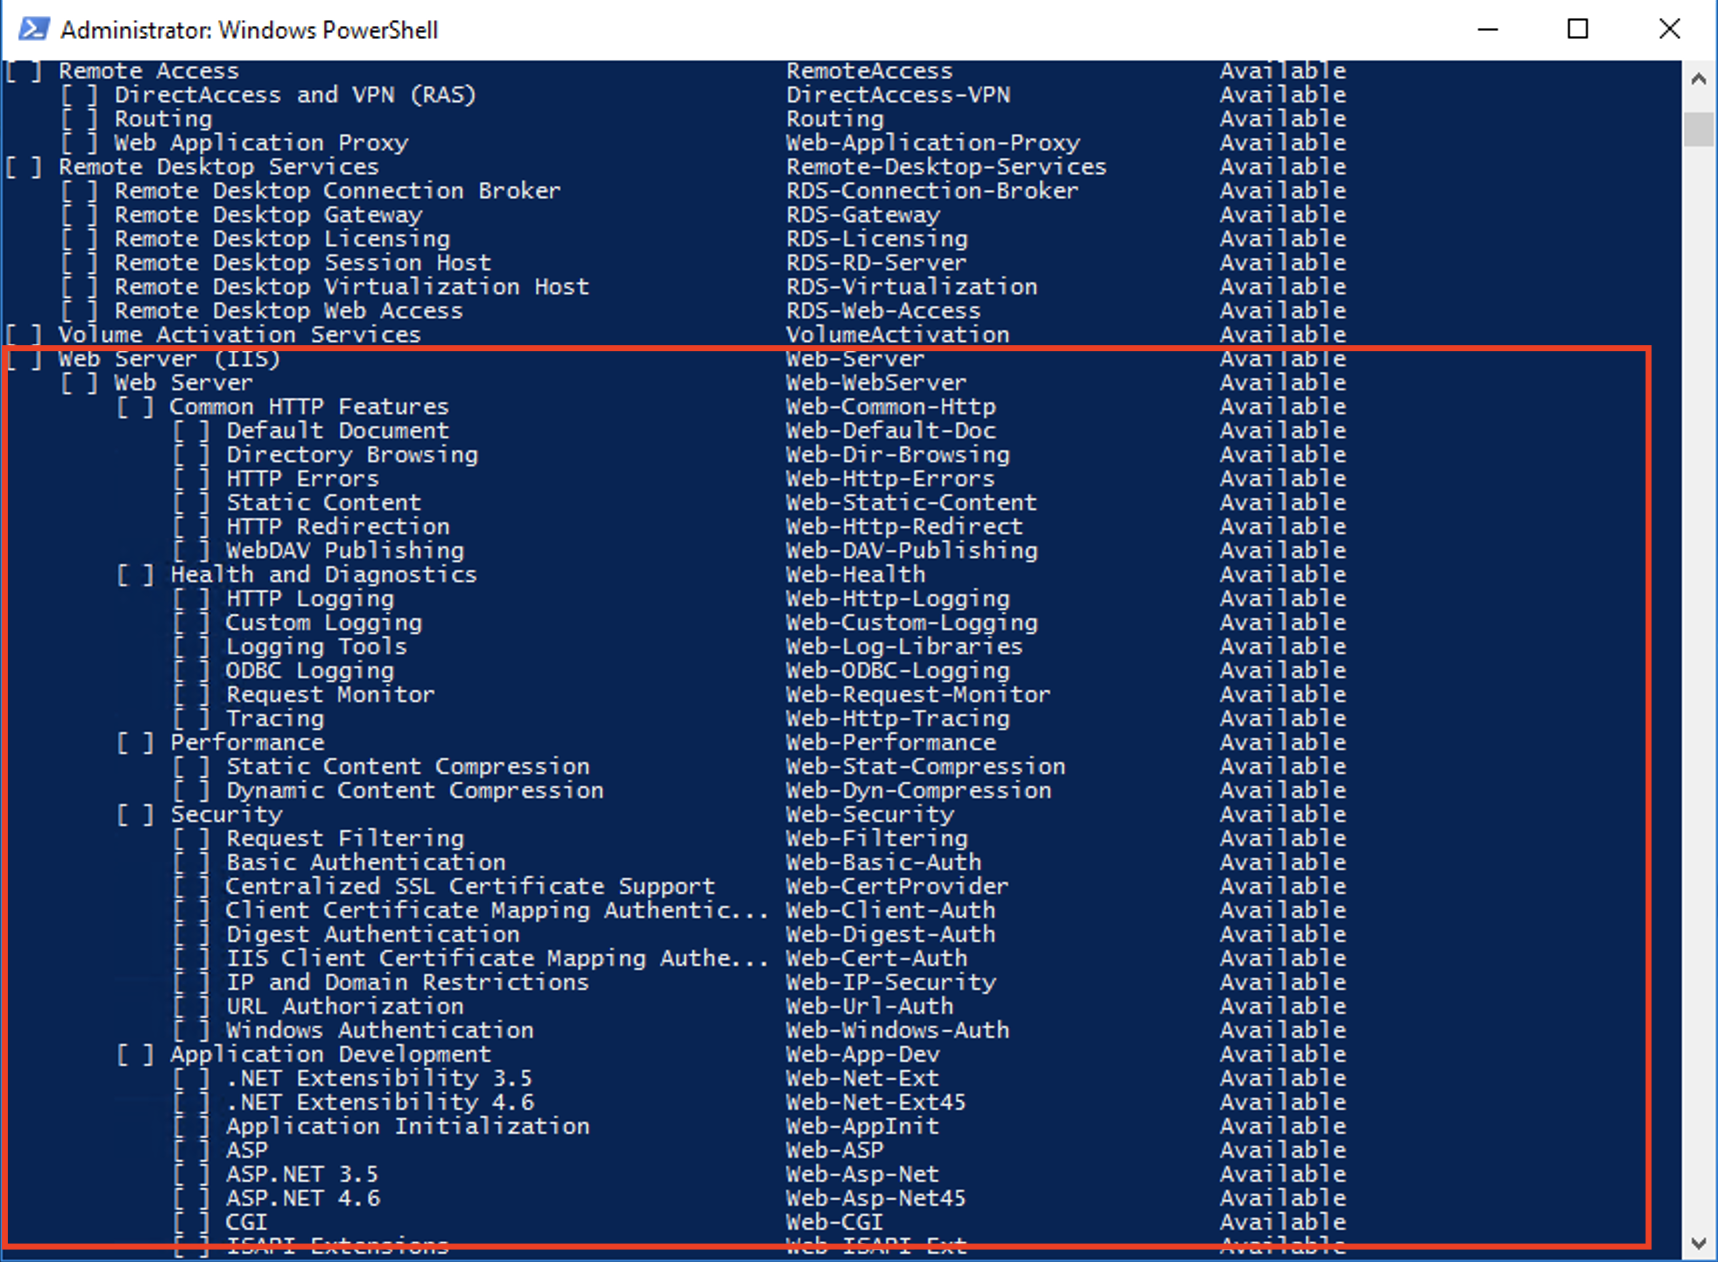
Get-WindowsFeature
Step 3 : Now, you should be looking at a complete list of all the roles and features available on your machine's server. Look for Web Server (IIS). We can see here its assigned name is 'Web-Server'. Keep a mental note of that. Take note of the role name 'Web-Common-Http' as well. There's no reason we can't launch several roles at once and this one will come in useful when we need to run common HTTP features.
Step 4 : Next, we're going to expand the PowerShell command by running these commands:
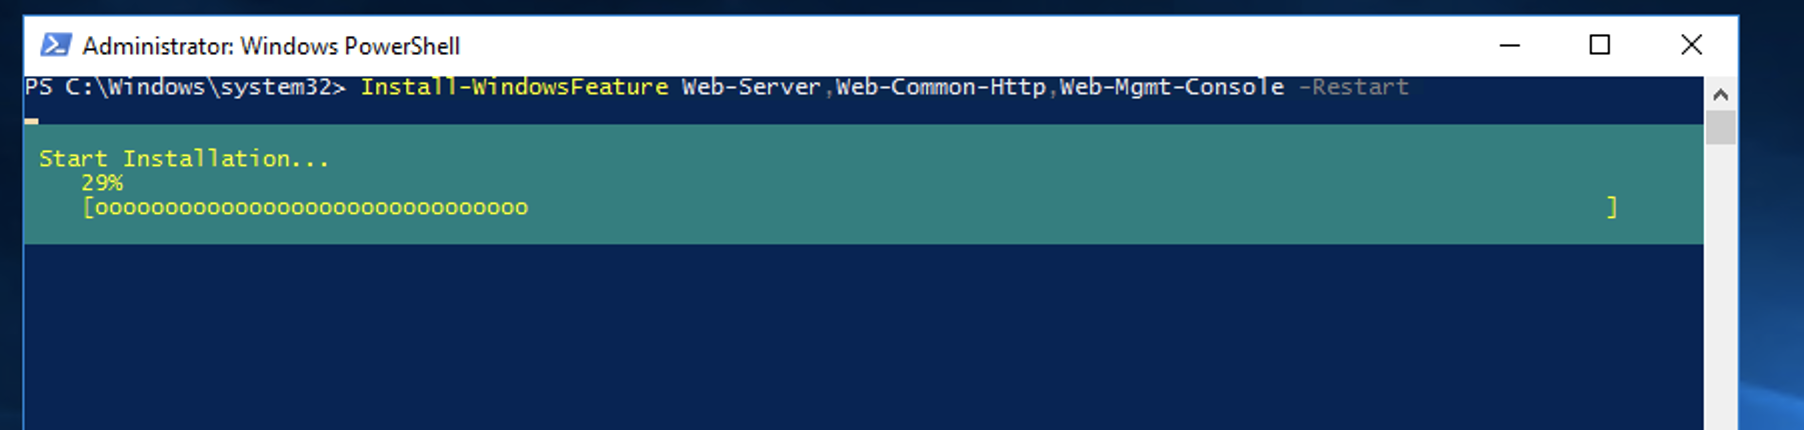
Install-WindowsFeature Web-Server,Web-Common-Http,Web-Mgmt-Console -Restart
Step 5 : If the commands are inputted correctly, you'll see this output:

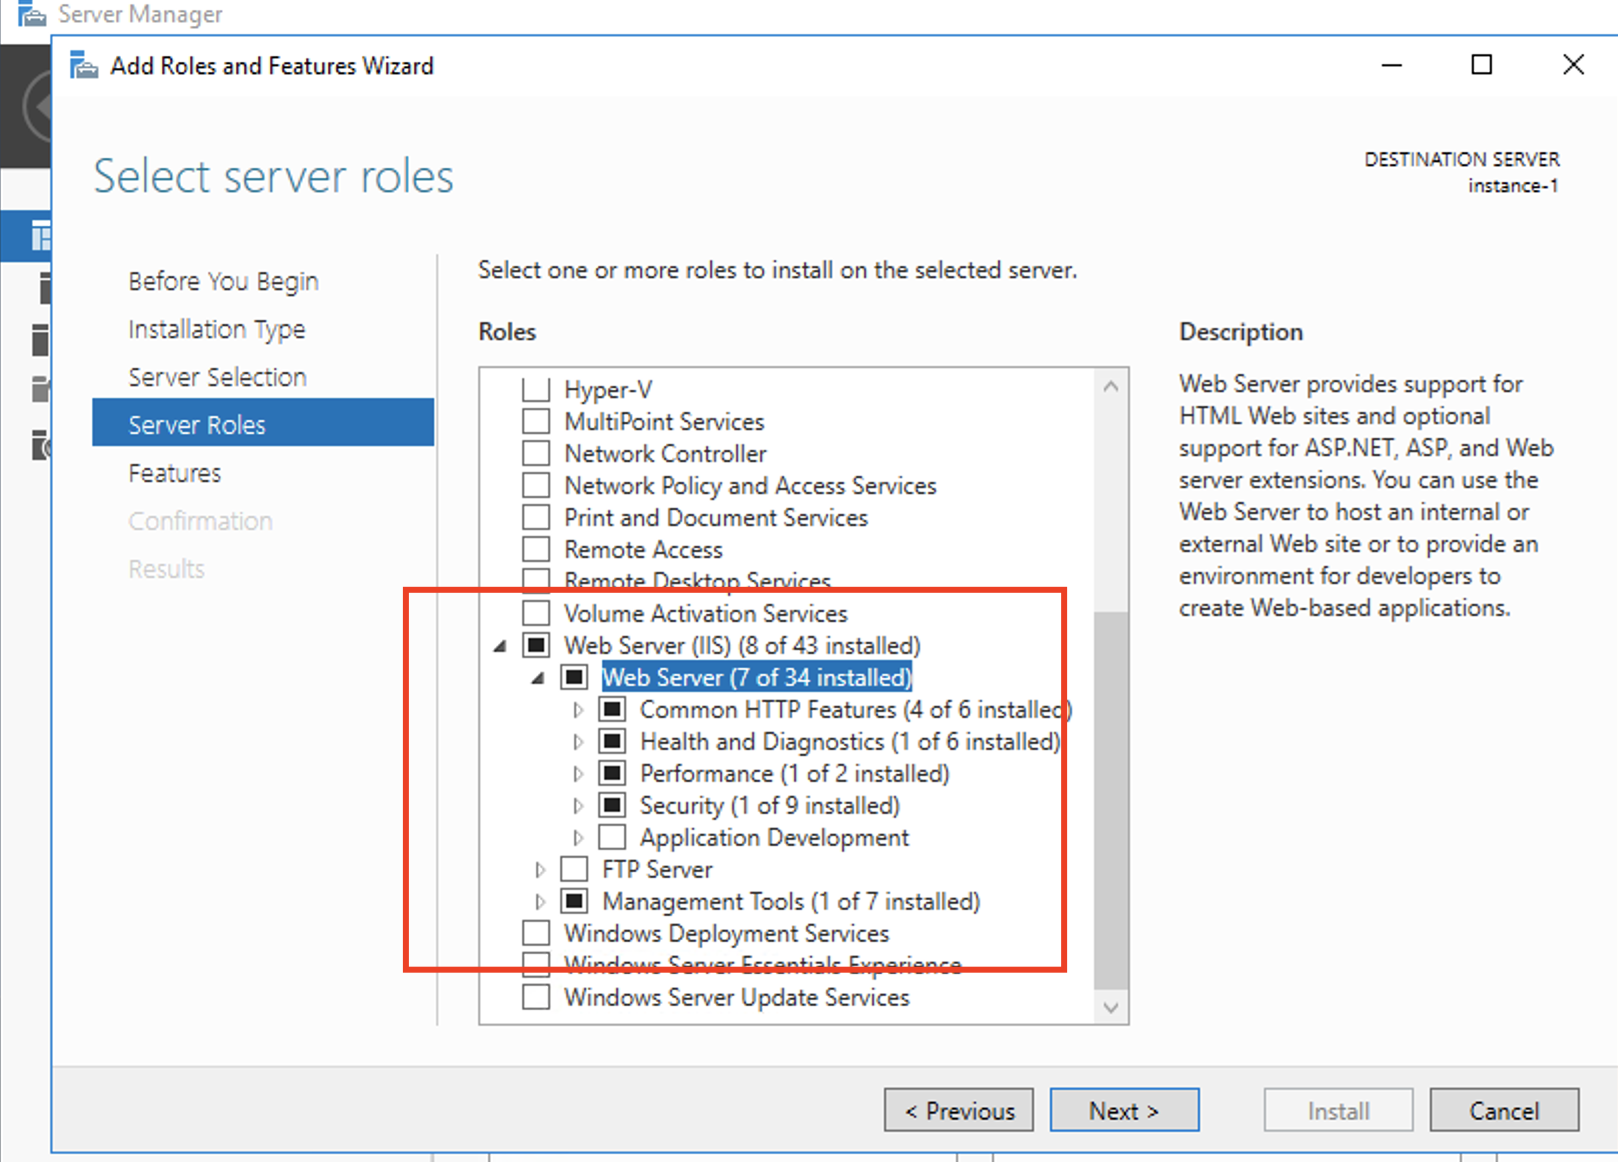
Step 6 : Now, your installation is complete. I recommend you take an extra minute to verify the PowerShell's launch. It never hurts to check things twice and can save you a lot of time and trouble in the long run. Open up the GUI to reveal the active roles and features. Scroll through the list to find the features you just added:
Step 7: From this point on, we can just use PowerShell and the Install-WindowsFeature cmdlet to assign any new roles and features to our machine's server. It's much quicker than trying to configure the same features using the graphical wizards.