How To Install PHP for Apache on Ubuntu Server 20.04
Jul 23, 2021
Follow these steps to serve dynamic contents with PHP
Step 1 : Add PHP PPA Repository
sudo apt -y install software-properties-common
sudo add-apt-repository ppa:ondrej/php
Step 2 : Update the apt package repository and install PHP 7.4
sudo apt update
sudo apt install php7.4
Step 3 : Check if PHP is properly installed and which version has been installed:
php -v
Step 4 : Run command to install additional packages:
sudo apt install php7.4-{mysql,curl,json,cgi,xsl,gd,common,xml,zip,soap,bcmath}
Step 5 : Create index.php under the html directory of our site:
cd /var/www/example.com/html
echo '<?php echo phpinfo(); ?>' > index.php
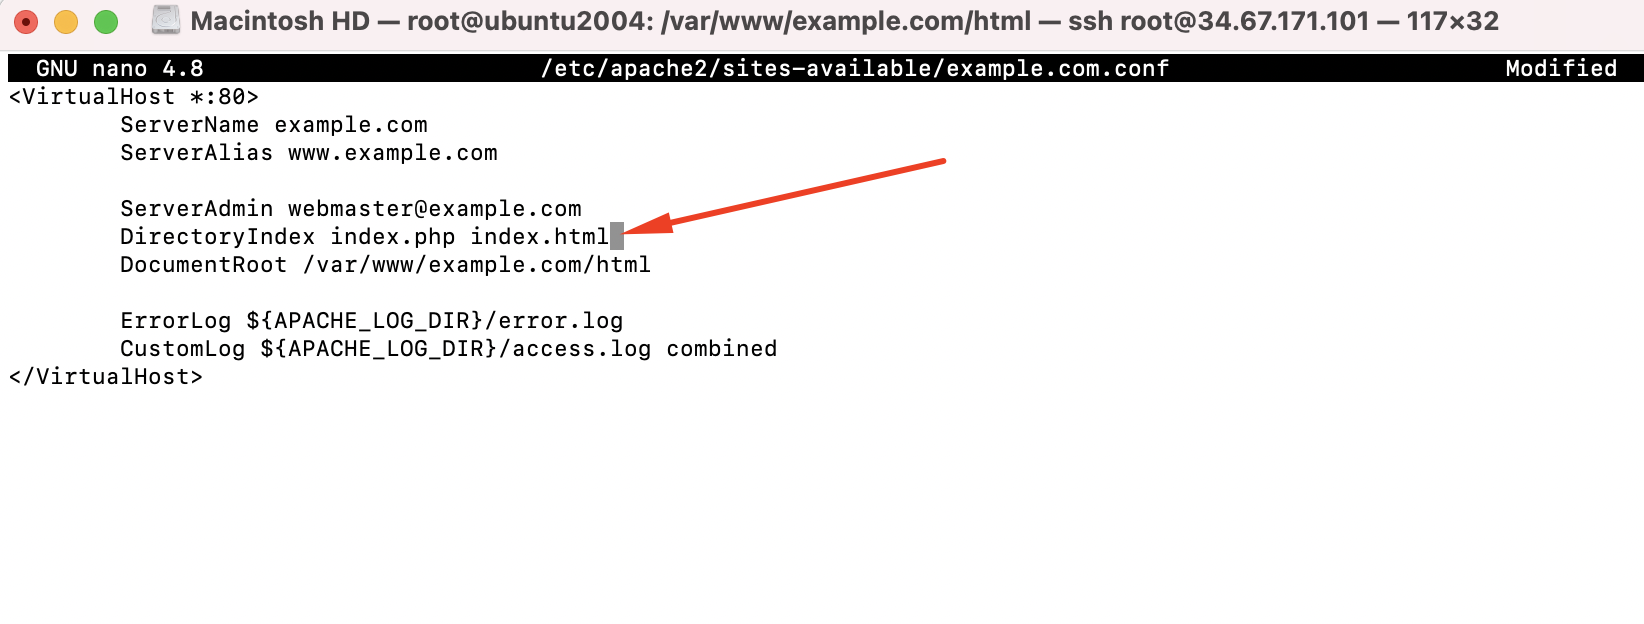
Step 6 : Open example.com.conf from sites-available.
sudo nano /etc/apache2/sites-available/example.com.conf
Step 7 : Add the following line under the VirtualHost directive
DirectoryIndex index.php index.html
Step 8 : Save the changes and reload Apache
sudo service apache2 reload
Step 9 : Now, access your site with your browser, and you should see a page with information regarding the installed PHP
Recommended
Apr 04, 2024
Apr 04, 2024
Apr 03, 2024
Apr 03, 2024
Apr 03, 2024
Apr 01, 2024
Apr 01, 2024
Apr 01, 2024
Apr 01, 2024
Mar 31, 2024
Mar 30, 2024
Mar 30, 2024
Mar 30, 2024