If you want to run an application on Kubernetes within a single zone or region, you have to create and upgrade the cluster quickly. For this to happen, you have to care less about the availability and the placements of clusters closer to the likely users.
Run your application on the zonal Kubernetes cluster. From one single control plane, you will manage the Kubernetes cluster. It is hence quite easy to start out in. Follow these steps to achieve that end:
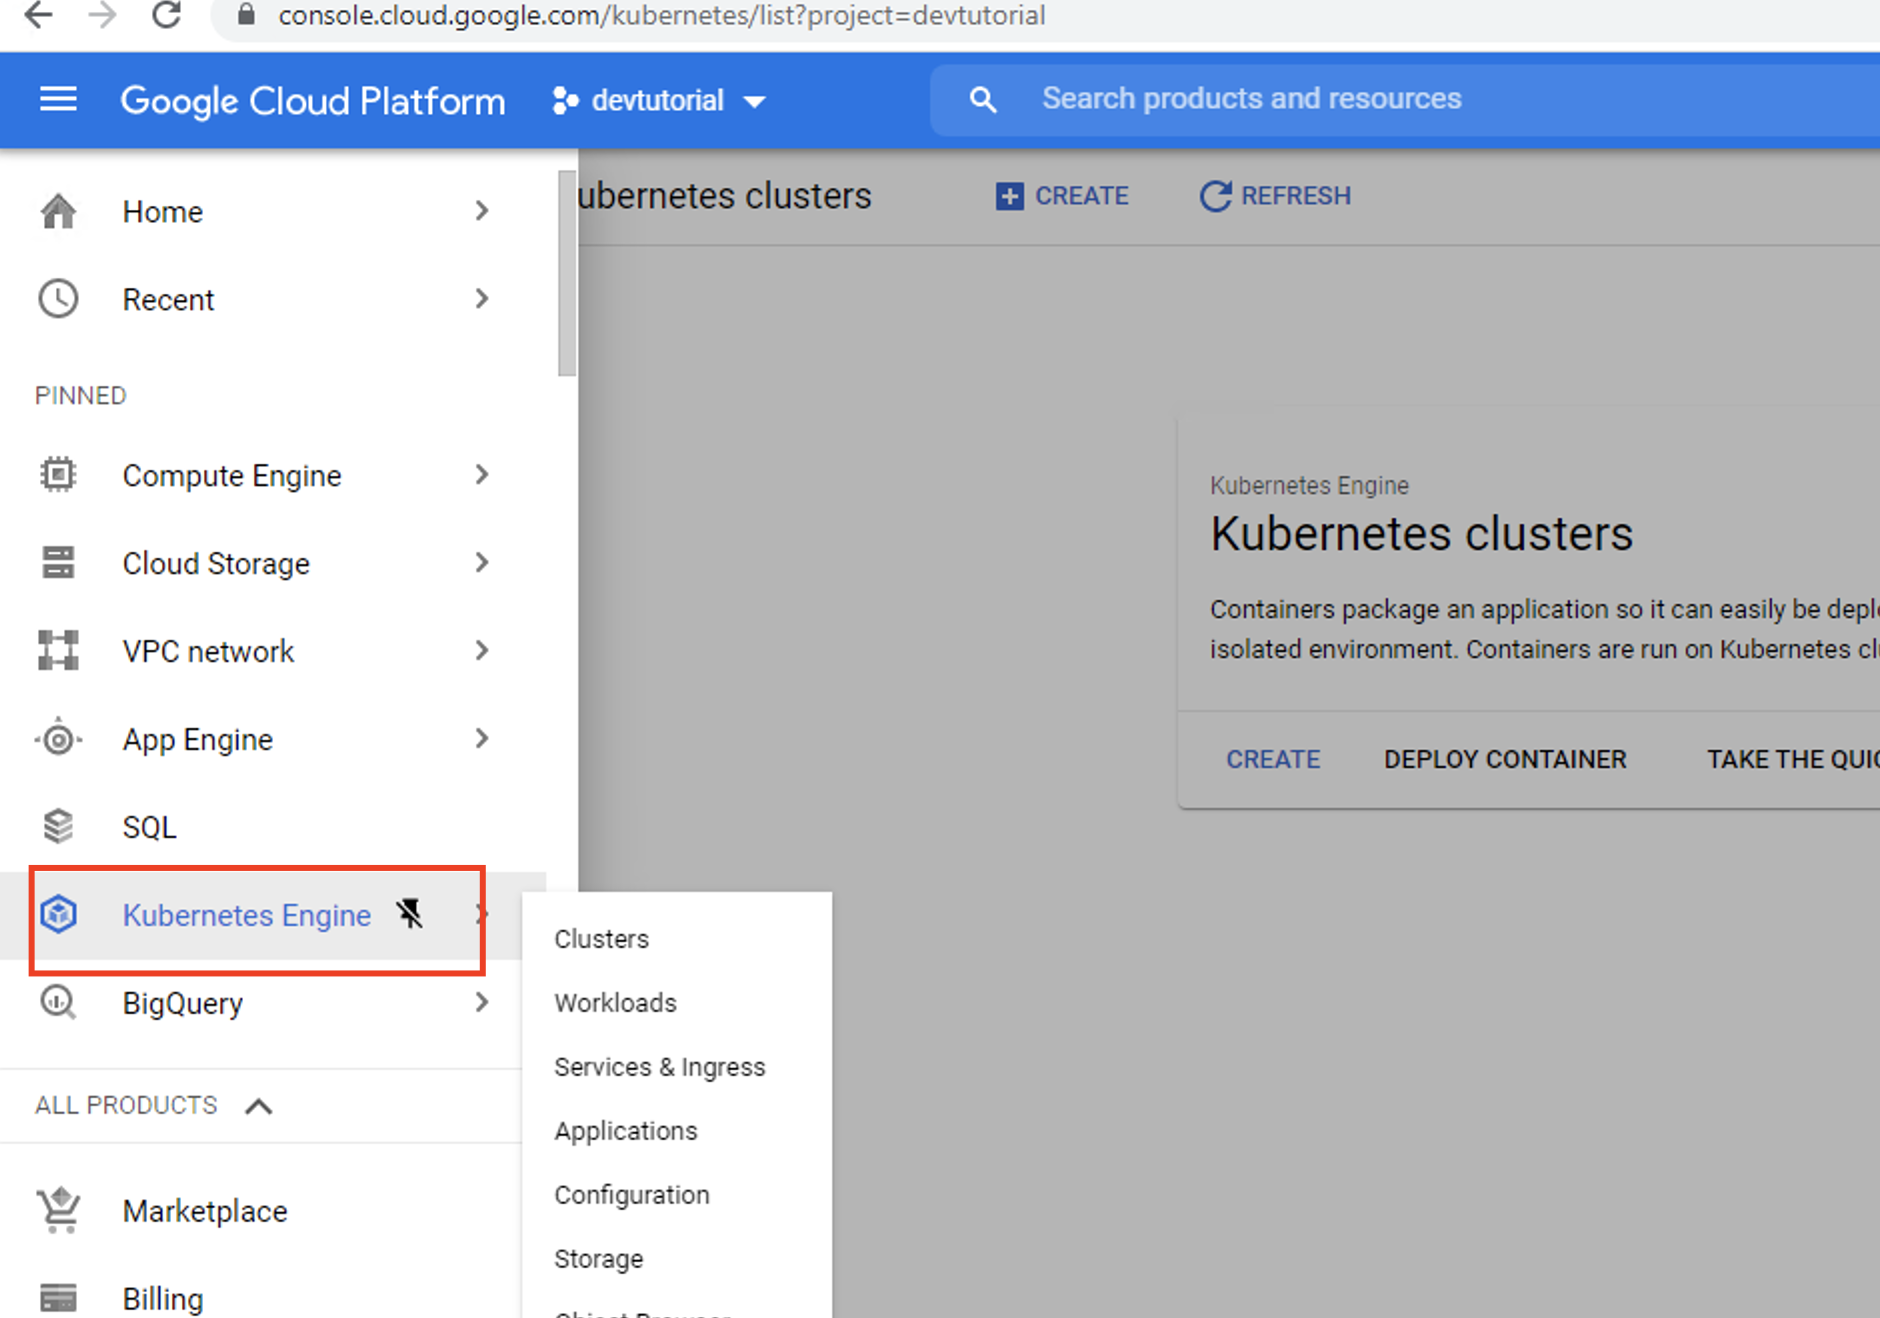
Step 1 : Sign in to the console of the Google Cloud
Step 2 : Navigate to Compute in the main menu
Step 3 : Click Kubernetes Engine
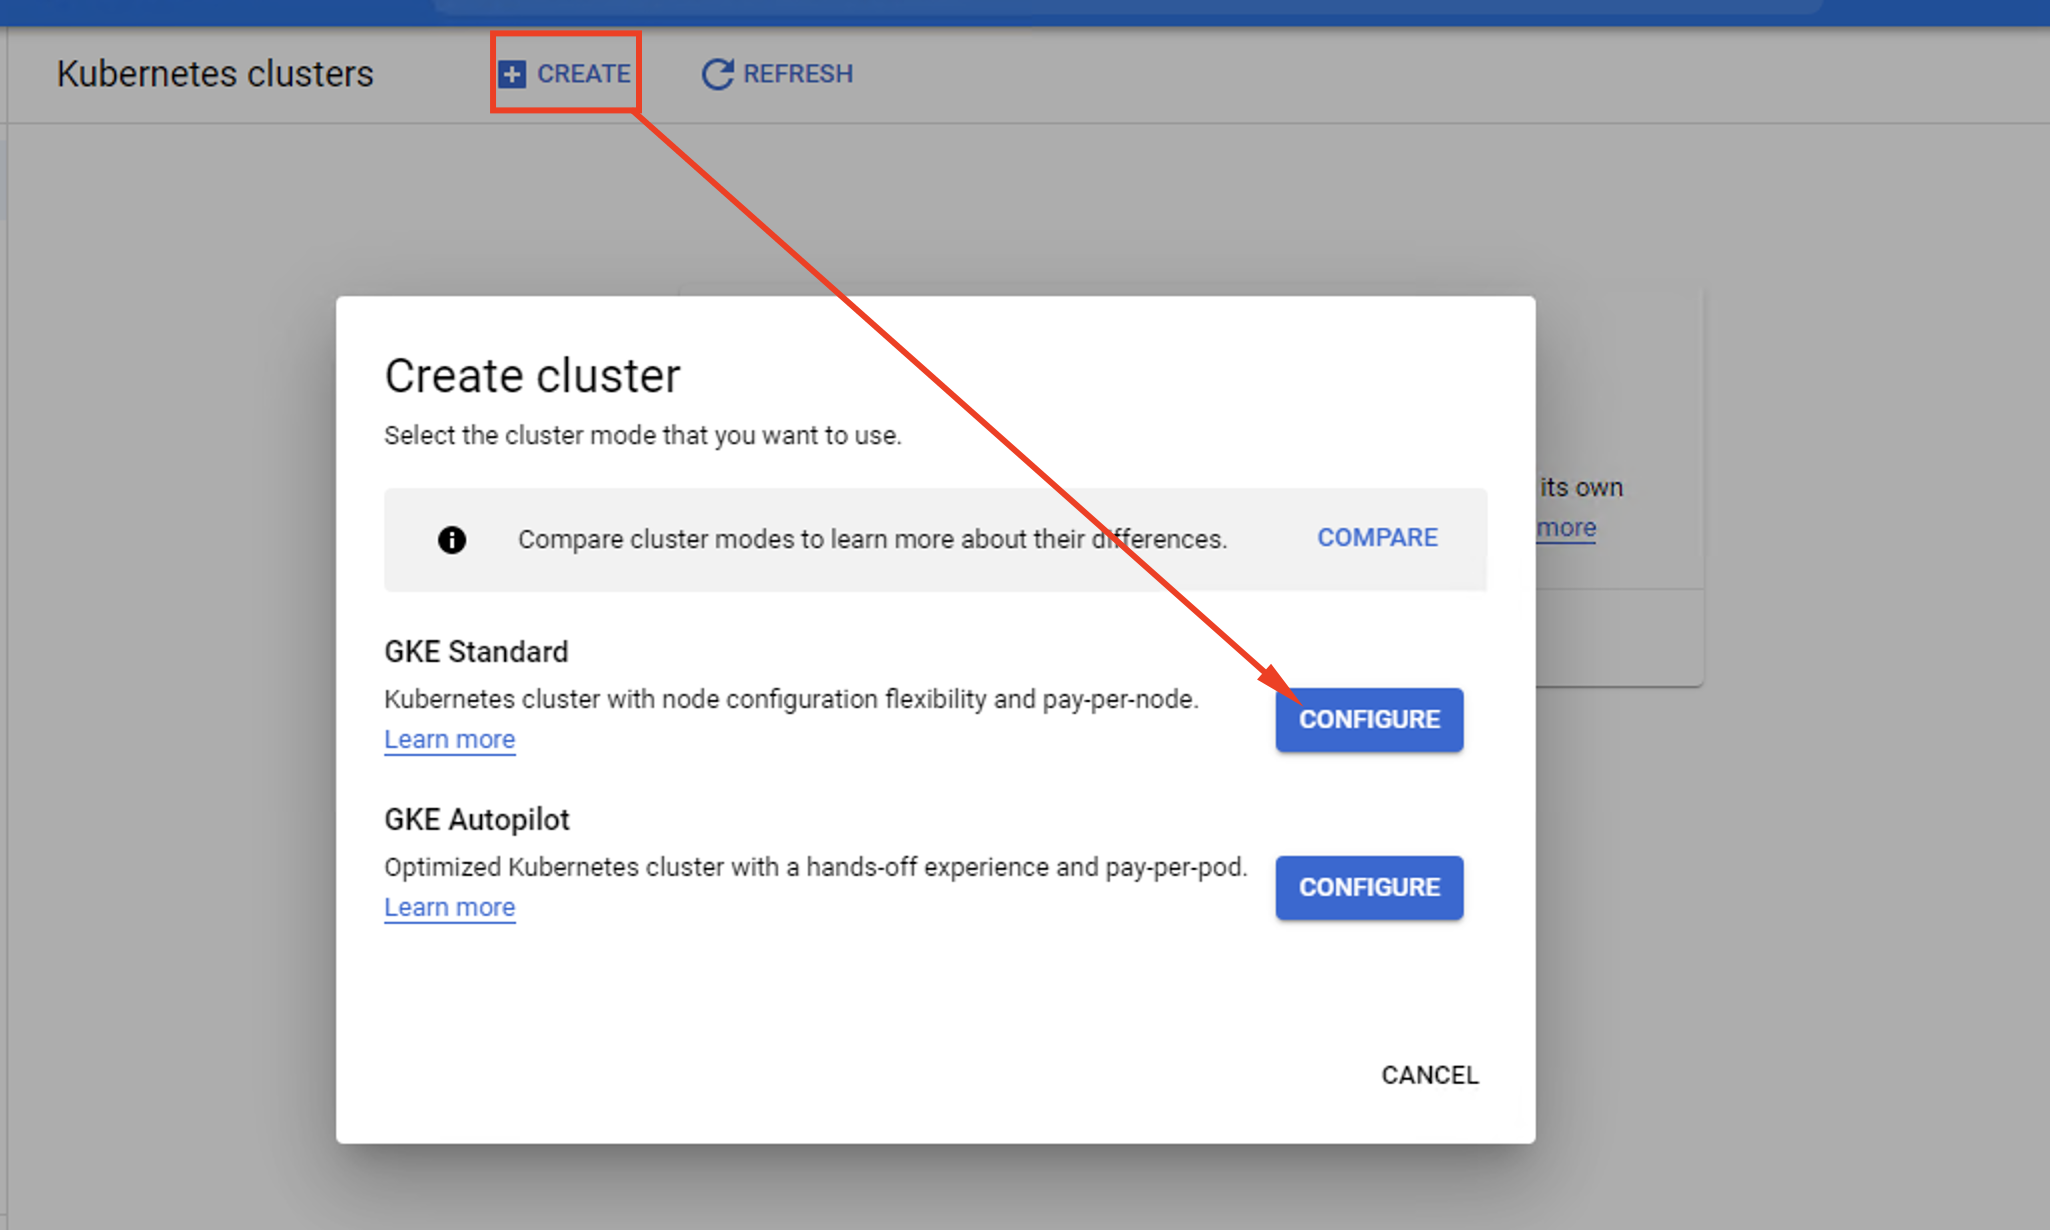
Step 4 : Click create button at the top portion of the screen
Step 5 : Click configure right next to the standard option
Step 6 : In the cluster basics section:
- Select a name for your cluster
- In Location type, choose zonal
- In Zone, select any zone of your preference
Step 7 : Leave the remaining settings untouched
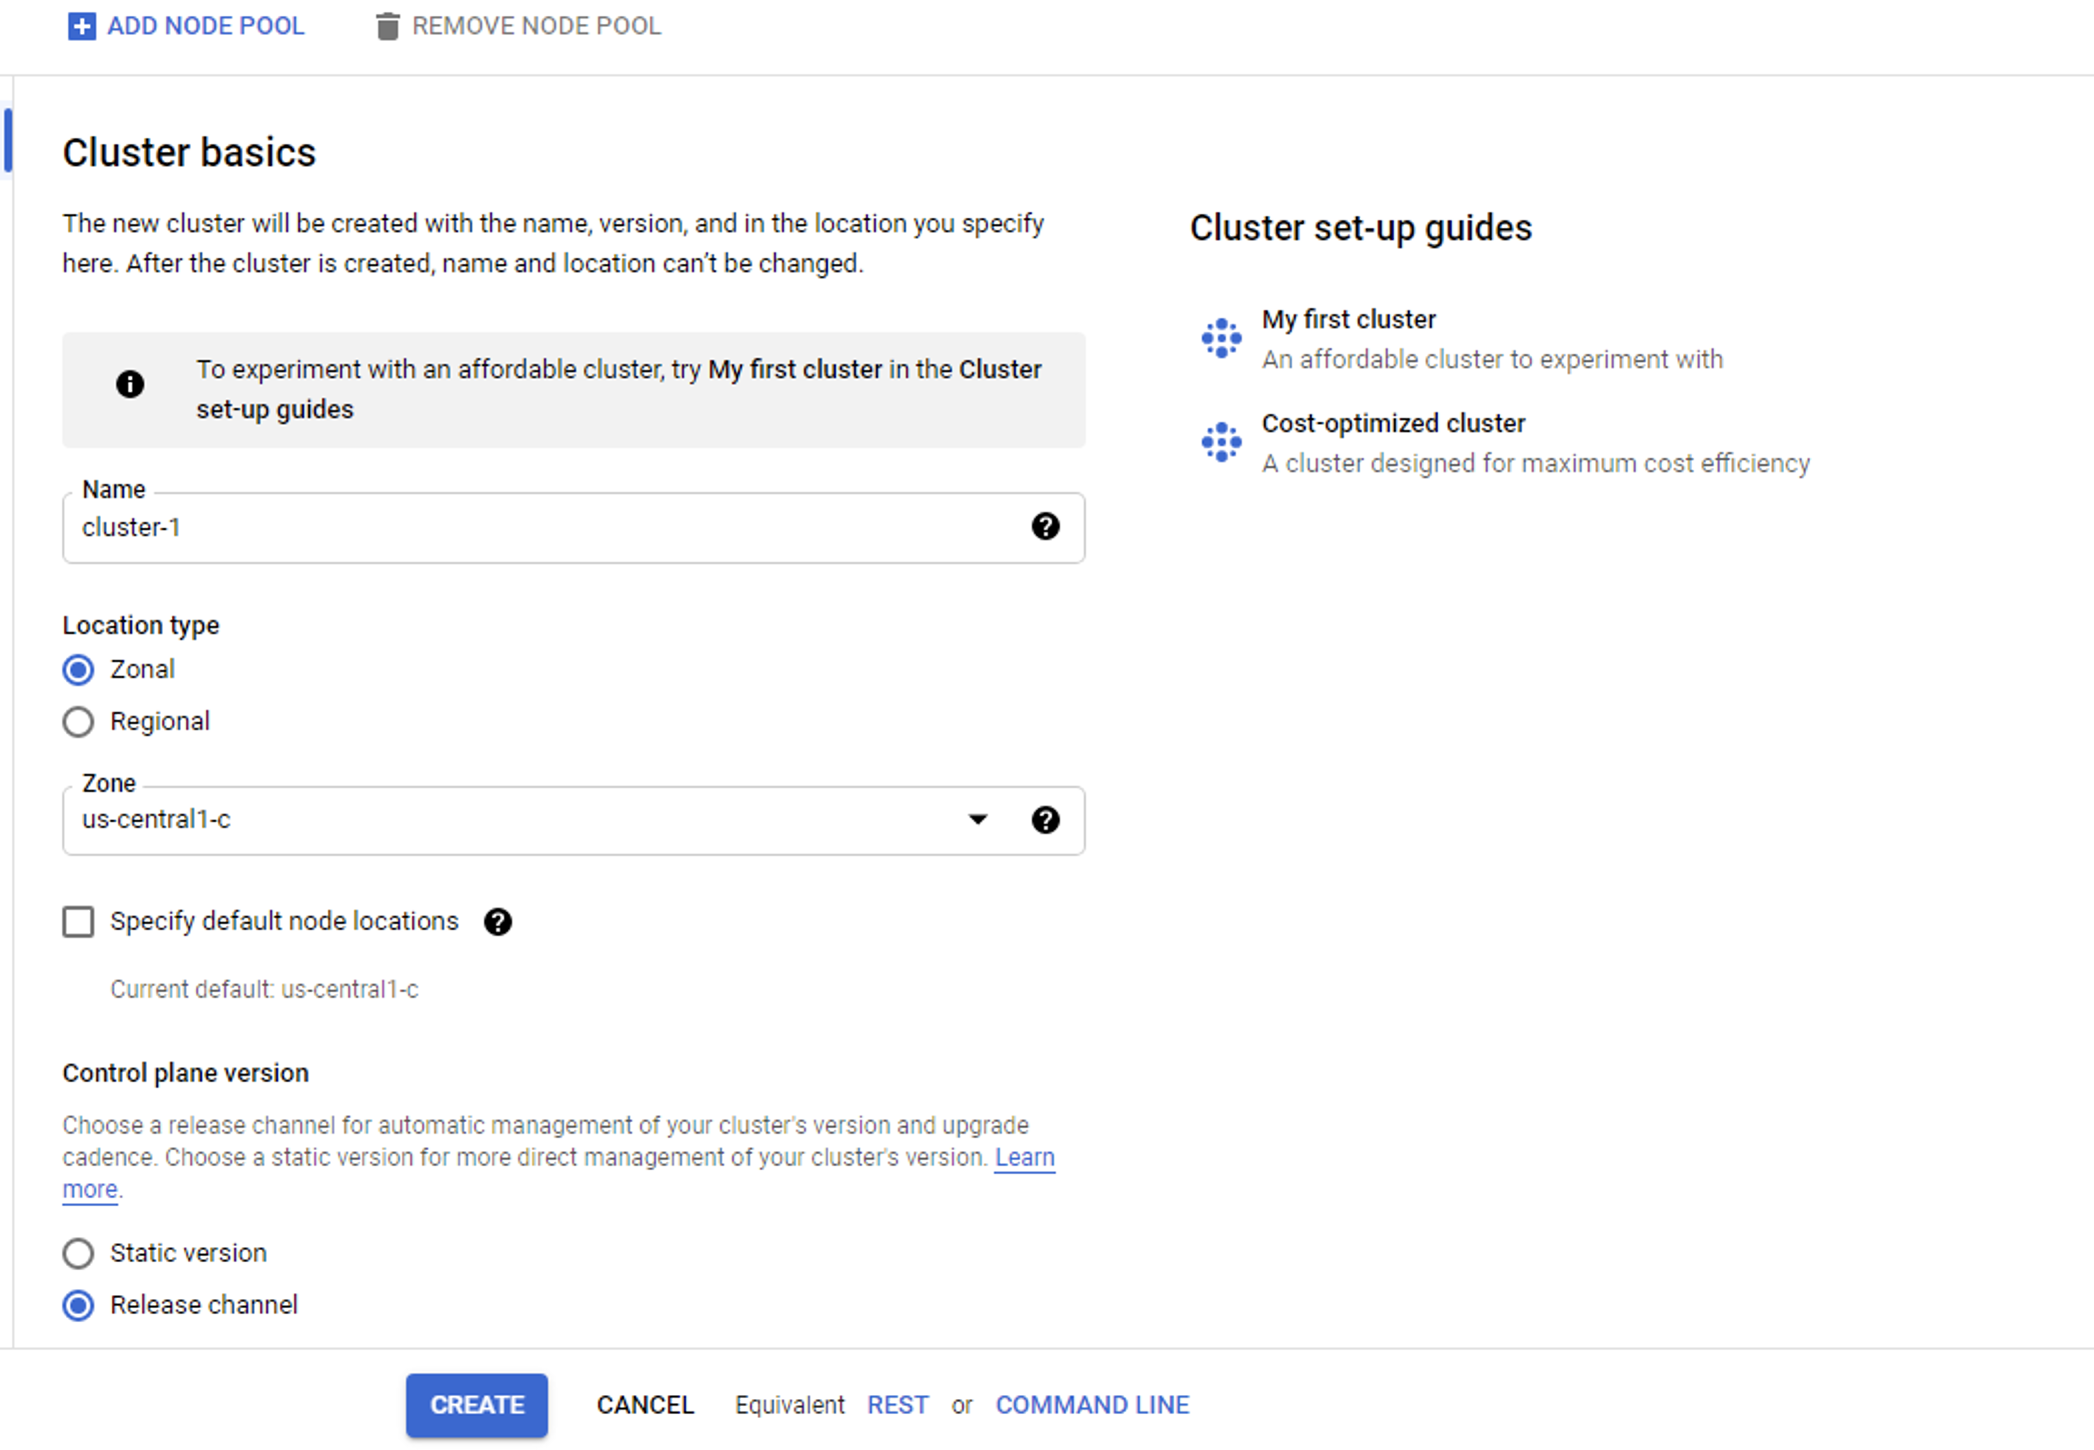
Step 8 : In the navigation pane at the left, skim the many alternative settings you may also set. Leave these options untouched at least for now.
Step 9 : Click create at the base of the screen
Step 10 : The system shall navigate you to the cluster screen from whence you shall behold the chosen cluster spinning up. This process may take more than a minute to implement fully.
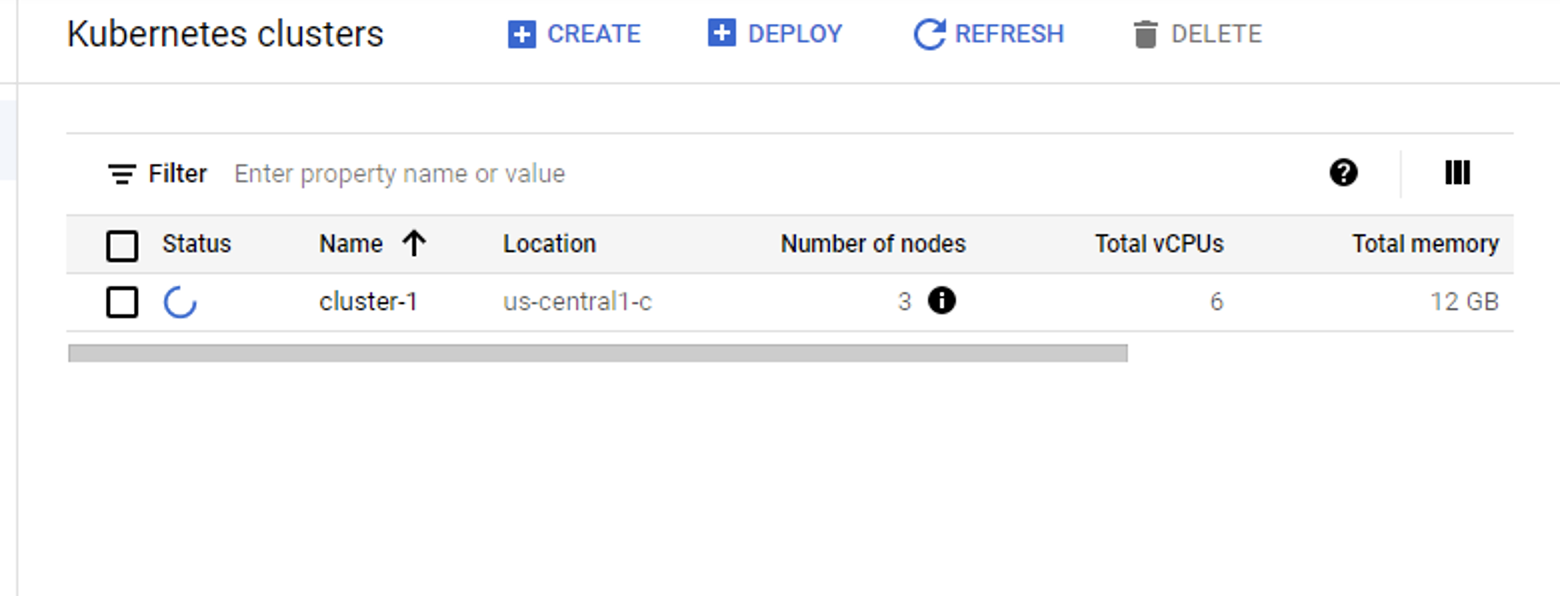
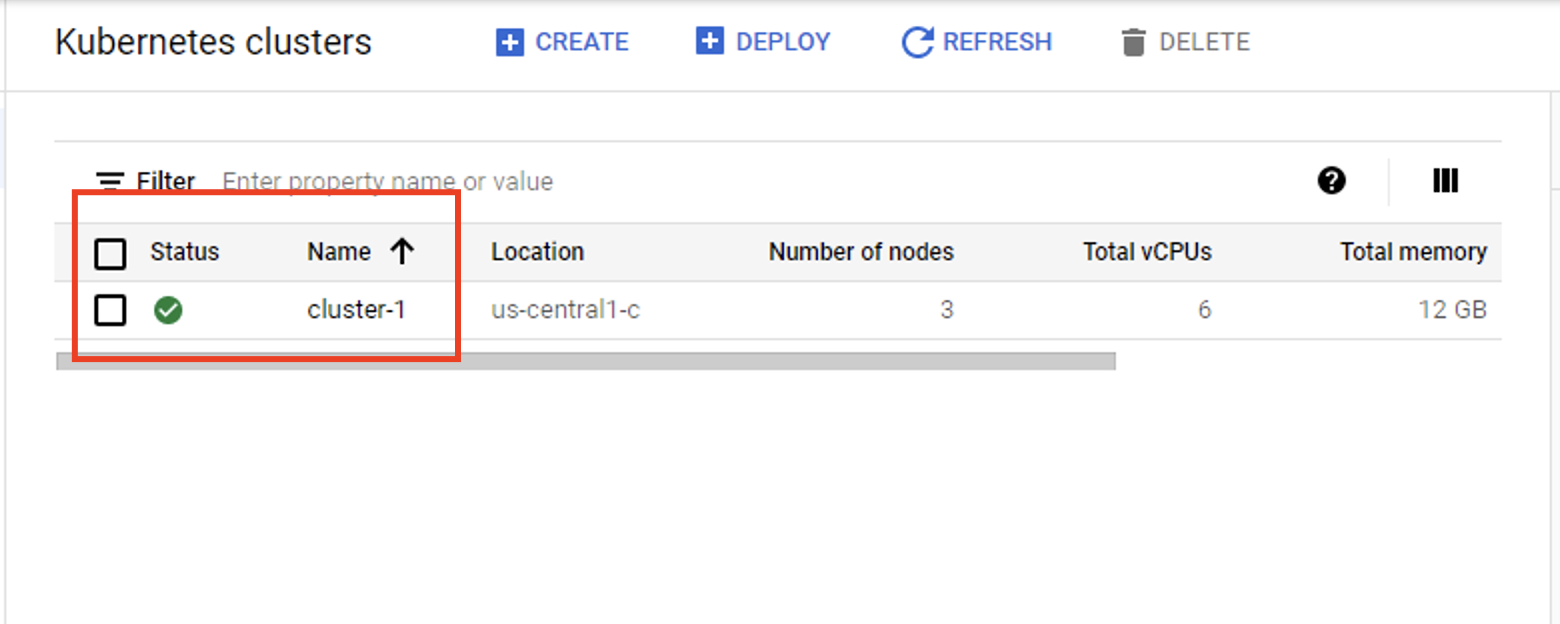
Step 11 : As soon as it is fully implemented a checkmark icon pops up right next to the name of your chosen cluster. The cluster is now ready for accepting the necessary applications.
.
In this post, you utilized the Google Cloud console to generate a zonal Kubernetes cluster using the GKE. Generating this zonal GKE cluster is a fast and simple manner of comprehending the Kubernetes compared to launching a self-managed Kubernetes cluster.