We will install Django and all the components that are needed for Nginx and Django to be able to communicate.
Install the Packages
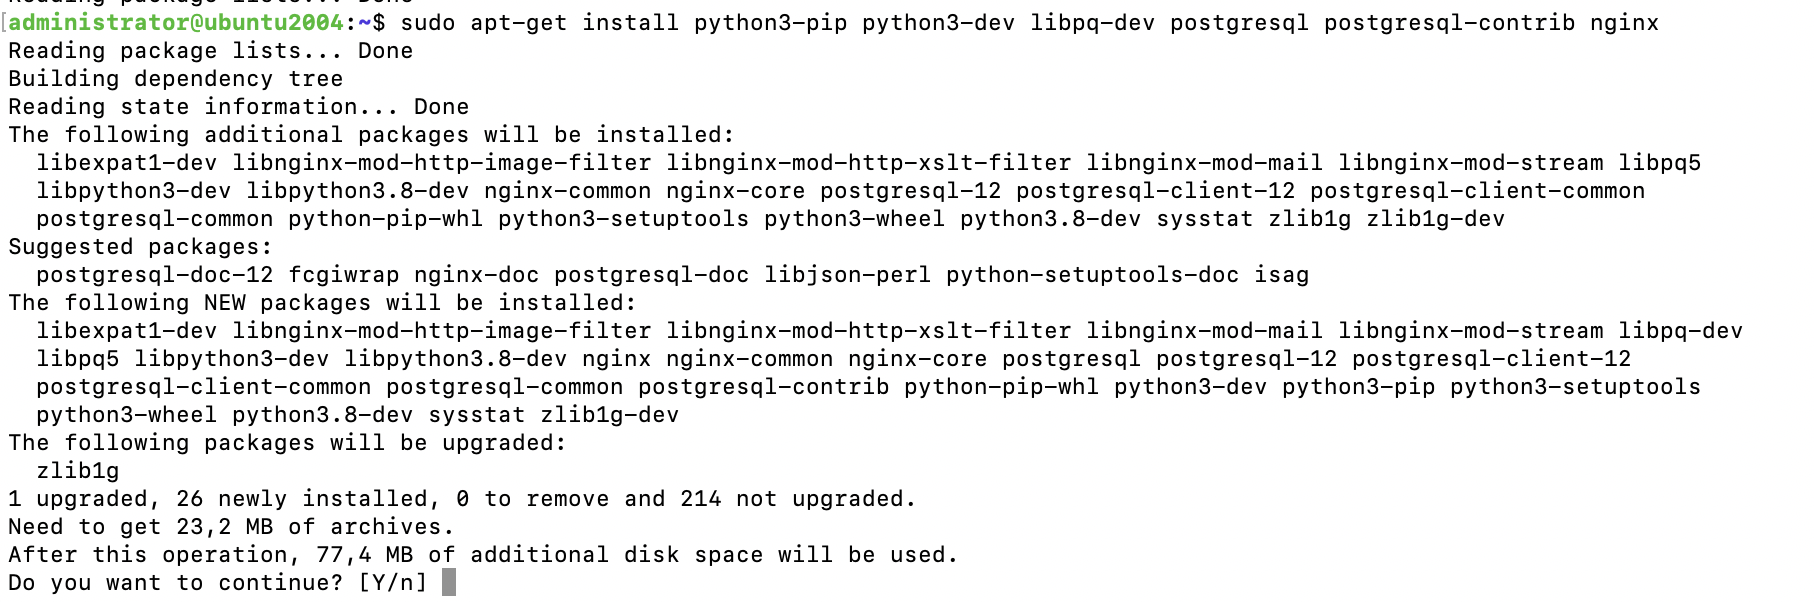
Step 1 : Install the Packages from the Ubuntu repositories
Setting up Django
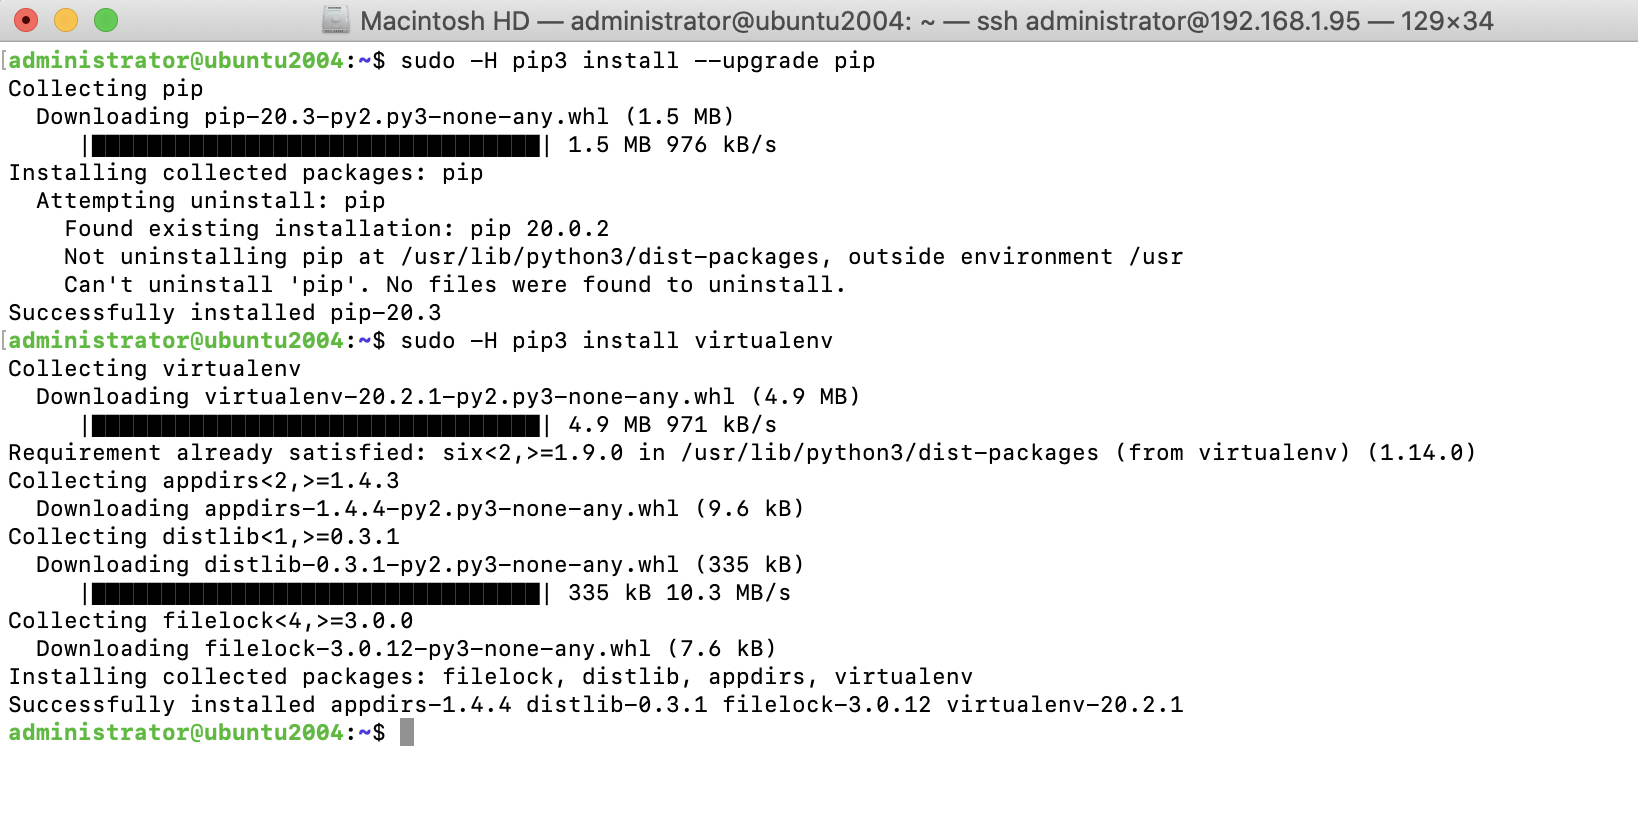
Step 2 : Upgrade pip and install the package by typing
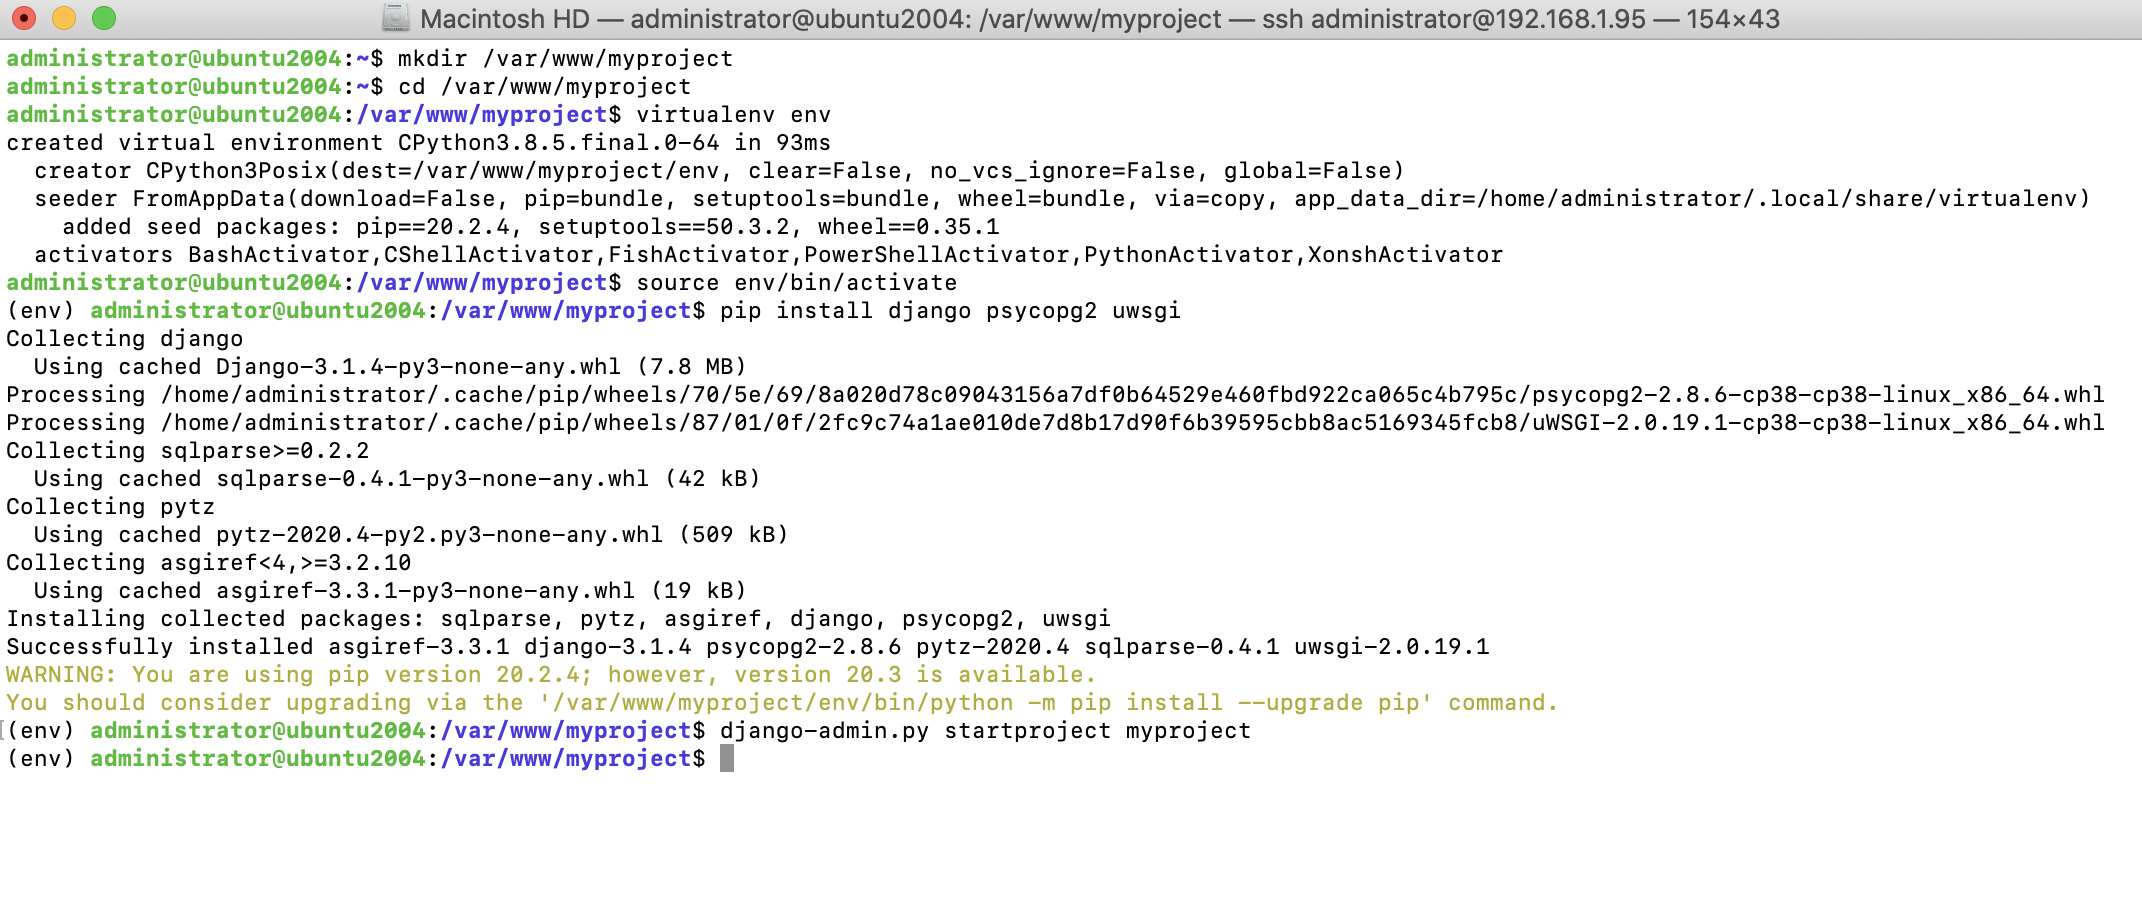
Step 3 : Create a new Django Project
Using PostgreSQL
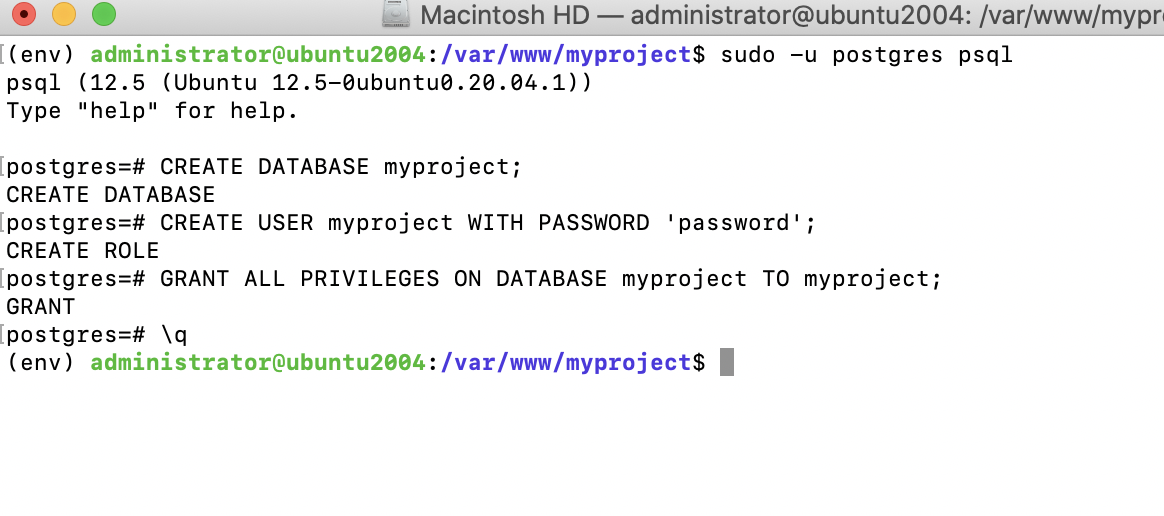
Step 4 :Let's create a PostgreSQL user a new database with the following command:
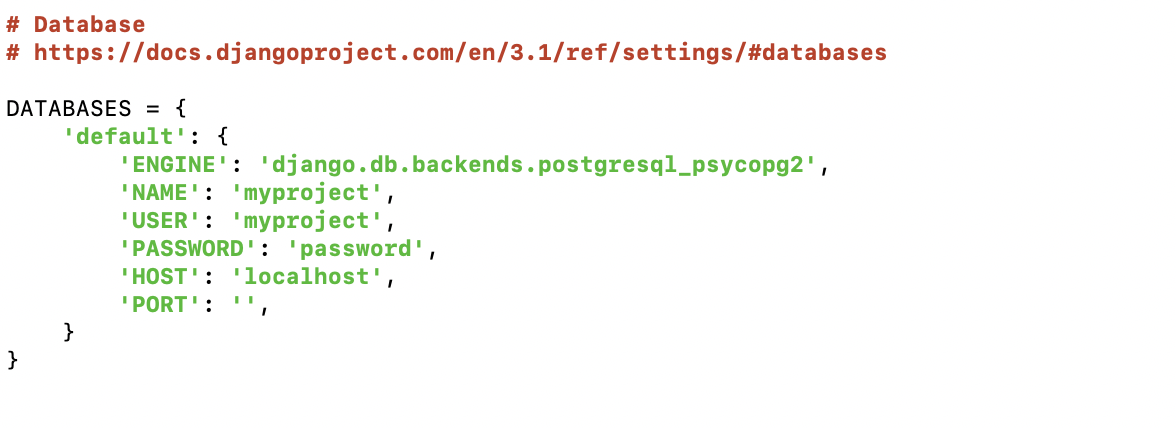
Step 5 : Then, edit the settings.py file and modify the DATABASES setting to make it look as follows:
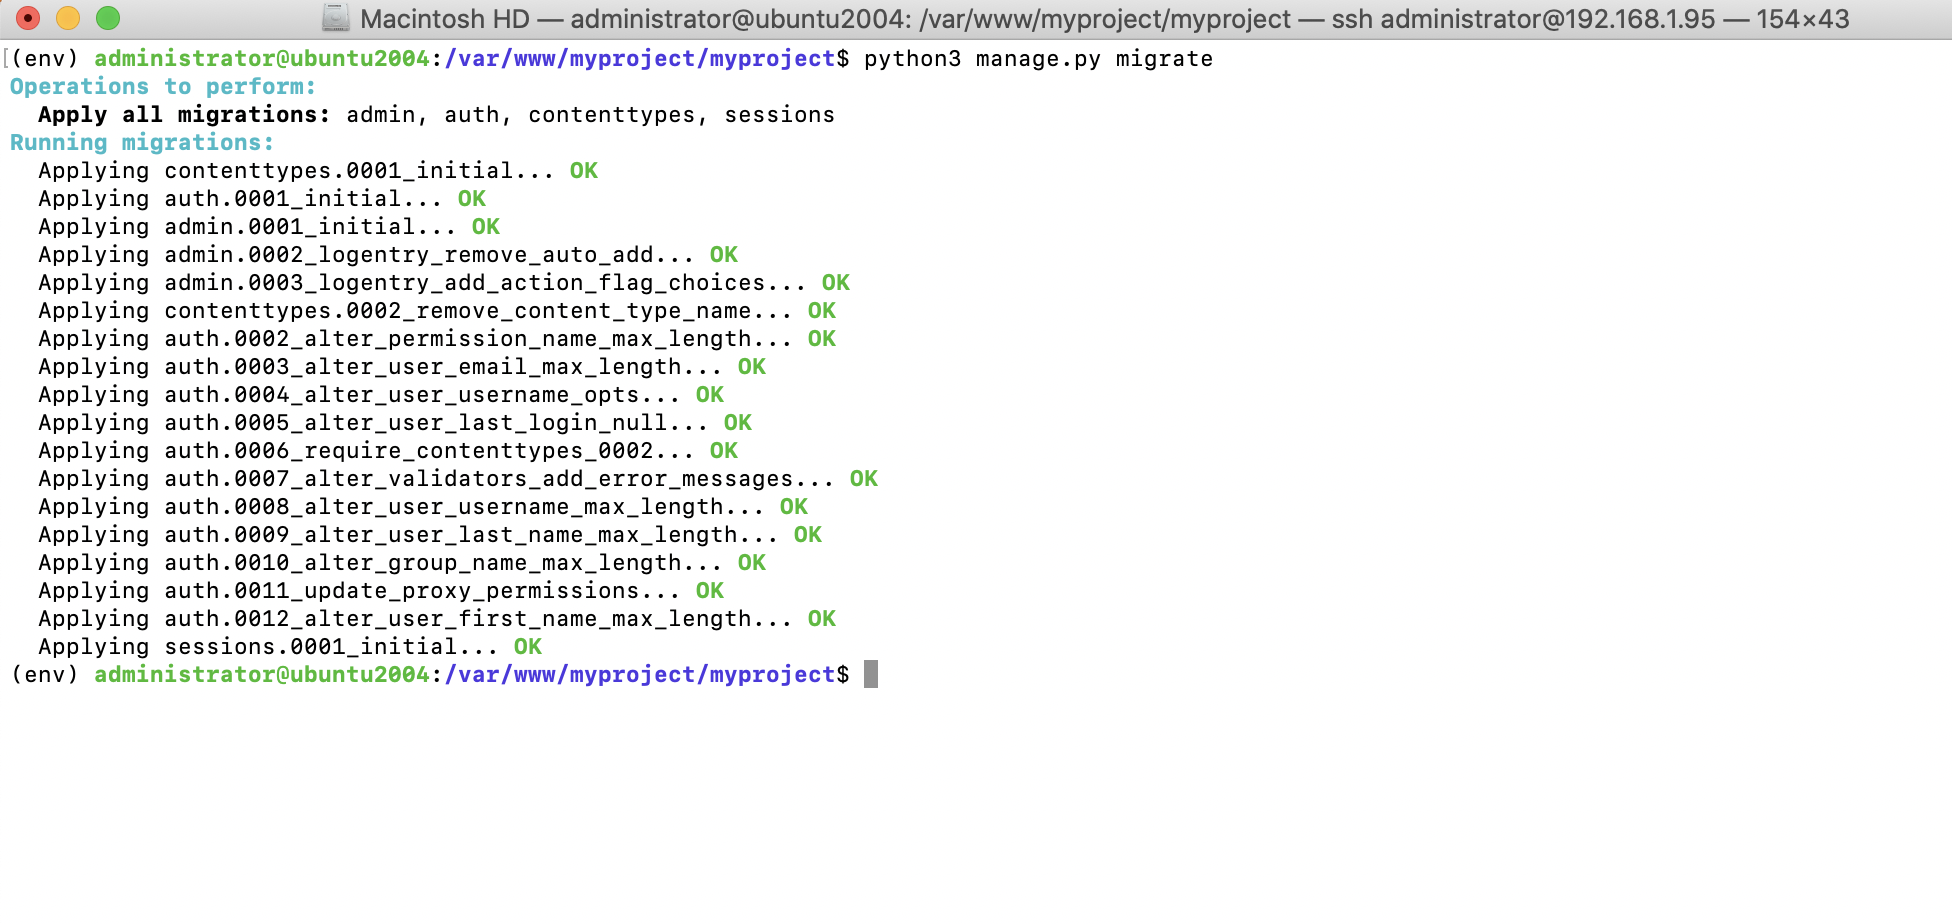
Step 6 : The new database is empty. Run the following command to apply all database migrations:
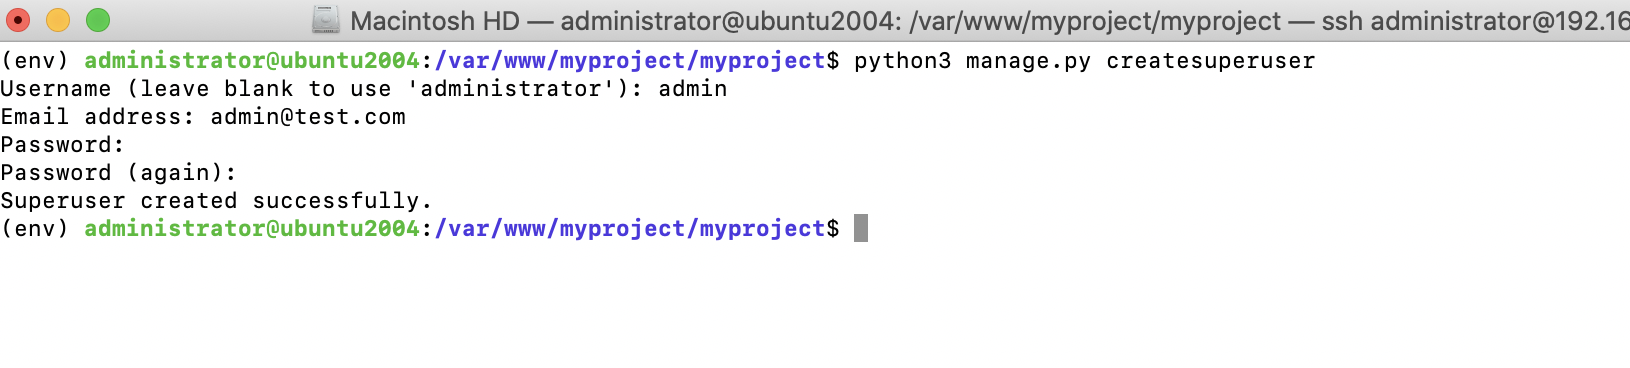
Step 7 : Finally, create a superuser with the following command:
Test your project
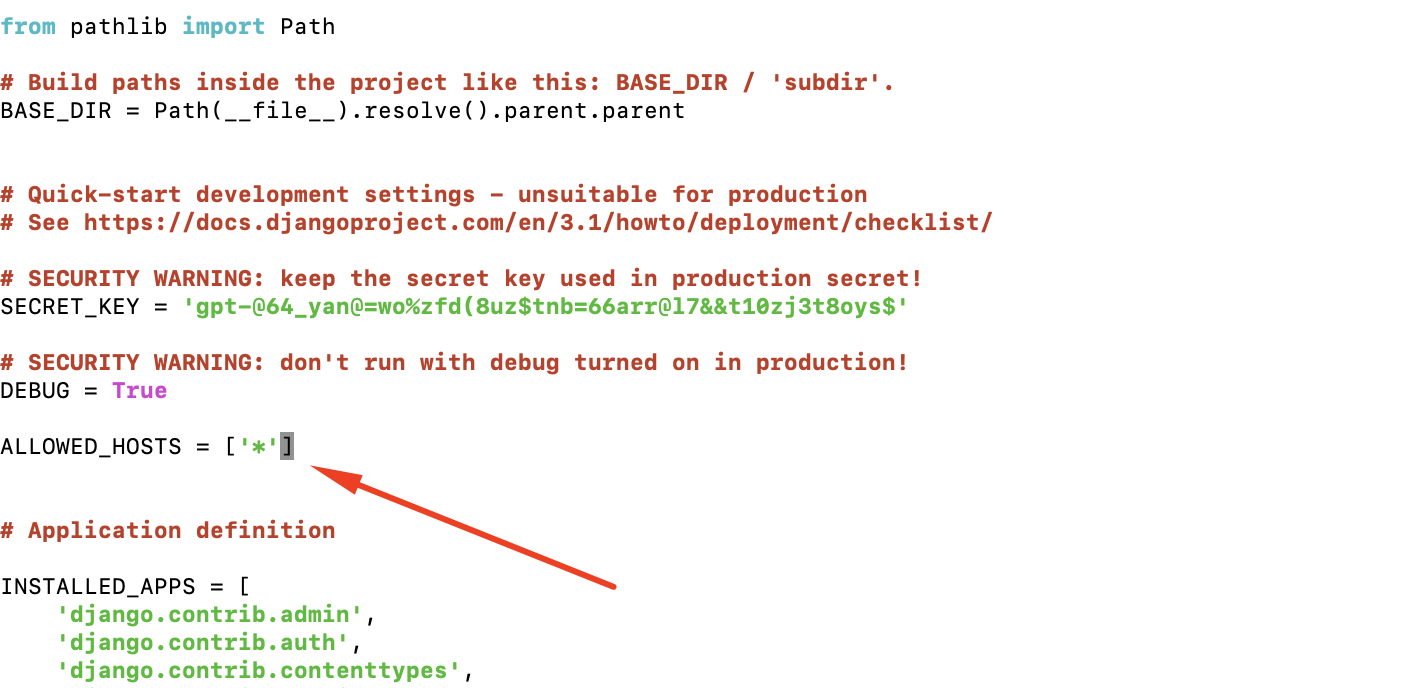
Step 8 : Edit the settings file settings.py of your project and change the ALLOWED_HOSTS setting, as follows:
Step 9 : you can test our your project by starting up the Django development server with this command:

Step 10 : To see the result, we must open our browser and enter the following URL: http://{domin_or_ip}:8080

Step 11 : hit CTRL-C in the terminal window to shut down the development server.
Configuring uWSGI
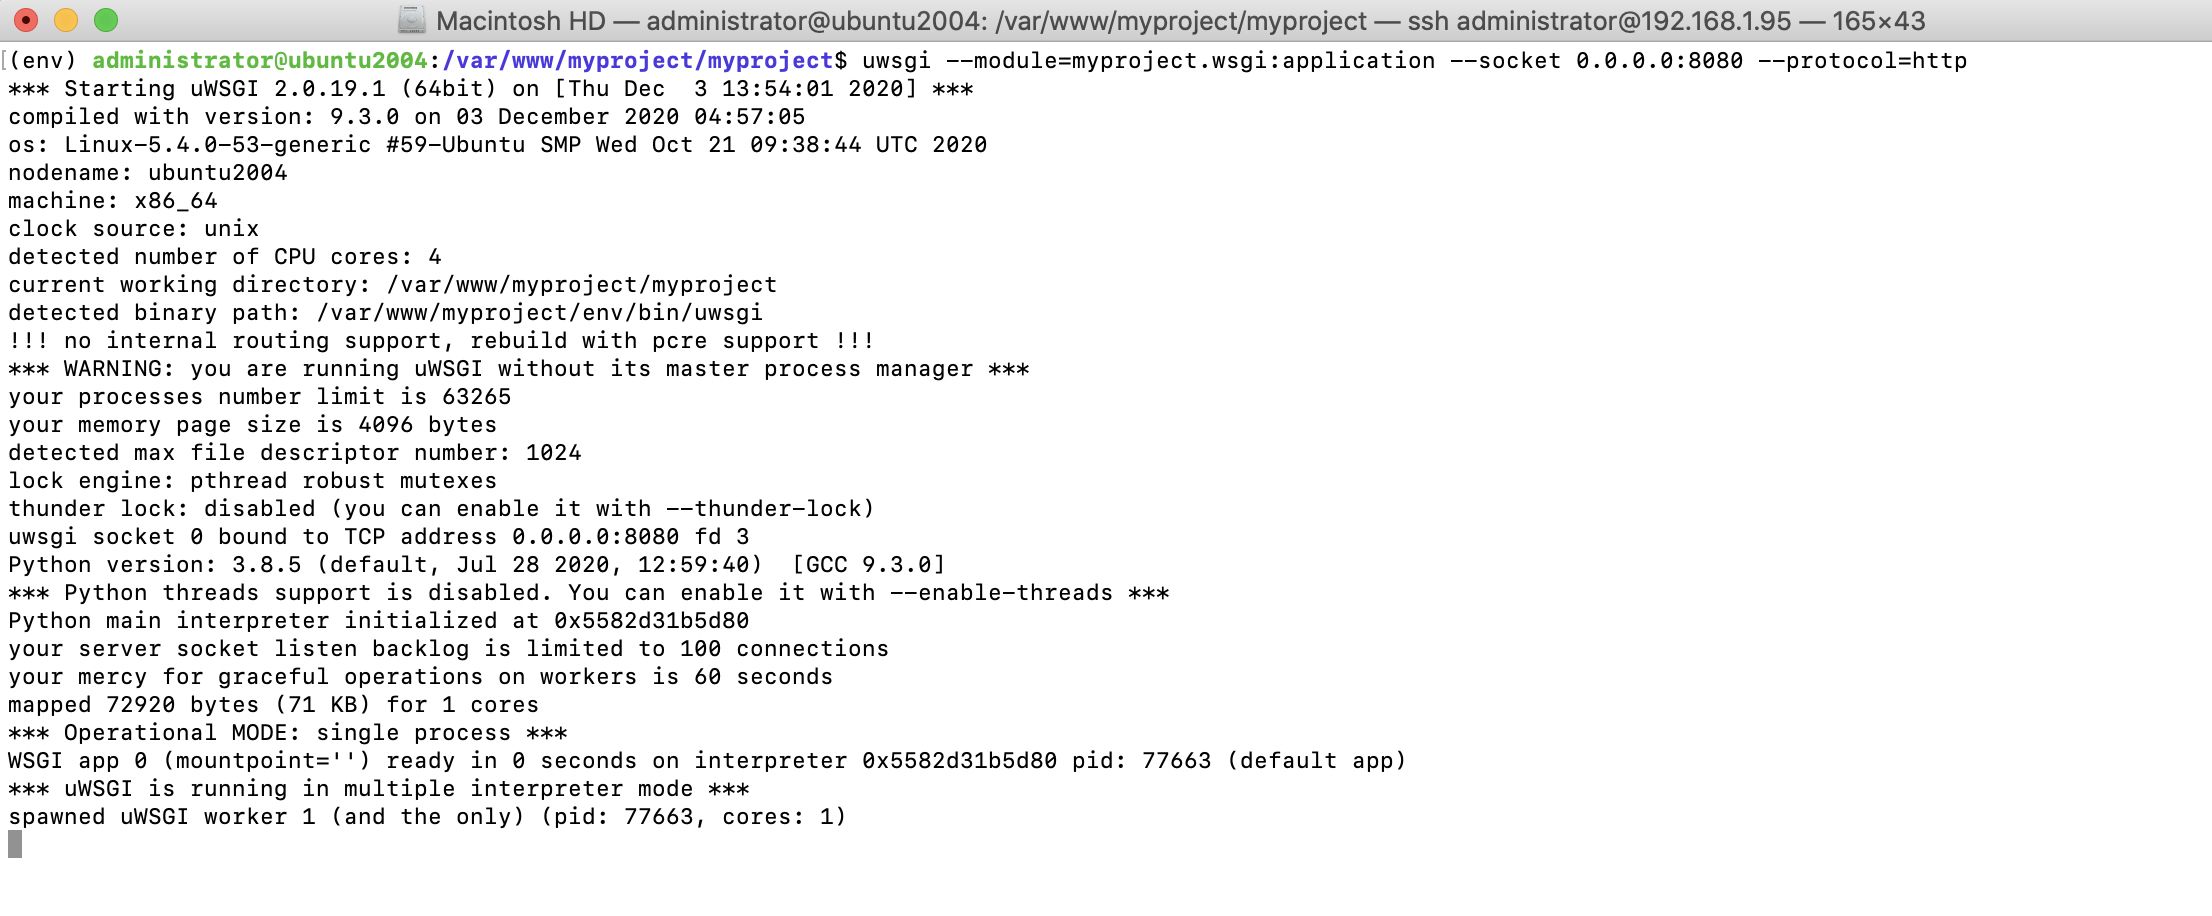
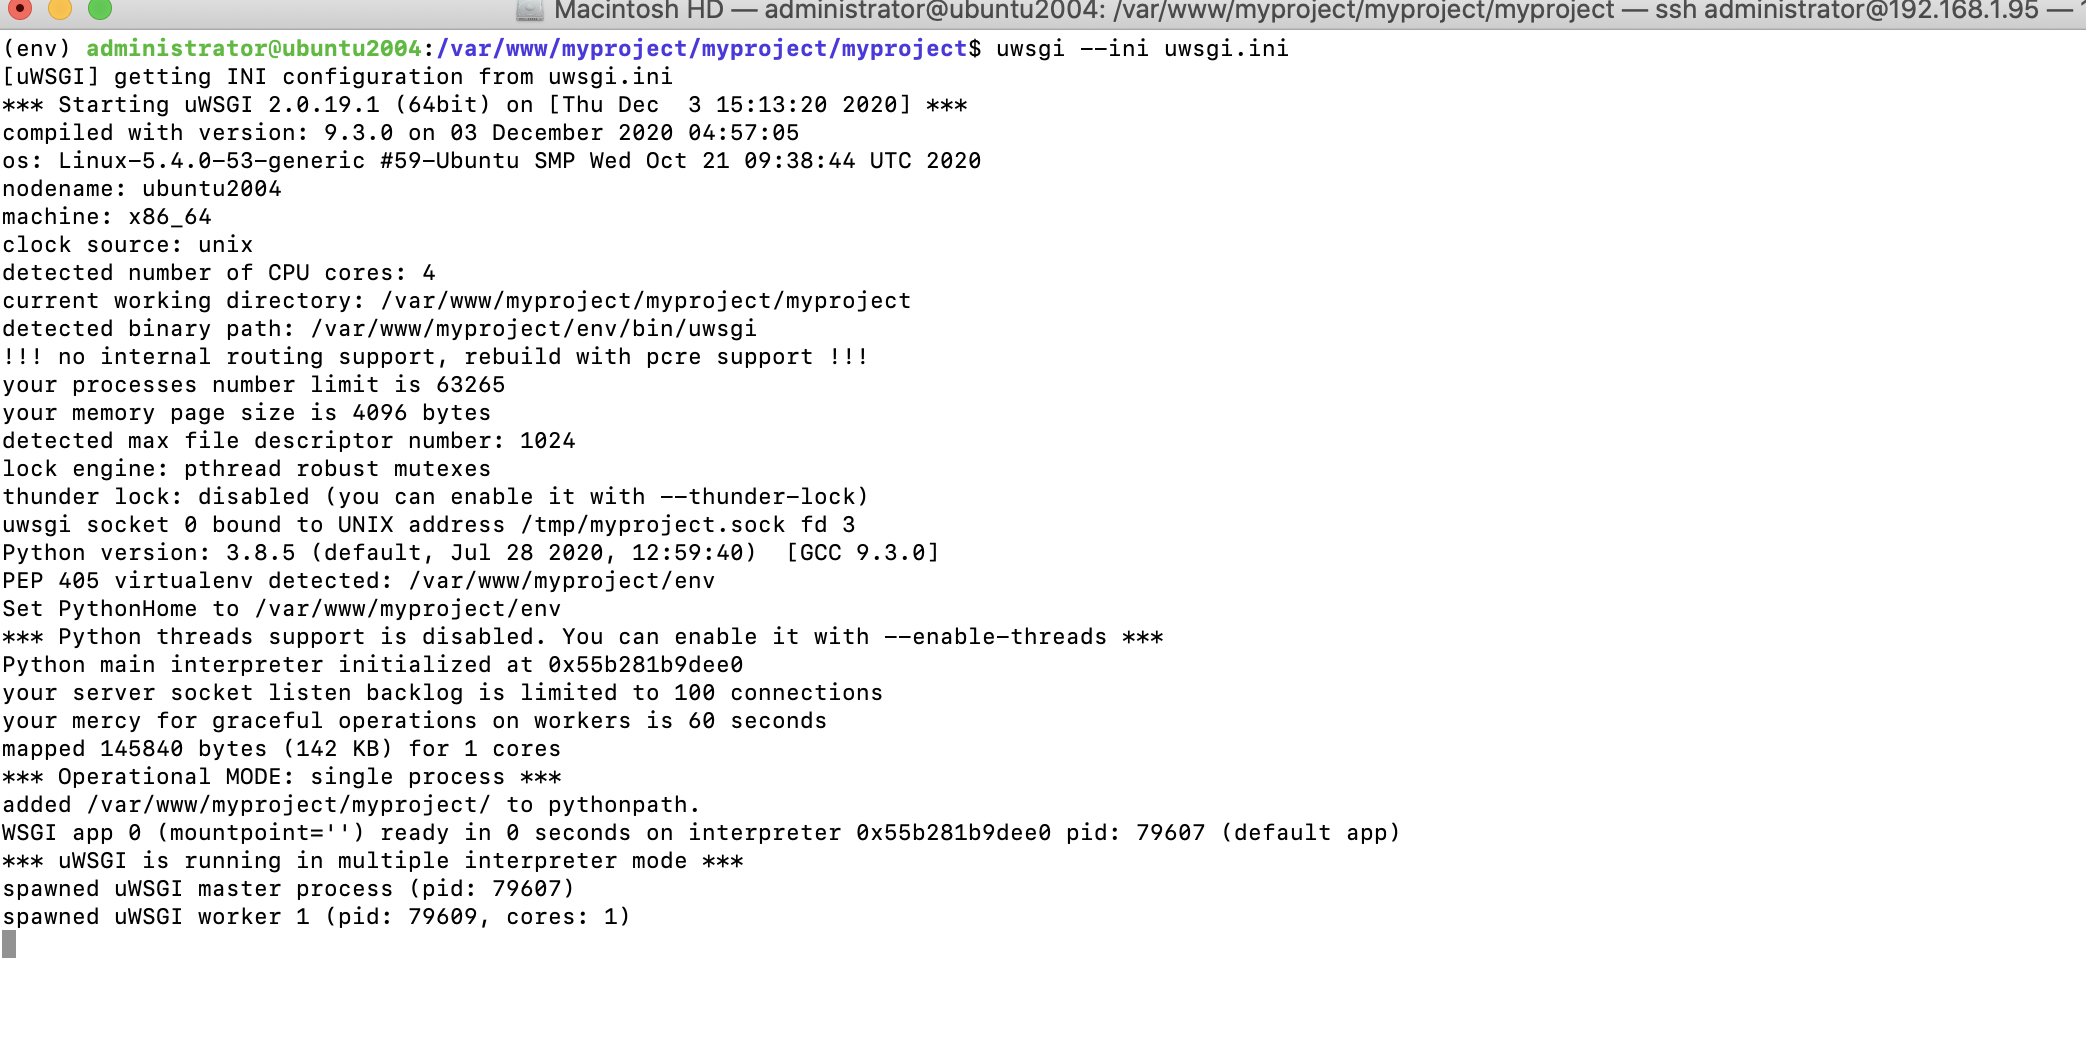
Step 12 : You can run uWSGI from the command line. Open the shell and run the following command:
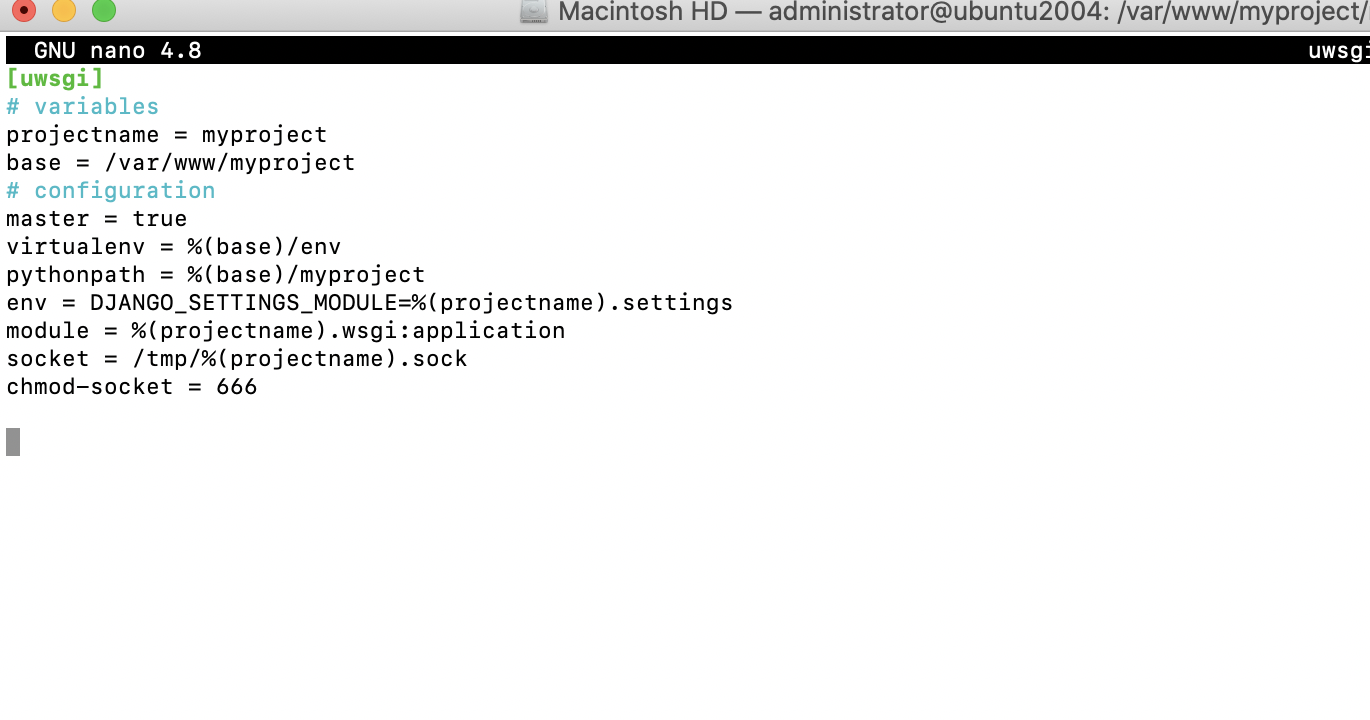
Step 13 : uWSGI allows you to define a custom configuration in a .ini file. This is more convenient than passing options through the command line. Create the following file structure inside the global myproject/uwsgi.ini directory:
Step 14 : Now, you can run uWSGI with your custom configuration using this command:
You will not be able to access your uWSGI instance from your browser now, since it's running through a socket. Let's complete the production environment.
Configuring NGINX
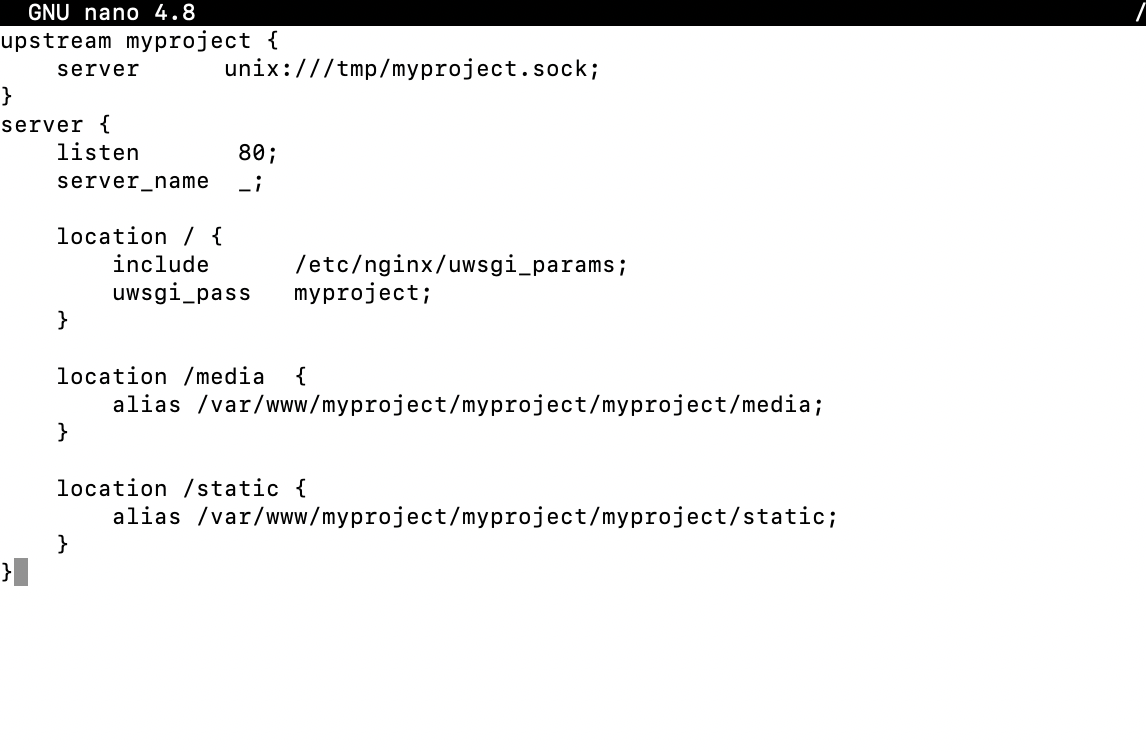
Step 15 : For running this Django site, you will need to add the following configuration
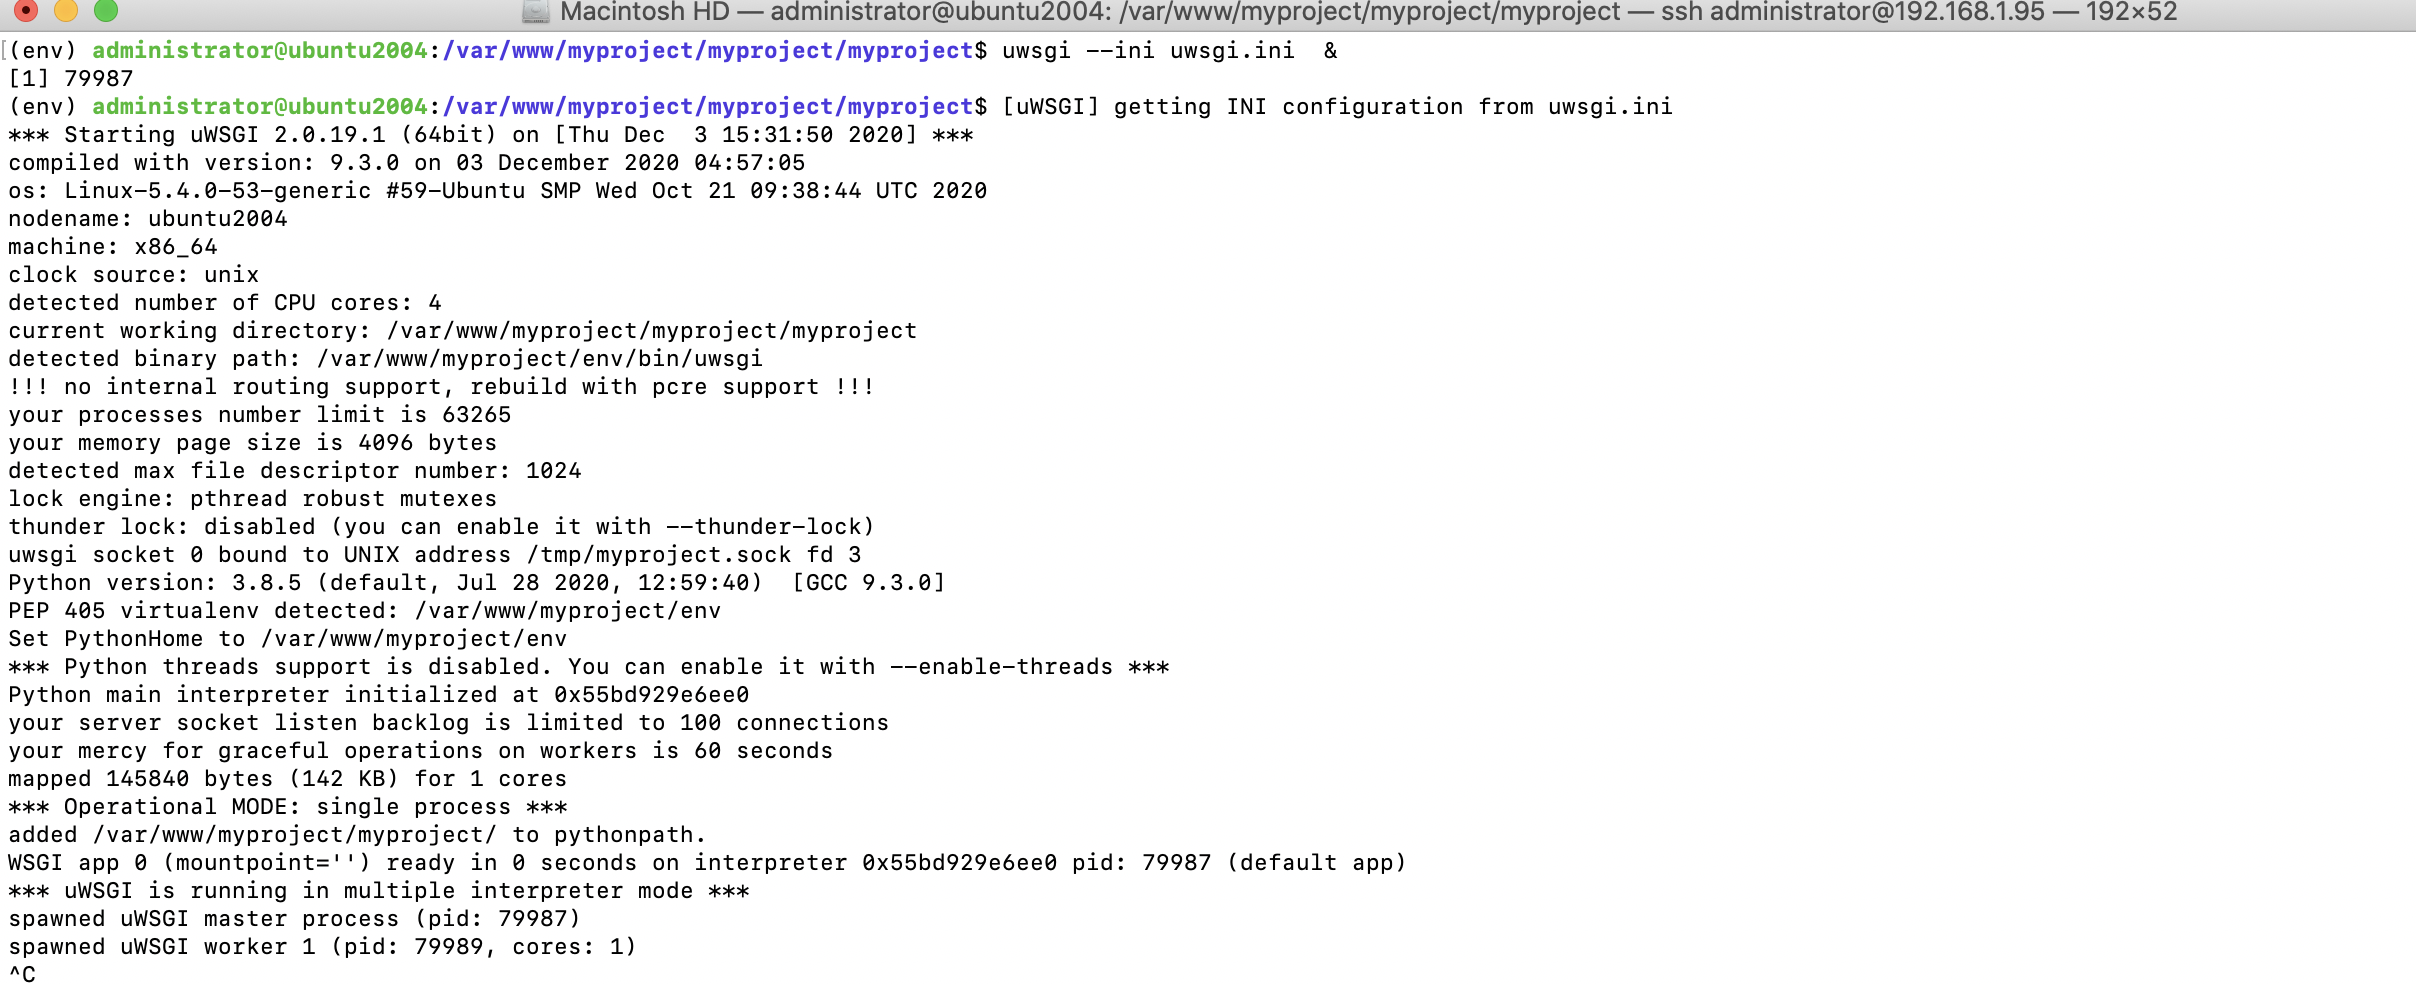
Step 16 : To run uWSGI in the background, run the following:
Step 17 : Reload NGINX with the following command:
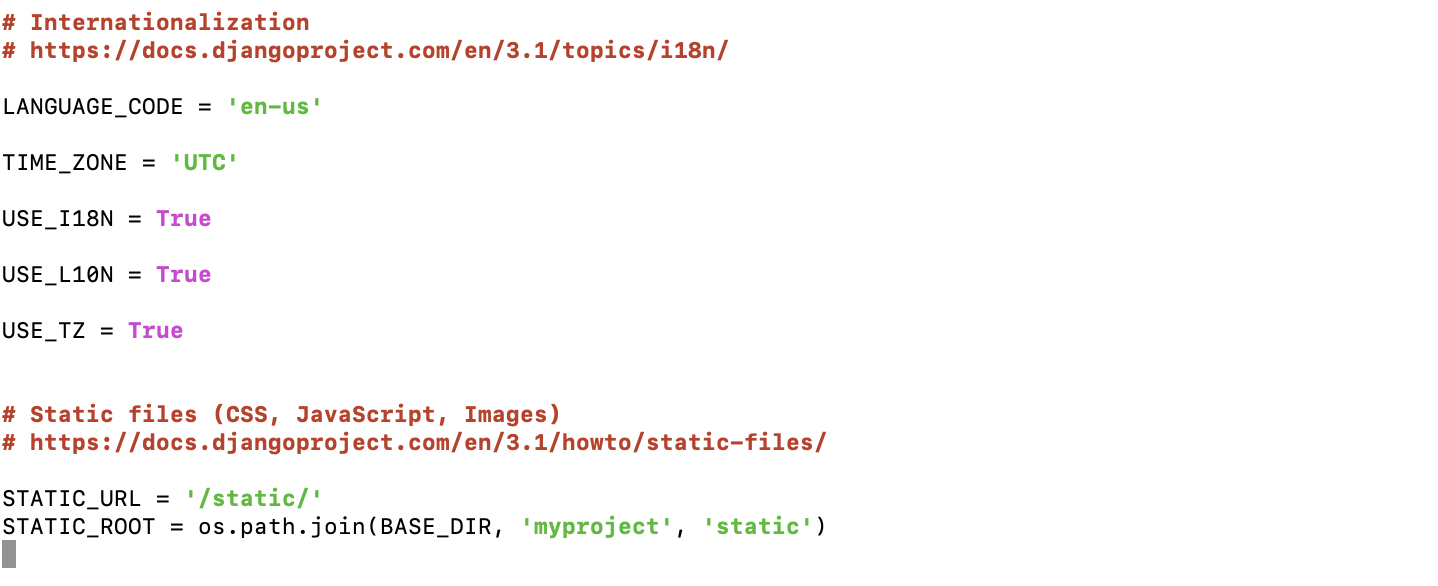
Deploying static files
Step 18 : First of all you have to edit myproject/settings.py adding:
Step 19 : And then run

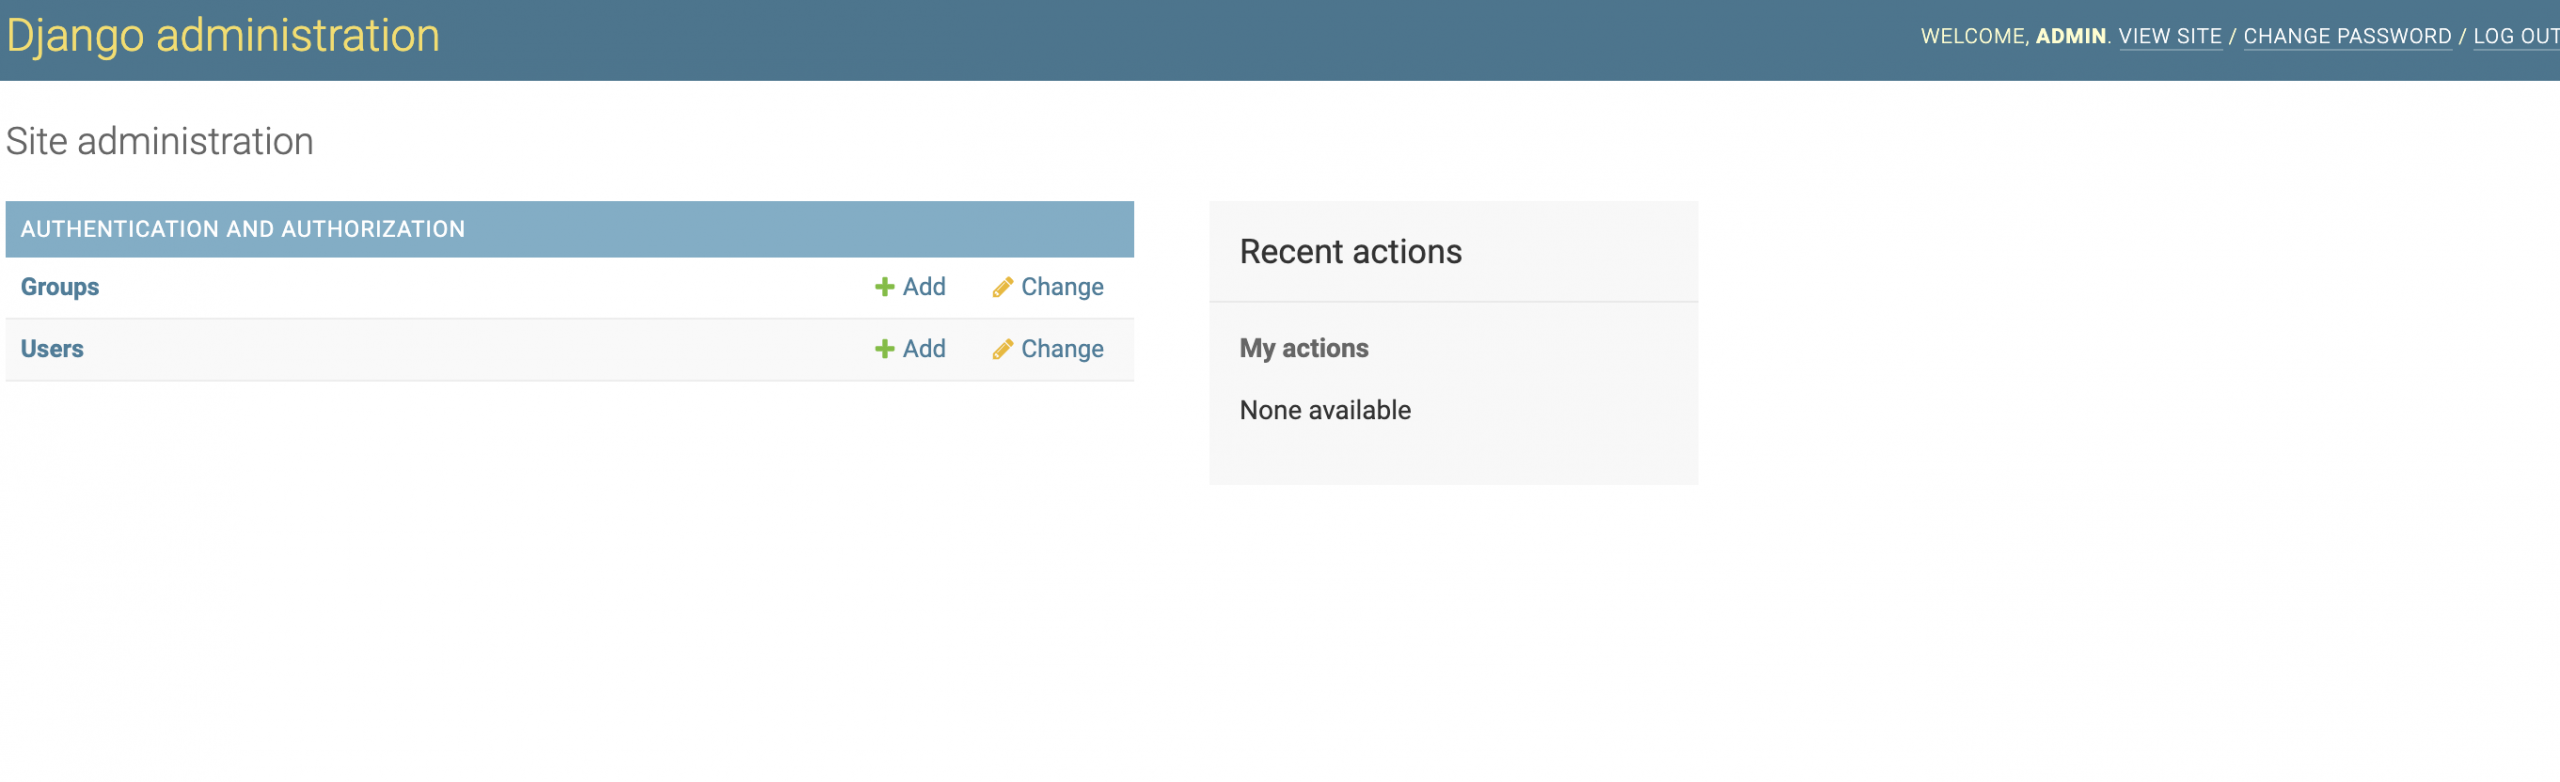
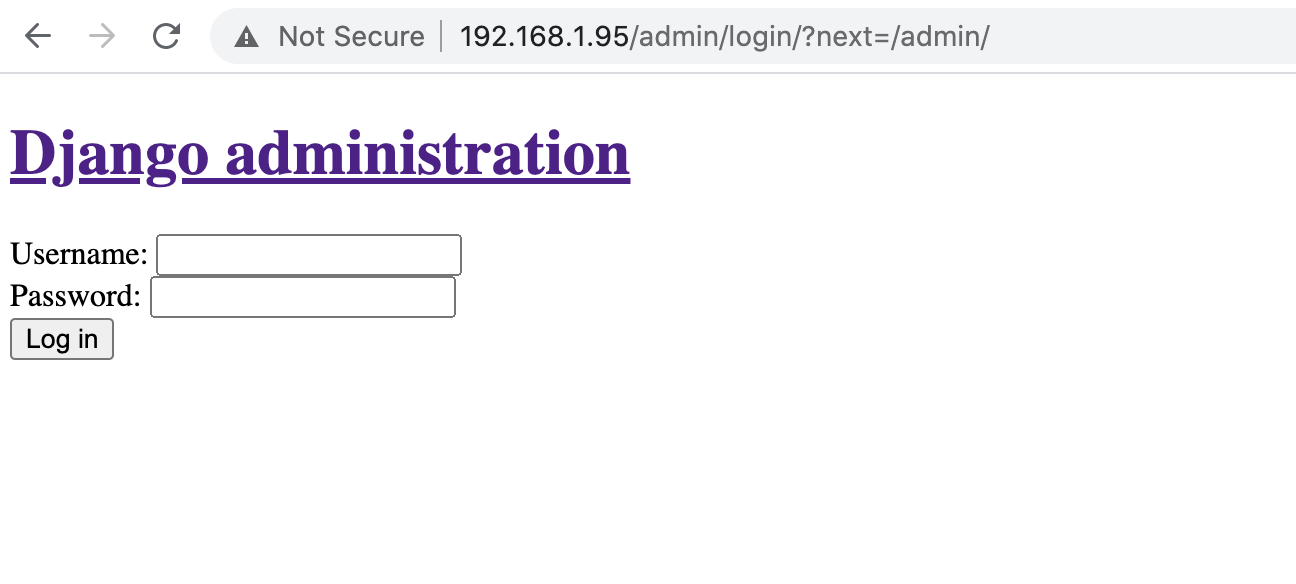
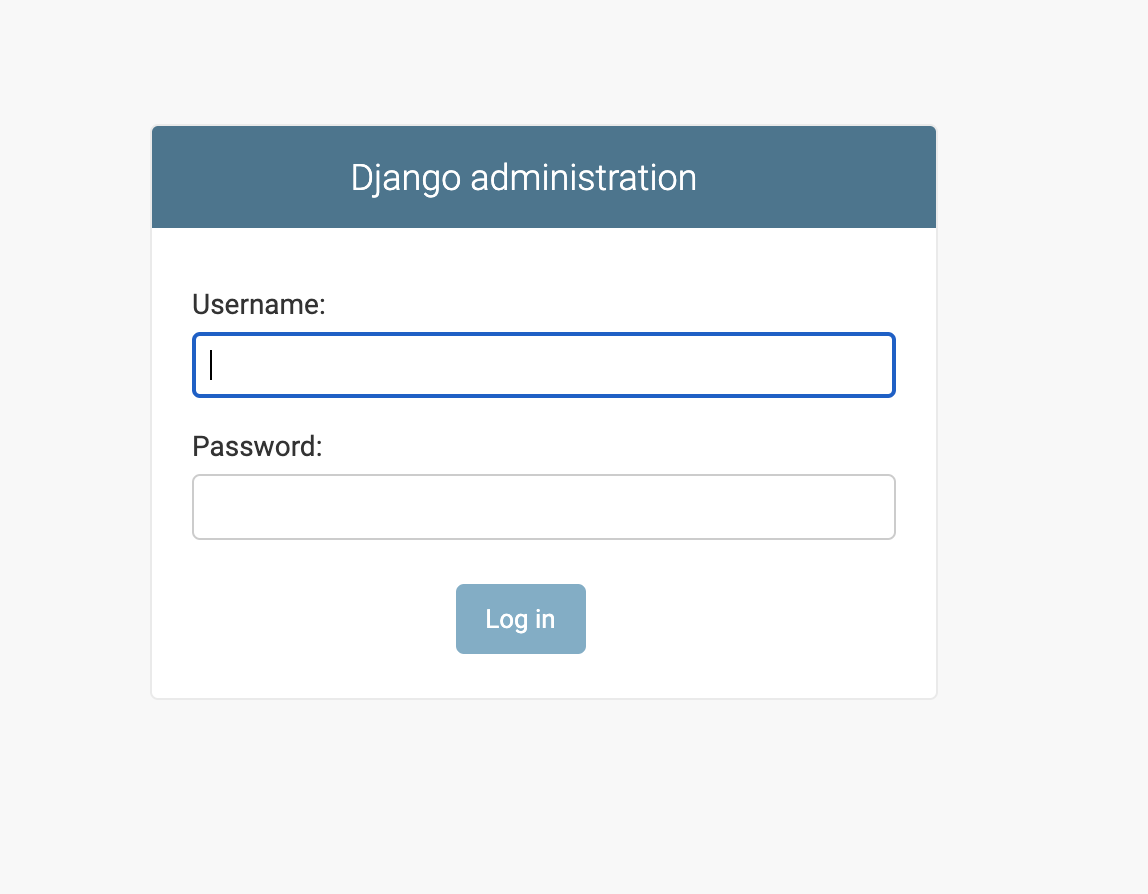
Step 20 : Open {domin_or_ip}/admin in your browser. You should see the following screen:
Step 21 : Edit the settings.py